How to Download and Install Visual Studio 2017
Step 1:
- Go to google and search for Visual Studio 2017.

Visual studio
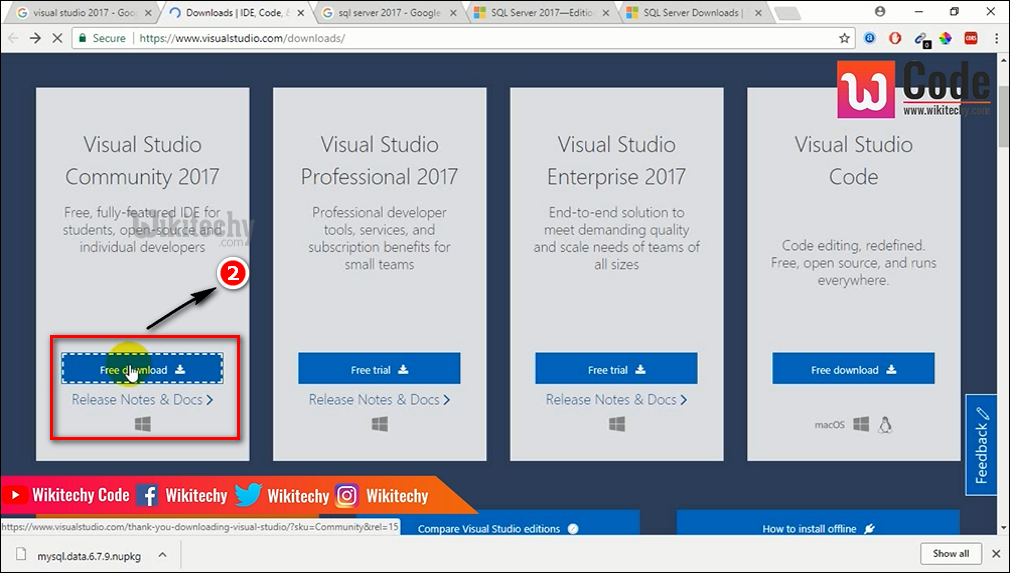
Step 2:
- Click the First link Downloads IDE, codes and team foundation server Visual studio.
- There will be four different options shown below the Visual studio 2017.
- click the Free Download option for Visual Studio Community 2017.
Download visual studio
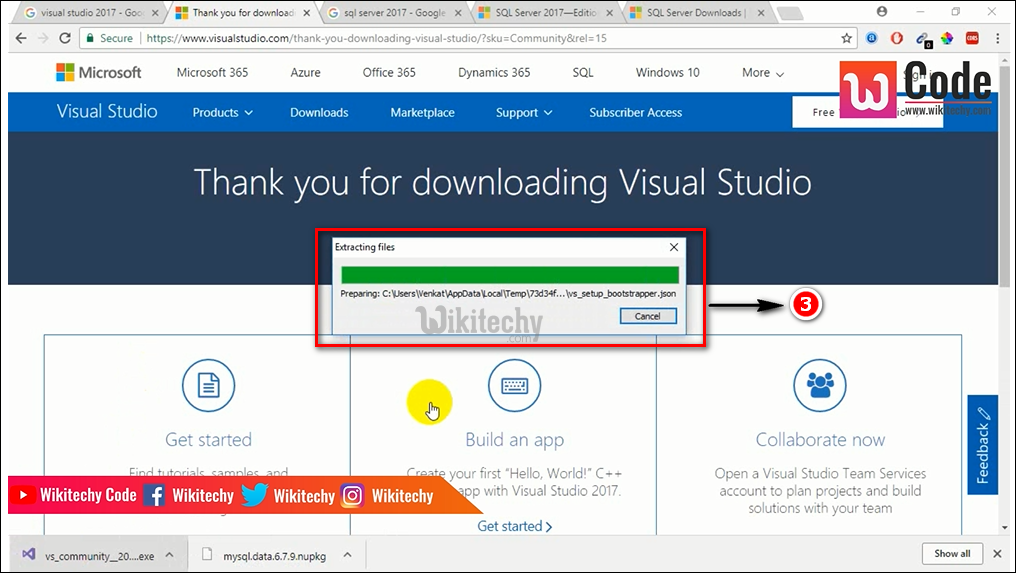
Step 3:
- Visual Studio community 2017 will start to download and you will get extracting files information in the window.
Extracting File
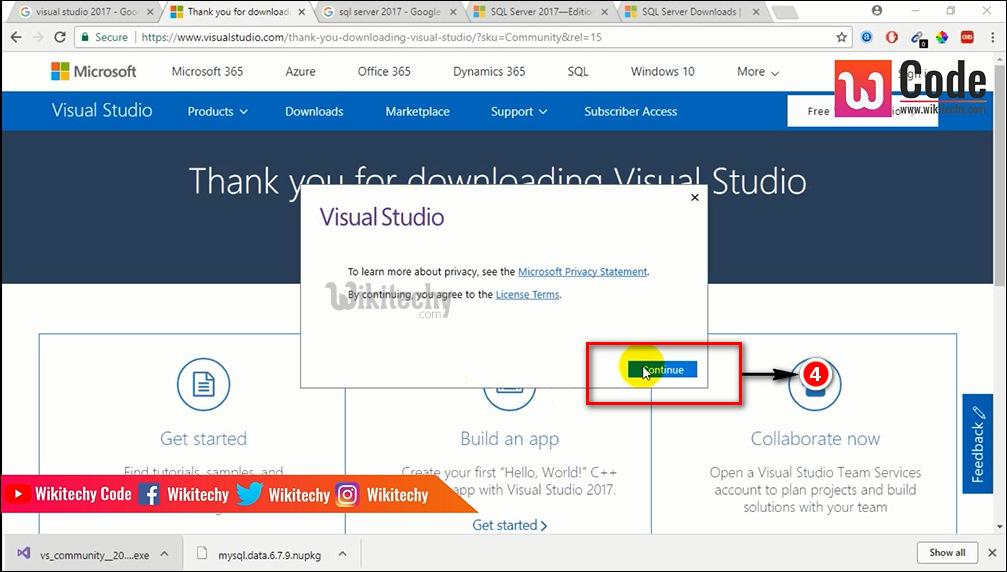
Step 4:
- Click the Continue button.
Continue Button
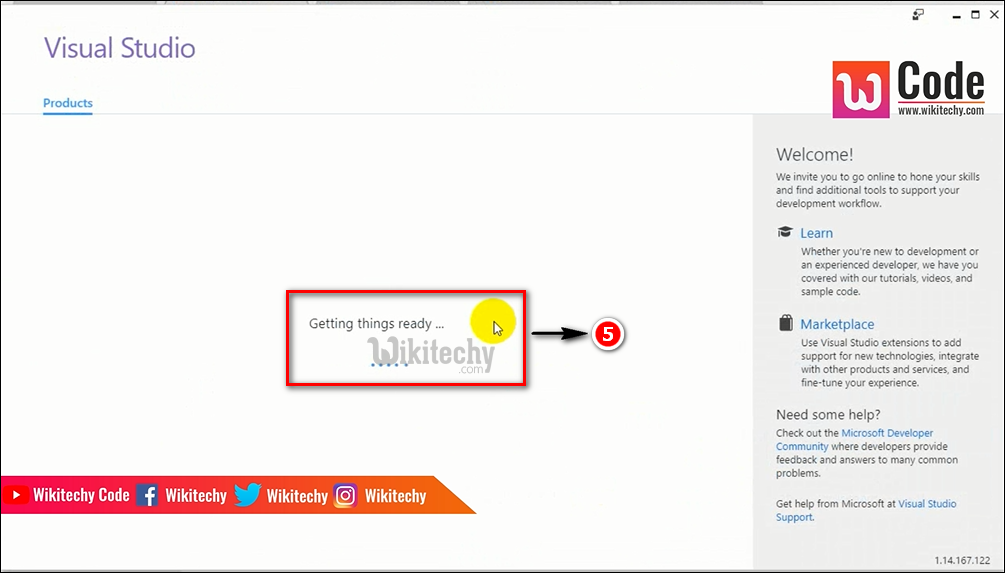
Step 5:
- The following widows page will be displayed.
Window Page
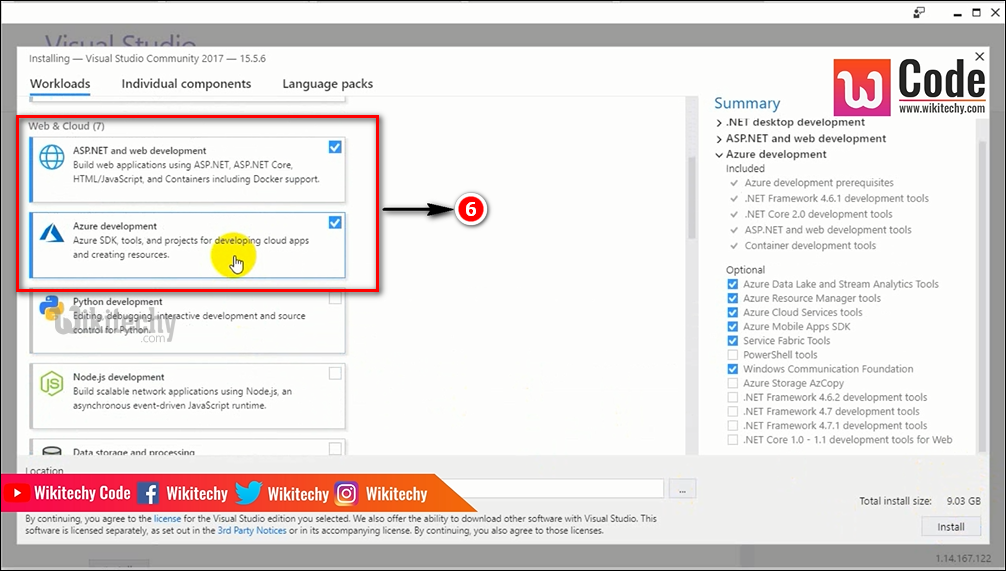
Step 6:
- In this step, several options will be shown.
- Select .NET desktop development, ASP.NET and web development, Azure development from the displayed option.
Select Option
Step 7:
- Click the Install Button.

Visual Studio Install
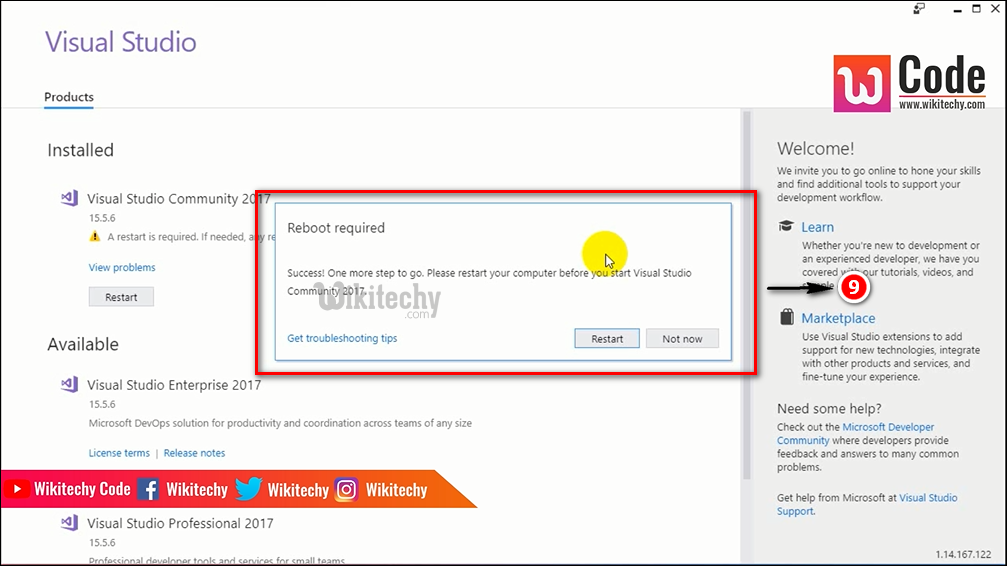
Step 8:
- Now the installation process information for the Visual Studio Community 2017 will be displayed as shown below.

Installation component
Step 9:
- After installing the Visual Studio Community 2017, Reboot required information box will be displayed for restarting purpose. Click restart button.
Reboot Required
Step 10:
- Go to Start menu èAll Programs è Visual Studio 2017.

Visual Studio sign in
Step 11:
- Now you will get Visual Studio Welcome Page for sign in purpose to connect all developer services.
- Click not now, maybe later option which is displayed at last.

Visual Studio sign in
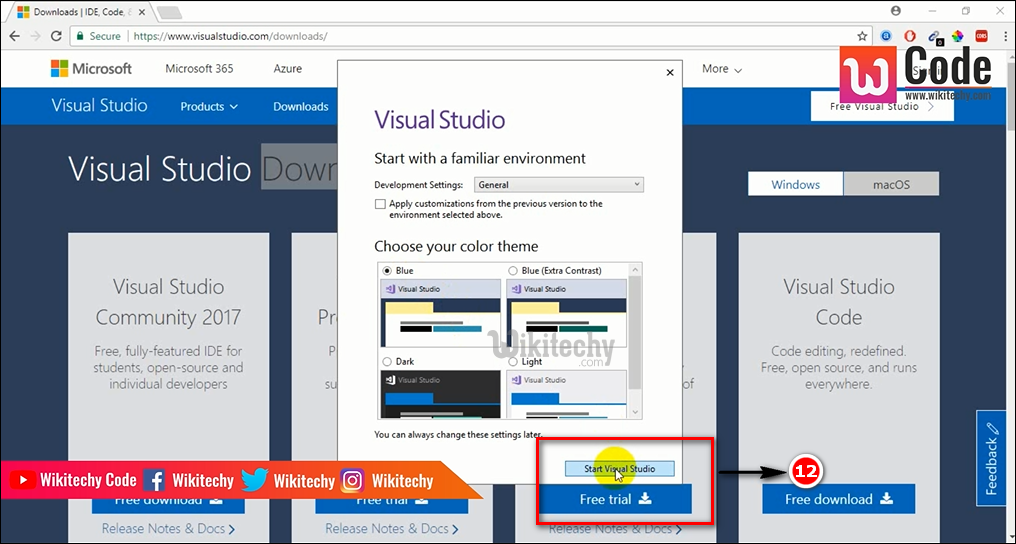
Step 12:
- Next click Start Visual Studio button to continue.
Visual Studio Button
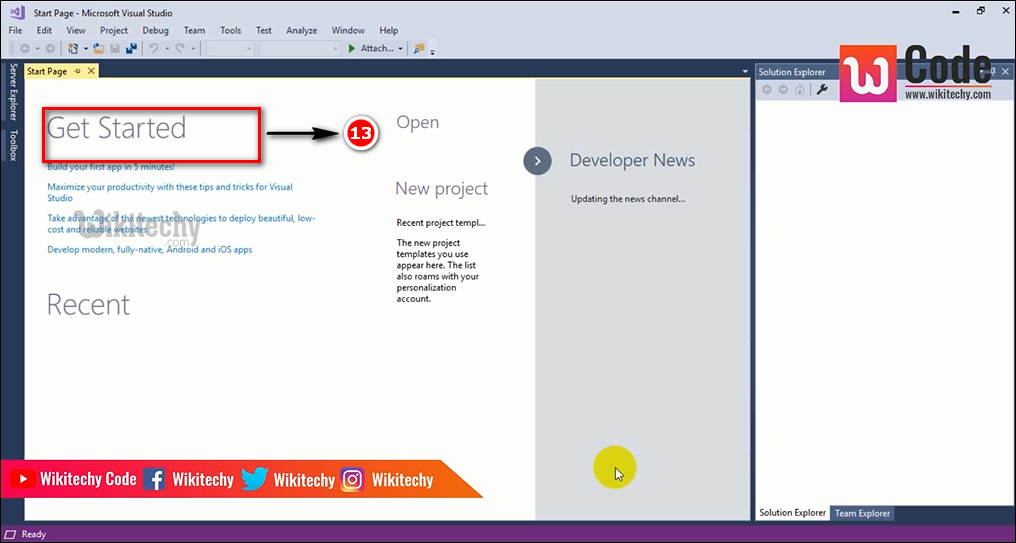
Step 13:
- You will get start page Microsoft Visual Studio window.
Microsoft Visual studio
Step 14:
- Go to File menu

Select File Menu
Step 15:
- Select New option from File Menu.

Select new option
Step 16:
- Select Project option as shown below.
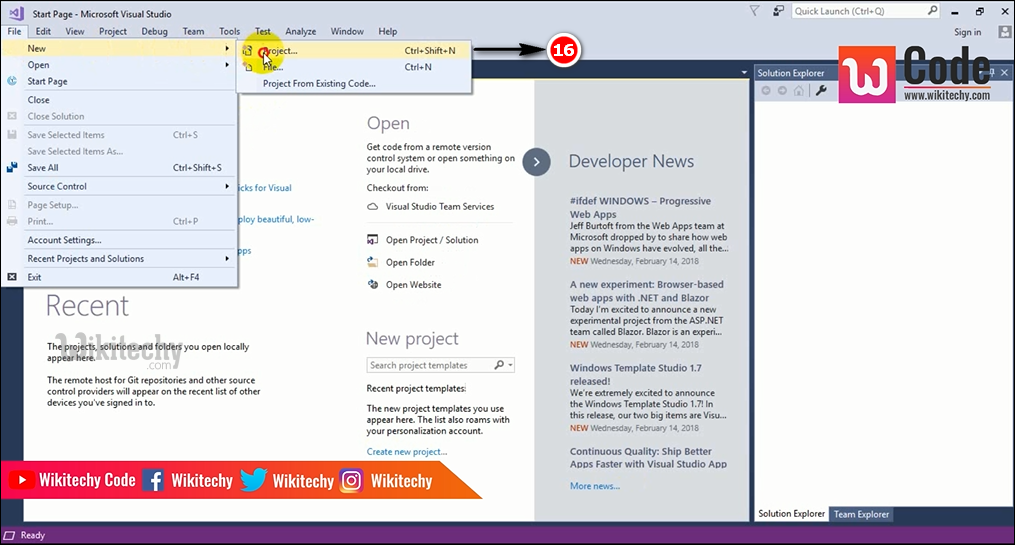
Select project option
Step 17:
- The following window page will be displayed.
Get Displayed
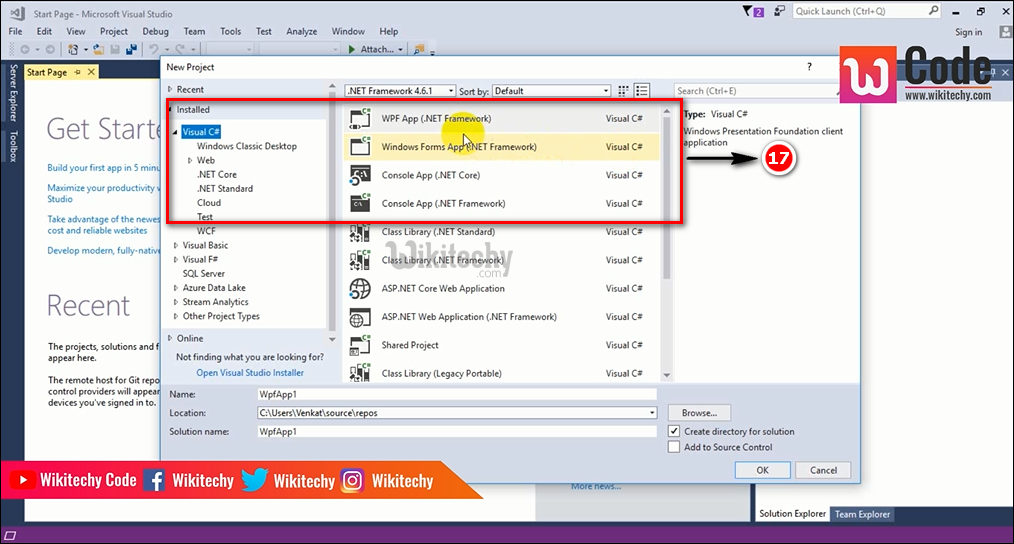
Step 18:
- Now select the window classic Desktop option from visual C# which is shown in left side corner of the new project window.
- And simultaneously select Windows Forms App i.e. (.NET Framework) as shown in below.
- Give some meaningful name. Select ‘Ok’ Button.
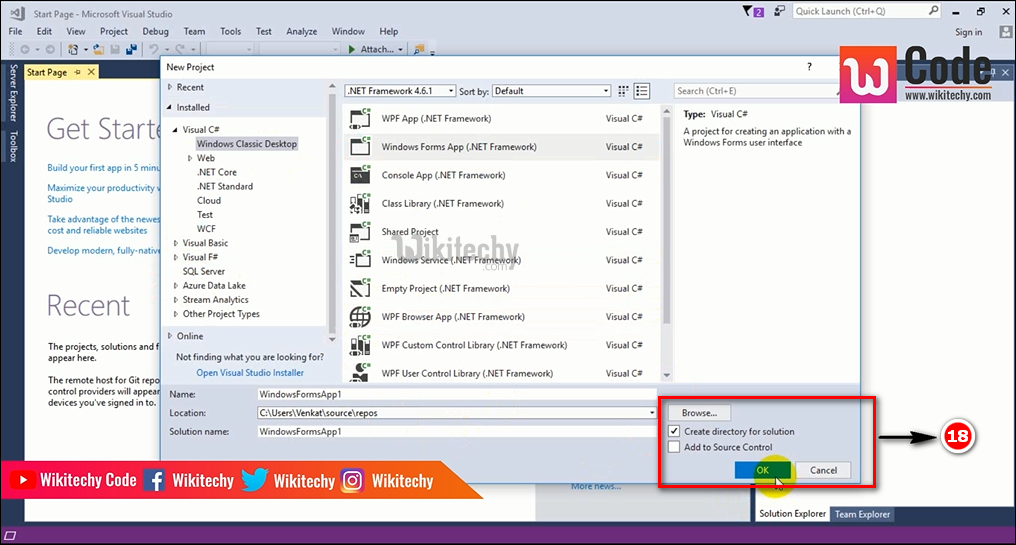
Select window form app
Step 19
- Finally you will get creating project windows information box.
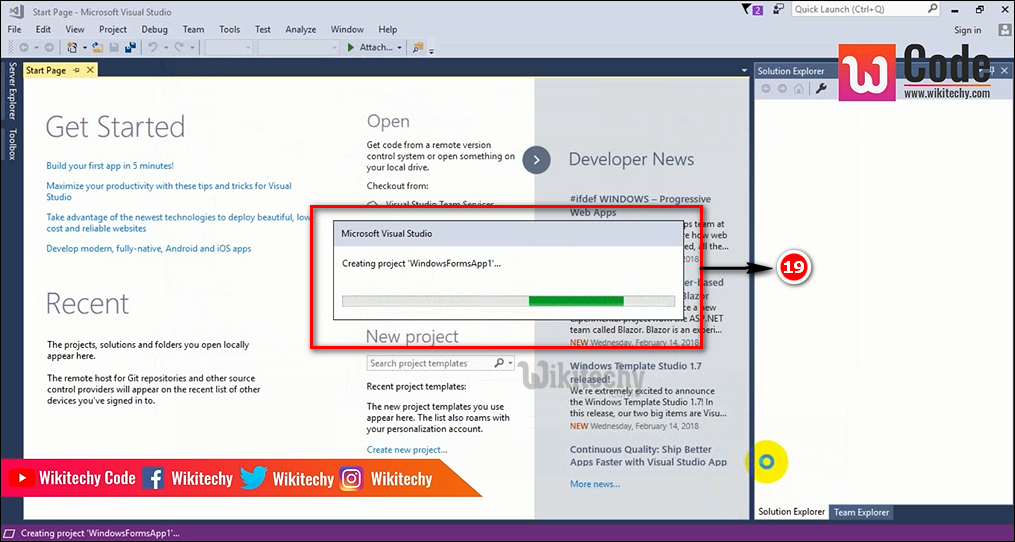
Project Created