How to Download MySQL Workbench for Windows ( 7 Simple Steps )

Download mysql workbench for windows — if you landed here, you probably want to set up a database environment on your PC quickly and cleanly. Good news: I did this recently myself, and I’ll walk you through every step, from zero to running SQL queries.
If you want to learn MySQL, starting with a good client is super helpful – especially when you are just beginning your journey.
There are a lot of clients out there for your MySQL-based needs, like XAMPP, DataGrip, and others. Among all of them, I prefer the MySQL Workbench. It is completely free, by the way.
In this tutorial, Download mysql workbench for windows – I will show you how you can install and configure your Windows machine for this MySQL and MySQL workbench from scratch.
✅ Step 1: Visit the Official Source and Download
- Open your browser and go to the official site of MySQL (Oracle’s download pages).
- Find the Downloads → MySQL Installer for Windows.
- Choose the version suitable for your system (Windows 10, Windows 11, etc.).


Step 2: Pick the Right Installer (Web vs Offline)
There are typically two modes:
- Web installer: small file, fetches components during installation. Good if you have stable internet.
- Full (offline) installer: large package containing all components (server, workbench, shell, etc.). Great if internet is spotty or you want to install on multiple machines quickly.
Since I had intermittent connectivity, I chose the offline installer. That way I didn’t need to download components mid-install and could complete everything offline.

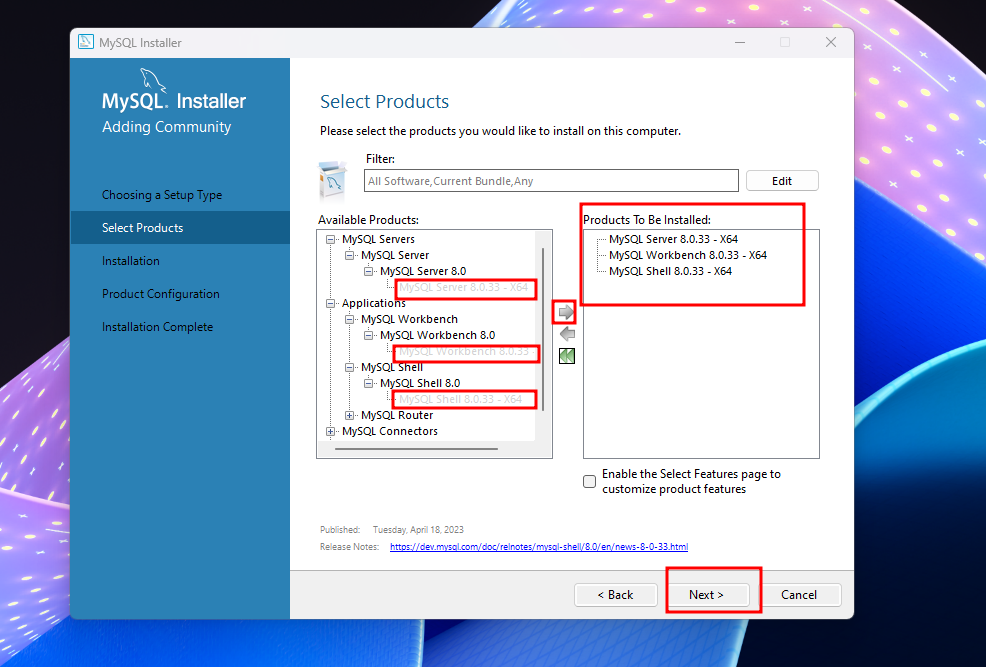
🔧 Step 3: Run the Installer and Choose Components
Once the installer is downloaded:
- Double-click the
.msior.exefile → allows Windows permissions. - You’ll see various setup types: Developer Default, Server Only, Custom, etc.
- For a beginner or all-in one setup, select Developer Default. This ensures you install:
- MySQL Server
- MySQL Workbench
- MySQL Shell
- Other utilities (optional)
This saved me from missing the Workbench component accidentally — I once selected “Server Only” and had to re-run the installer to add Workbench.
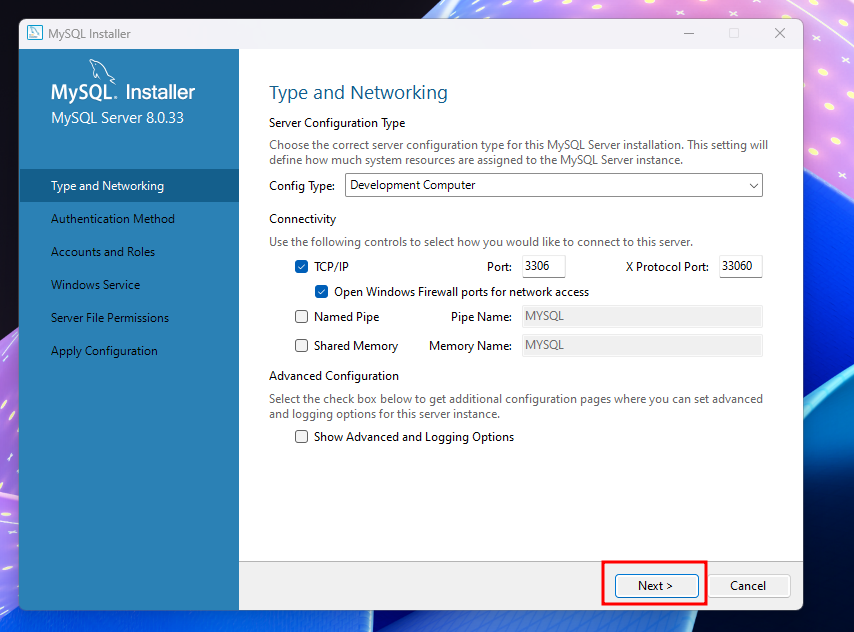
Step 4: Configure the MySQL Server
During installation, you’ll hit configuration steps:
- Choose Standalone MySQL Server (default).
- Set up the root password. Write it down or remember it!
- Optionally create additional users (useful if you share your PC or database with others).
- Default port is usually 3306 — fine in most cases.
One tip I learned: never set the root password to something trivial (like “test” or “1234”) especially if the machine is used by multiple people. Avoid security issues.

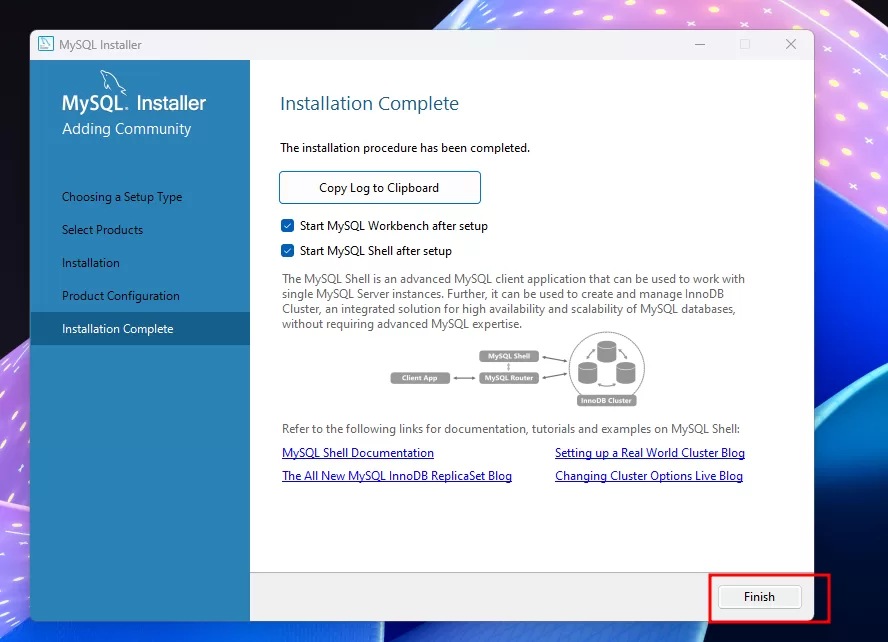
Step 5: Install MySQL Workbench on Windows and Open It
If in Step 3 you selected Developer Default or included Workbench, it gets installed along with the server.
After installation:
- Search for MySQL Workbench in Start menu.
- Launch it and look for the local connection (often labelled “Local instance” or similar).
- Enter your root credentials (or the user credentials you configured).
At this stage:
- You can create new schemas (databases).
- Run SQL queries visually.
- Design ER diagrams or models.
- Manage data without typing long commands all the time.

Step 6: Verify Everything Works
To ensure your setup works, do this quick test:
- Open Command Prompt or Windows Terminal.
- Type:
Enter your password. If you see the prompt mysql>, good — server is working.
Open MySQL Workbench and connect. Run a simple query:
- → should return the version of your MySQL server.
If you get connection refused:
- Check Windows Services → look for service like MySQL80 (or similar).
- Ensure it is running. Start it if not.
Step 7: Tidy Up & Practical Tips
Here are tips I wish someone told me earlier:
- Add the MySQL
binfolder to the PATH environment variables → makesmysqlcommands runnable from anywhere in terminal. - Save your Workbench connection credentials → prevents always entering password.
- Keep backups of your
.sqlexports / schemas. - If you upgrade MySQL version, sometimes you may need to update or reinstall Workbench to match compatibility.
Final Thoughts
So, now you know how to download MySQL Workbench for Windows and get MySQL running smoothly on your machine. It doesn’t need to be complicated. I walked this path — ran into errors, fixed path variables, re-configured the server — so you don’t have to.
Go ahead, try it out. Launch Workbench, create your first database, run queries, experiment. Whether you’re building a personal project, learning SQL, or prepping for bigger data tasks, you’re ready now. – Download mysql workbench for windows
Want to learn more about this?, Kaashiv Infotech Offers, SQL Course, Mysql Course & More, Visit www.kaashivinfotech.com.