Create a Windows Azure SQL Database From the Portal
- As with everything in Windows Azure, You have to have a Windows Azure account and an Azure Subscription. After you have both, go to https://portal.azure.com. From here, you can add new resources to your Azure subscription.

Learn Azure - Azure tutorial - Azure New Module - Azure examples - Azure programs
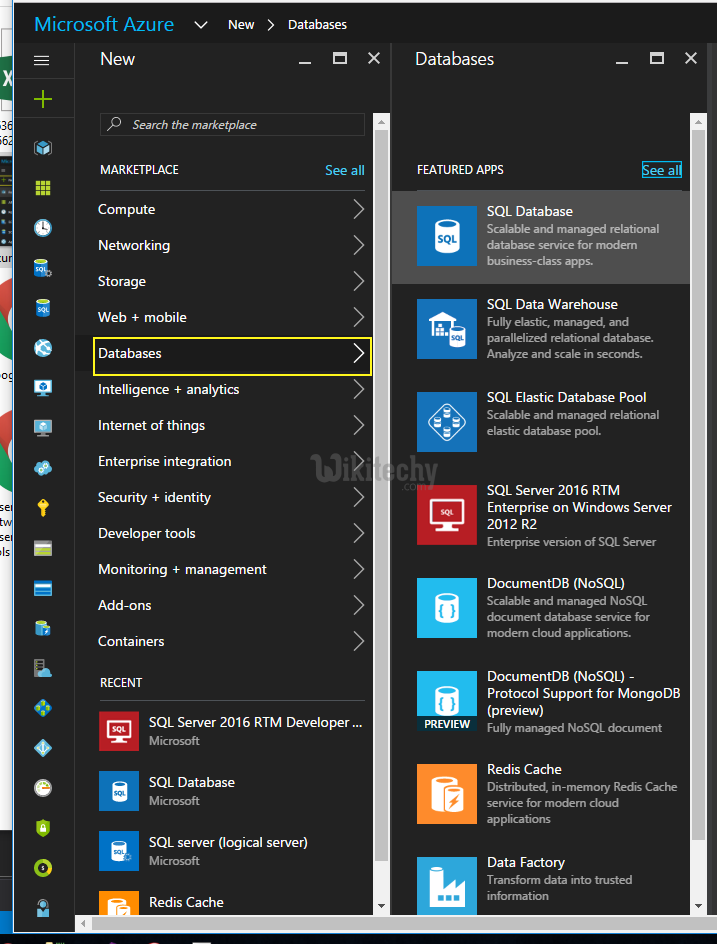
- Click New on the left menu.A new blade will be added to the right of your menu. From this menu, choose Databases, and one more blade will be added to your menu.
Learn Azure - Azure tutorial - Database Connectivity - Azure examples - Azure programs
- Choose SQL Database, then the "New" and "Databases" blades will be removed, and a new SQL Database blade will be added to your menu.
Learn Azure - Azure tutorial - SQL Database - Azure examples - Azure programs
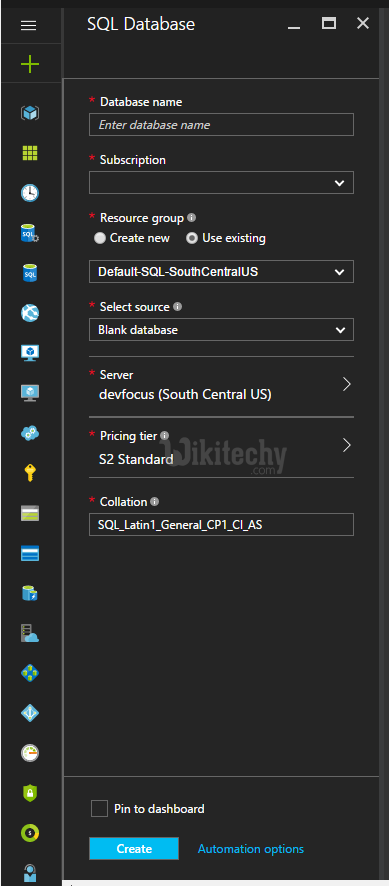
From here you have to choose a database name to give this new database. You also have to select the subscription to add this database to, if you have access to more than one subscription. This is where the bill for your database will be recorded. Next, if you have already defined Resource groups for your subscription, you can choose to re-use one of these resource groups, or you can create a new one. Think of these resource groups as collections of resources within Windows Azure that are share a common life-cycle. All the resources within this group are all created and destroyed within the same time frame. This concept of resource groups will help you manage your resources more easily moving forward.
- Once you've selected the resource group most applicable to your business need, you can choose the source for your new database.
- You can choose to create a blank database, this gives you the most flexibility with your new database.
- You could also choose to create your database from a sample database. Currently the two sample options is AdventureWorks, Microsoft's OLTP (Transactional) demonstration database.
- The final option is to choose to create your database from a backup. This option is best for those who are spinning up multiple copies of a single database. With this option you can choose to restore from an automatic backup taken on one Windows Azure SQL Database. This can be useful if you need to perform a "partial" restore.
- After selecting the source option most appropriate to your business need, you can then choose to create this new database on an existing Windows Azure SQL Database server (if you have one), or create a new server.
- If you are creating a new server, the name you give this new server must be unique across all of Windows Azure.
- You will get to select the alias for this server. The full name of this server will be .database.windows.net.
Once you've selected the server option that best fits your business needs, you will be prompted for a pricing tier. If you click on the pricing tier selection, you can see the current SLAs and prices for the different pricing tiers.
- Here are the basics of pricing tiers. Tier B databases will be the slowest performing and have the most severe restrictions on size and features, but will be the least expensive.
- Tier P databases will be the fastest, most feature-filled offerings, but their price will reflect this. Tier S is in the middle.
The final option you're faced with in creating a new database is the collation. This controls how data will be compared and sorted. If you don't have a good business reason to change the default option, I suggest leaving this alone. After you've made all your selections, hit Create, and a background task will be fired off to create your new database.
- You will get a notice in the Windows Azure Portal once your database is ready. In order to connect to this database from outside Windows Azure (such as your workstation) additional steps will be required. See the StackOverflow documentation for Managing Windows Azure SQL Database Firewall Settings.