Laravel view
laravel , laravel framework , laravel documentation , laravel tutorial , laravel install , laracasts
What is Laravel View?
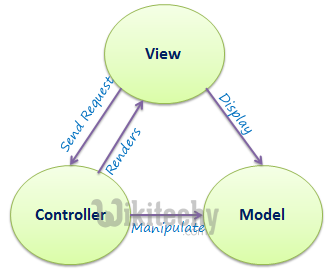
- In MVC framework, the letter “V” stands for Views.
- It separates the application logic and the presentation logic.
- Views contain the HTML served by your application and separate your controller / application logic from your presentation logic.
- Views are stored in the resources/views directory. A simple view might look something like this:
Example:
- Step 1 − Copy the following code and save it at resources/views/test.php
<html>
   <body>
      <h1>welcome to wikitechy</h1>
   </body>
</html>
- Step2 − Add the following line in app/Http/routes.php file to set the route for the above view.
Route::get('/test', function(){
   return view('test');
});
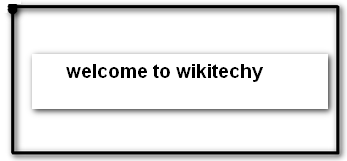
- Step 3 − Visit the following URL to see the output of the view. http://localhost:8000/test
- Step 4 − The output will appear as shown in the following image.
laravel , laravel framework , laravel documentation , laravel tutorial , laravel install , laracasts
Passing Data to Views:
- While building application it may be required to pass data to the views.
- Pass an array to view helper function.
- After passing an array, we can use the key to get the value of that key in the HTML file.
Example:
- Step 1 − Copy the following code and save it at resources/views/test.php
<html>
   <body>
      <h1><?php echo $name; ?></h1>
   </body>
</html>
- Step2 − Add the following line in app/Http/routes.php file to set the route for the above view.
Route::get('/test', function(){
   return view('test',[‘name’=>’Wikitechy’]);
});
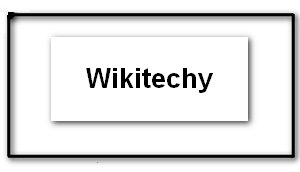
- Step 3 − The value of the key name will be passed to test.php file and $name will be replaced by that value.
- Step 4 − Visit the following URL to see the output of the view. http://localhost:8000/test
- Step 5 − The output will appear as shown in the following image.
Sharing Data with all Views:
- We have seen how we can pass data to views but at times, there is a need to pass data to all the views.
- Laravel makes this simpler. There is a method called “share()” which can be used for this purpose.
- The share() method will take two arguments, key and value.
- Typically share() method can be called from boot method of service provider.
- We can use any service provider, AppServiceProvider or our own service provider.
Example:
- Step 1 − Add the following line in app/Http/routes.php file.
Route::get('/test', function(){
   return view('test');
});
Route::get('/test2', function(){
   return view('test2');
});
- Step2 - Create two view files - test.php and test2.php with the same code.
- These are the two files which will share data.
- Copy the following code in both the files. resources/views/test.php & resources/views/test2.php
<html>
   <body>
      <h1><?php echo $name; ?></h1>
   </body>
</html>
- Step 3 - Change the code of boot method in the file app/Providers/AppServiceProvider.php as shown below.
- (Here, we have used share method and the data that we have passed will be shared with all the views.) app/Providers/AppServiceProvider.php
<?php
namespace App\Providers;
use Illuminate\Support\ServiceProvider;

class AppServiceProvider extends ServiceProvider {

   /**
   * Bootstrap any application services.
   *
   * @return void
   */

   public function boot(){
      view()->share('name', 'Wikitechy');
   }

   /**
   * Register any application services.
   *
   * @return void
   */

   public function register(){
      //
   }
}
- Step 4 − Visit the following URLs. http://localhost:8000/test
- http://localhost:8000/test2
- Step 5 − The output will appear as shown in the following image.

Blade Templates:
- Blade is a simple, yet powerful templating engine provided with Laravel.
- Blade is Laravel's lightweight template language and its syntax is very easy to learn.
- A blade template contains extension - blade.php and is stored at resources/views.
- Blade also supports all of PHP's major constructs to create loops and conditions - @for, @foreach, @while, @if, and @elseif, allowing you to avoid opening and closing the <?php tags everywhere in your templates.
- The main advantage of using Blade templates is that we can set up the master template and this master template can be extended by other individual pages.
Example
- Step 1 − Create a master template and save it at resources/views/layouts/master.blade.php.
<html>

   <head>
      <title>@yield('title')</title>
   </head>

   <body>
      @section('sidebar')
      This is the master sidebar.
      @show

      <div class = "container">
         @yield('content')
      </div>

   </body>
</html>
- Step2 − Here, in the master template,
- @yield('title') is used to display the value of the title
- @section('sidebar') is used to define a section named sidebar
- @show is used to display the contents of a section
- @yield('content') is used to display the contents of content
- Step 3 − Now, create another page and extend the master template and save it at resources/views/page.blade.php
@extends('layouts.master')
@section('title', 'Page Title')
@section('sidebar')
@parent
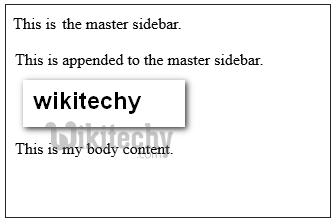
<p>This is appended to the master sidebar.</p>
@endsection
@section('content')
<h2>{{$name}}</h2>
<p>This is my body content.</p>
@endsection
- Step 4 − Here is the description of each element.
- @extends('layouts.master') is used to extend the master layout. “layouts.master” - Here, layouts is the name of the directory, where we have stored the master template and “.master” of the master template “master.blade.php” refers to its name but here only name is used without extension blade.php
- @section('title', 'Page Title') − sets the value of the title section.
- @section('sidebar') − defines a sidebar section in the child page of master layout.
- @parent − displays the content of the sidebar section, defined in the master layout.
- <p> − This is appended to the master sidebar.</p> adds paragraph content to the sidebar section
- @endsection − ends the sidebar section.
- @section('content') − defines the content section.
- @section('content') − adds paragraph content to the content section.
- @endsection − ends the content section.
- Step 5 − Now, set up the route to view this template. Add the following line at app/Http/routes.php
Route::get('blade', function () {
   return view('page',array('name' => 'Wikitechy'));
});- Step 6 − Visit the following URL to view the blade template example. http://localhost:8000/blade
This tutorial is used to learn laravel and also provides guidance on laravel book , laravel books , laravel hosting , laravel programming , laravel server php , laravel server , laravel development server , start laravel server , laravel getting started , laravel programmer , php with laravel for beginners , what is laravel framework in php , up and running with laravel , php framework laravel , getting started with laravel , what is laravel framework , laravel applications , what is laravel in php , laravel hosting , laravel framework , php laravel framework , latest framework in php
World's No 1 Animated self learning Website with Informative tutorials explaining the code and the choices behind it all.
© 2016 - 2026 KaaShiv InfoTech, All rights reserved. Powered by Inplant Training in chennai | Internship in chennai