How to Install React.js on Windows: A Complete Guide (2026) 🚀 | The Easiest Beginner-Friendly Tutorial
Key Highlights 📌
- Learn How to Install React.js on Windows: A Complete Guide in simple steps.
- Install Node.js, npm, and create your first React project.
- Understand why React needs Node.js.
- Verify that everything is installed correctly.
- Fix common installation errors.
- Run your first React application successfully.
- Perfect for beginners with zero React experience.
How to Install React.js on Windows: A Complete Guide
If you’re searching for How to Install React.js on Windows: A Complete Guide, you’re in the right place.
When I first decided to learn React, I thought installing it would be complicated. I imagined downloading dozens of files, changing system settings, and spending hours fixing errors. Thankfully, I was completely wrong.
The truth is that learning How to Install React.js on Windows: A Complete Guide is much easier than most beginners think. If you already know a little HTML, CSS, and JavaScript, you’re only a few steps away from building modern web applications.
In this guide, I’ll walk you through everything exactly the way I wish someone had explained it to me. No confusing technical words. No skipped steps. Just a simple, beginner-friendly tutorial.
Let’s get started! 😊
What is React.js?
Before installing React, let’s quickly understand what it is.
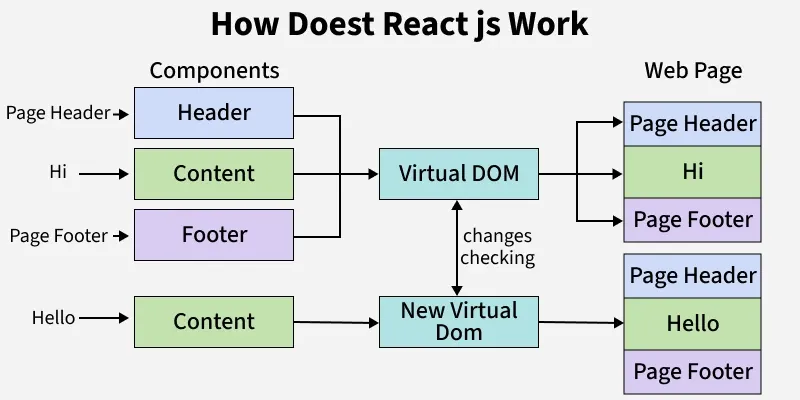
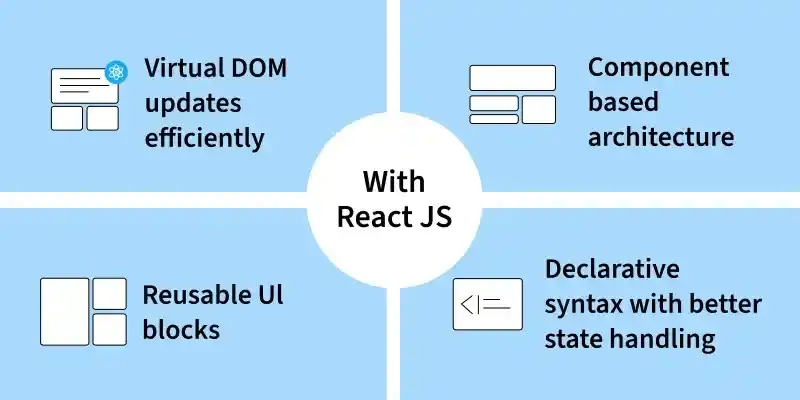
React.js is a popular JavaScript library used to build fast and interactive user interfaces (UI). Instead of reloading an entire webpage whenever something changes, React updates only the parts that need updating.
Think about websites like:
- Netflix
- Airbnb
These websites contain lots of dynamic content. React helps developers build these kinds of applications efficiently.
One thing I personally like about React is how it breaks a webpage into small reusable components. Instead of writing the same code repeatedly, I can create one component and use it multiple times.
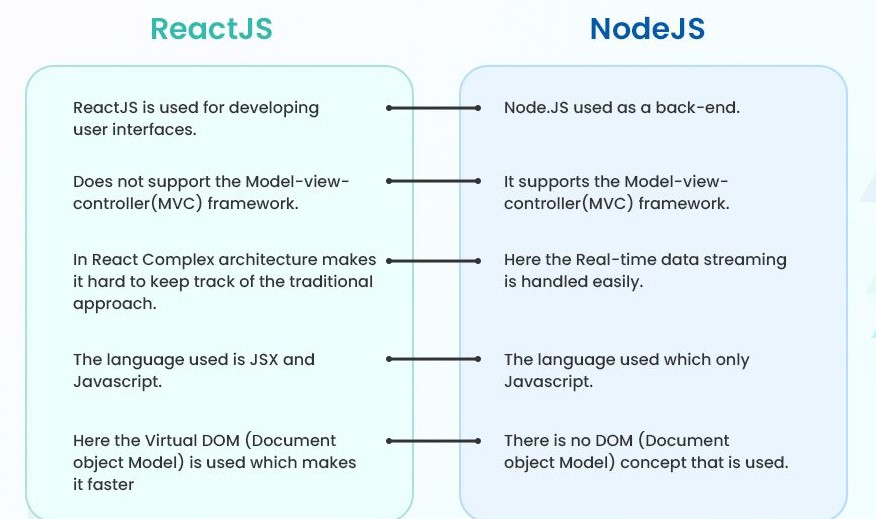
Why Do We Need Node.js Before Installing React?
This is probably the question I had the most.
“Why can’t I just install React?”
Here’s the simple answer.
React itself doesn’t install directly on Windows. Instead, we use Node.js, which comes with npm (Node Package Manager).
Think of it like this:
- Windows = Your house 🏠
- Node.js = Electricity ⚡
- React = Your computer 💻
Without electricity, the computer won’t run.
Similarly, without Node.js, React cannot be created or managed properly.
Prerequisites Before Installing React.js on Windows
Before following How to Install React.js on Windows: A Complete Guide, make sure you have:
✅ Windows 10 or Windows 11
✅ Stable internet connection
✅ Administrator permission (recommended)
✅ A code editor like Visual Studio Code
Recommended downloads:
- Node.js: https://nodejs.org/
- Visual Studio Code: https://code.visualstudio.com/
- React Documentation: https://react.dev/
These are the official websites, so they’re always the safest places to download from.
Step 1: Download Node.js
Visit the official Node.js website.
You’ll usually see two versions:
- LTS (Long-Term Support) ✅
- Current
I always recommend downloading the LTS version because it’s more stable for beginners.
Click Download LTS.
Wait for the installer to finish downloading.
Step 2: Install Node.js
Now open the installer.
The installation wizard is straightforward.
Simply click:
- Next
- Accept the License Agreement
- Next
- Install
- Finish
Keep all the default settings.
After installation finishes, restart your computer if Windows asks you to.
Step 3: Verify Node.js Installation
Now let’s make sure everything installed correctly.
Open:
Command Prompt
or
Windows Terminal
Type:
node -vYou should see something like:
v24.x.xNow type:
npm -vExample:
11.x.xIf both commands show version numbers, congratulations! 🎉
Node.js and npm are successfully installed.
Step 4: Install Visual Studio Code
Although any editor works, I personally recommend Visual Studio Code.
It’s:
- Free
- Lightweight
- Beginner-friendly
- Supports React extensions
Download it from the official website and complete the installation.
Step 5: Create Your First React Project
Now comes the exciting part.
Open Command Prompt.
Move to the folder where you’d like to create your project.
Example:
cd DesktopNow run:
npx create-vite@latest my-react-appWhy Vite instead of Create React App?
Because today, Vite is much faster and has become the recommended way to start new React projects.
The installer will ask a few questions.
Choose:
- Framework → React
- Variant → JavaScript
After it’s created:
cd my-react-appInstall dependencies:
npm installStep 6: Start the React Development Server
Run:
npm run devYou’ll see something like:
Local: http://localhost:5173/Open this address in your browser.
Congratulations! 🎉
You’ve successfully completed How to Install React.js on Windows: A Complete Guide.
Your First React Project Structure
You’ll notice several folders.
Some important ones are:
my-react-app

├── node_modules
├── public
├── src
├── package.json
├── vite.config.js
The folder you’ll work with most is:
srcInside src, you’ll create components, pages, styles, and JavaScript files.
Don’t worry if this structure looks unfamiliar today. It becomes much easier after building a few projects.
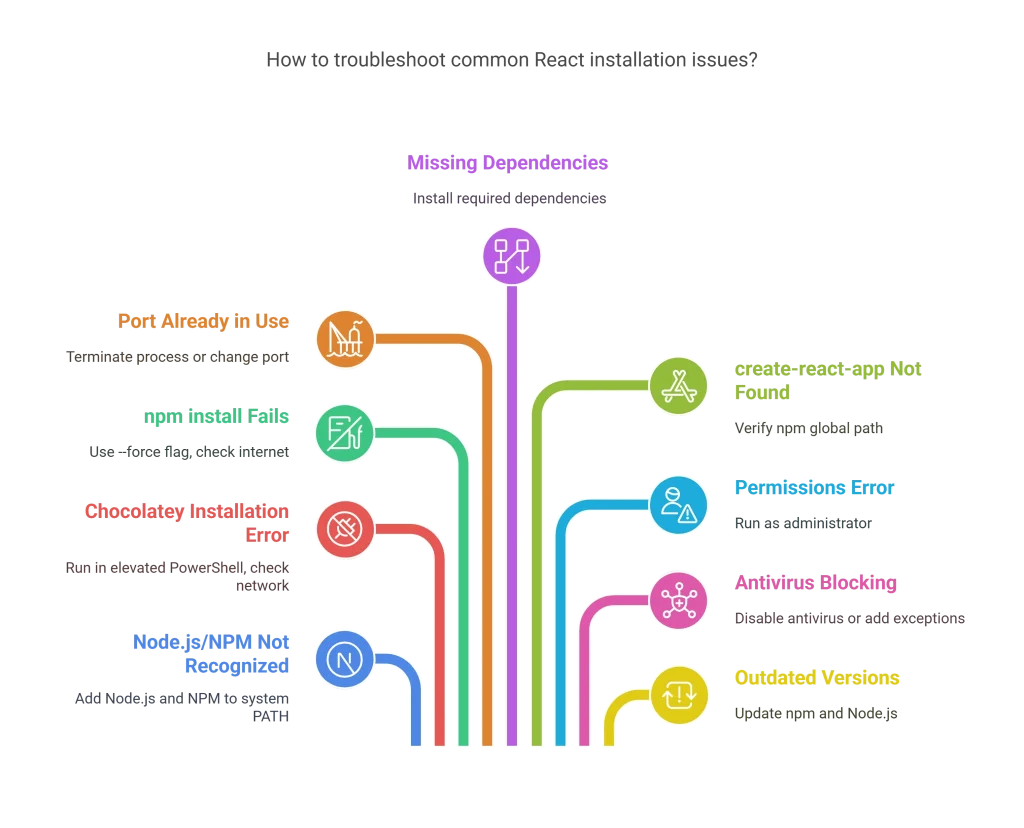
Common Installation Errors (And Their Solutions)
When I first installed React, I ran into a few small problems. Here are the most common ones.
1. node is not recognized
This usually means Node.js wasn’t installed correctly or wasn’t added to the system PATH.
Solution:
- Restart your computer.
- Reinstall Node.js.
2. npm is not recognized
This happens for the same reason.
Installing the latest LTS version usually fixes it.
3. Port Already in Use
Sometimes another application is already using the default port.
Simply stop the other application or restart the development server.
4. Internet Connection Problems
If packages aren’t downloading:
- Check your internet.
- Disable VPN if necessary.
- Try again after a few minutes.
Why I Recommend Learning React
I’ve tried learning several frontend technologies over the years, and React always stands out because of its simplicity once you understand the basics.
Some reasons I recommend React are:
- Huge community support
- Thousands of learning resources
- High demand in software jobs
- Reusable components
- Fast development
- Excellent performance
If your goal is becoming a frontend or full-stack developer, React is definitely worth learning.
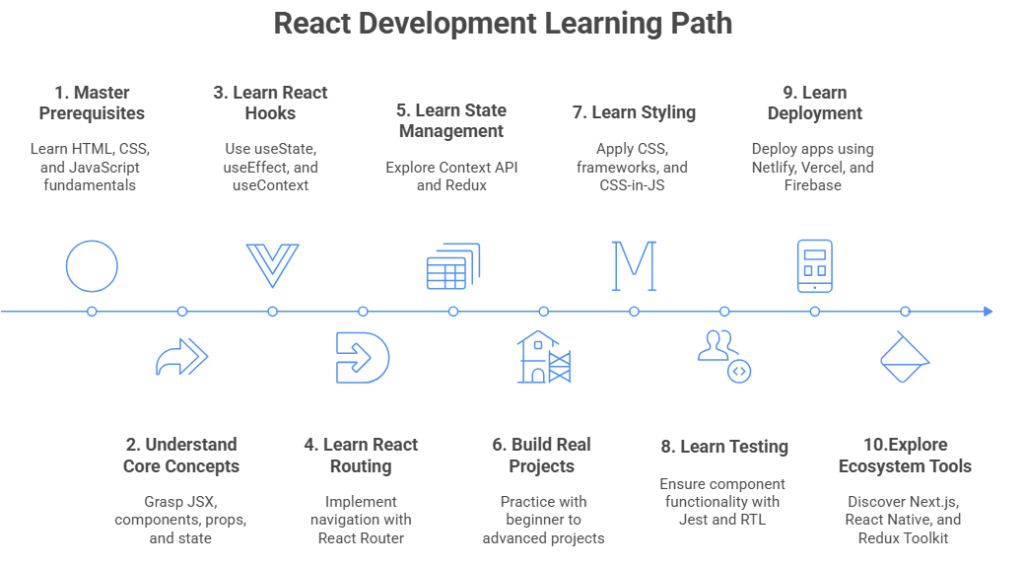
Tips After Installing React
Once you’ve completed How to Install React.js on Windows: A Complete Guide, don’t stop there.
I suggest following this learning path:
- Learn JSX
- Components
- Props
- State
- Events
- Hooks
- React Router
- API Integration
- Project Building
The more projects you build, the more confident you’ll become.
Final Thoughts 💡
I hope this tutorial on How to Install React.js on Windows: A Complete Guide made the installation process feel much less intimidating.
When I installed React for the first time, I expected it to be a long and confusing process. In reality, it took only a few minutes once I understood the role of Node.js, npm, and Vite. If you’re just starting your web development journey, don’t worry about mastering everything at once. Install React, build small projects, make mistakes, and keep experimenting. Every project teaches something new.
If you’ve successfully followed How to Install React.js on Windows: A Complete Guide, you’re now ready to dive into the exciting world of React development. Happy coding! 🚀
Want to learn more about React ?, Kaashiv Infotech Offers React course and more Visit Their website www.kaashivinfotech.com.


![What is ReactJS A Beginner's Guide [2026]](https://www.wikitechy.com/wp-content/uploads/2026/06/What-is-ReactJS-A-Beginners-Guide-2026-380x220.png)