Easily Root and Install TWRP Recovery on LG V20. We identify bootloader of LG v20 is unlockable and users who already unlock its bootloader looking for a technique root LG V20. TWRP recovery direct installation is not available due to a secure system. To install TWRP recovery using the Dirty Cow exploit and recovery exploit. To Root and Install TWRP Recovery on LG V20, first we need to install TWRP Recovery on LG V20 and then flash SuperSu to Root LG V20.
[ad type=”banner”]If you are planning to install LG V20, first we need to Root LG V20 and Install TWRP Recovery On it. Developers providing to install TWRP on LG V20 using the Dirty Cow root exploit in the kernel. So here is the Steps to Root and Install TWRP Recovery on LG V20.
Benefits of Rooting LG v20:
- Install custom ROM and custom kernel on your device for faster and better performance.
- Block Advertisements in apps with the help of ad blocker.
- Increase performance and battery life by killing background process automatically.
- After you root Android 7.0 LG v20 and install custom recovery, you can install Xposed Framework to customize your device
- Backup to restore all of your apps and data using Titanium.
- we can uninstall bloatware (Pre-installed Apps)
Note:
- Rooting invalid your phone warranty, and you won’t claim it back.
- It may format all your phone data, so it is advisable to take a complete backup of your phone and then proceed.
- Make sure that your phone has at least 50-60% charged to prevent the unexpected shutdown in-between the process.
Files required to Root and Install Custom Recovery on LG V20 :
- Download ADB and fastboot driver for windowsor ADB and Fastboot for Mac and install it on your PC. This will also install your device driver.
- Download and install Drivers for LG V20
- Download TWRP 3.0.2.0 Recovery for LG V20 and place it in the folder where ADB installed and rename it to ‘twrp.img’.
- Download recovery binaries(you need to download all of these)
- Download Dm Variety disabler for LG v20
- Download SuperSu to root LG V20 and copy it to your phone sd card.
Steps to Root and Install TWRP Recovery on LG V20
Install Temporary TWRP on LG V20
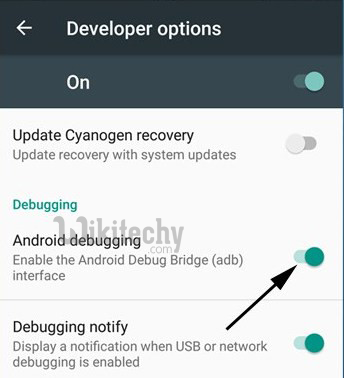
First enable USB debugging from setting>developer option>. To enable Developer Options, go to About phone and tap the Build Number 7 times.

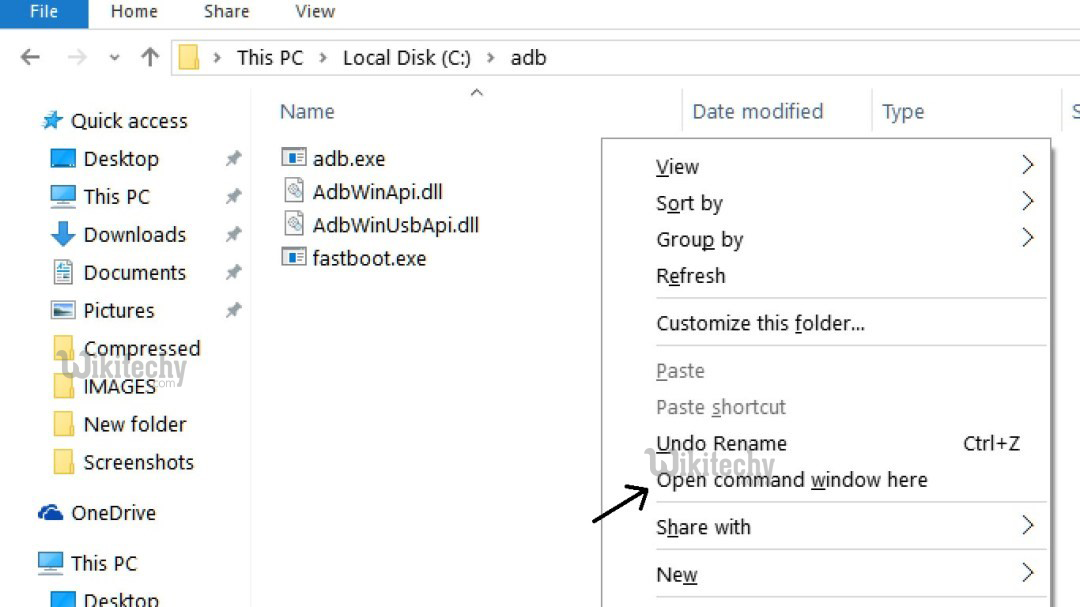
Now go to installation directory open ADB folder and open the command window thereby pressing and hold the ‘shift’ key and right-clicked anywhere in that folder.

Installation Directory
Now connect your phone to PC and reboot the device into fastboot mode by typing
adb reboot bootloader
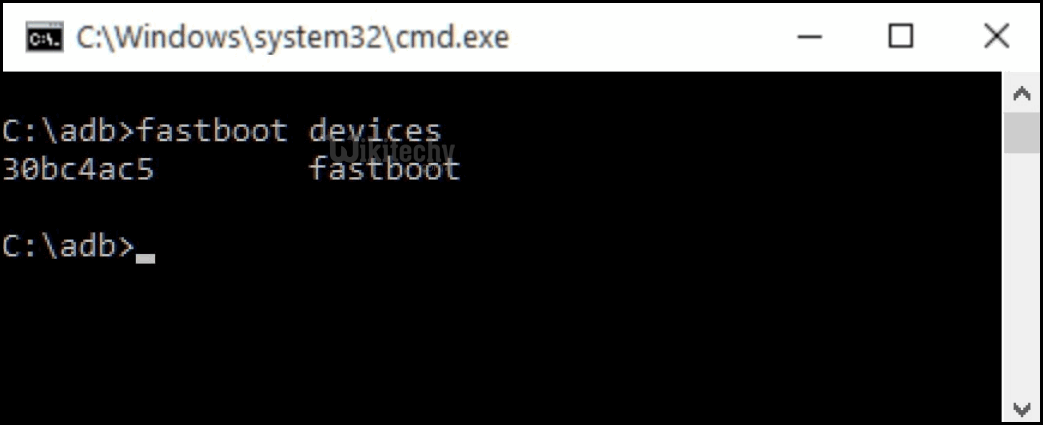
You are in Fastboot mode now to check your connection by entering below command in command prompt. It will return your device serial number means your device properly connected. Check your driver if the above command is not responding.
[ad type=”banner”]fastboot devices

Type the below command correctly in command prompt one by one –
adb push dirtycow /data/local/tmp
adb push recowvery-applypatch /data/local/tmp
adb push recowvery-app_process64 /data/local/tmp
adb push recowvery-run-as /data/local/tmp
Above will save recovery to temp folder. Continue pushing the below steps.
adb shell
$ cd /data/local/tmp
$ chmod 0777 *
$ ./dirtycow /system/bin/applypatch recowvery-applypatch
“Wait for Completion”
$ ./dirtycow /system/bin/app_process64 recowvery-app_process64
“Wait for Completion, your phone will look like it’s crashing”
$ exit
adb logcat -s recowvery
“<wait for it to tell you it was successful, then press CTRL+C>”
adb shell reboot recovery
“<wait for phone to boot up again, your recovery will be reflashed to stock>”
adb shell
$ getenforce
“<it should say Permissive, adjust source and build for your device!>”
$ cd /data/local/tmp
$ ./dirtycow /system/bin/run-as recowvery-run-as
$ run-as exec ./recowvery-applypatch boot
“<wait for it to flash your boot image this time>”
$ run-as su
#
“<play around in your somewhat limited root shell full of possibilities>”
dd if=/sdcard/twrp-3.0.2-0-beta4-h918.img of=/dev/block/bootdevice/by-name/recovery
The above step will flash TWRP Recovery on LG V20.
With above command, you installed the custom recovery on LG V20.
Install TWRP and Root LG v20
Once you’ve got the permissive shell in adb, you will access to your partitions via dd.
Now transfer TWRP to your internal storage (rename it to twrp.img) using MTP. you can also just use
You can use adb push to flash the TWRP
Now enter the following commands in command window once again.
adb push twrp-3.0.2-0-beta4-h918.img /sdcard/twrp.img
adb shell
$ run-as exec dd if=/sdcard/twrp.img of=/dev/block/bootdevice/by-name/recovery
"<wait for it to complete>"
$ reboot recovery
[ad type=”banner”]
You should be inside TWRP now. It will ask you if you want to enable system modifications. You should tap “Never show this screen on boot again”, and Swipe Yes to allow modification.
Now flash SuperSu and Dm variety disabler to turn off the forced encryption at boot and allow you to boot a modified system.
Now Go to “Wipe” section and tap “Format Data”, and type “yes” (It will Disable Force Encryption)
Done! Now reboot your device.
solved my problems
Informative