

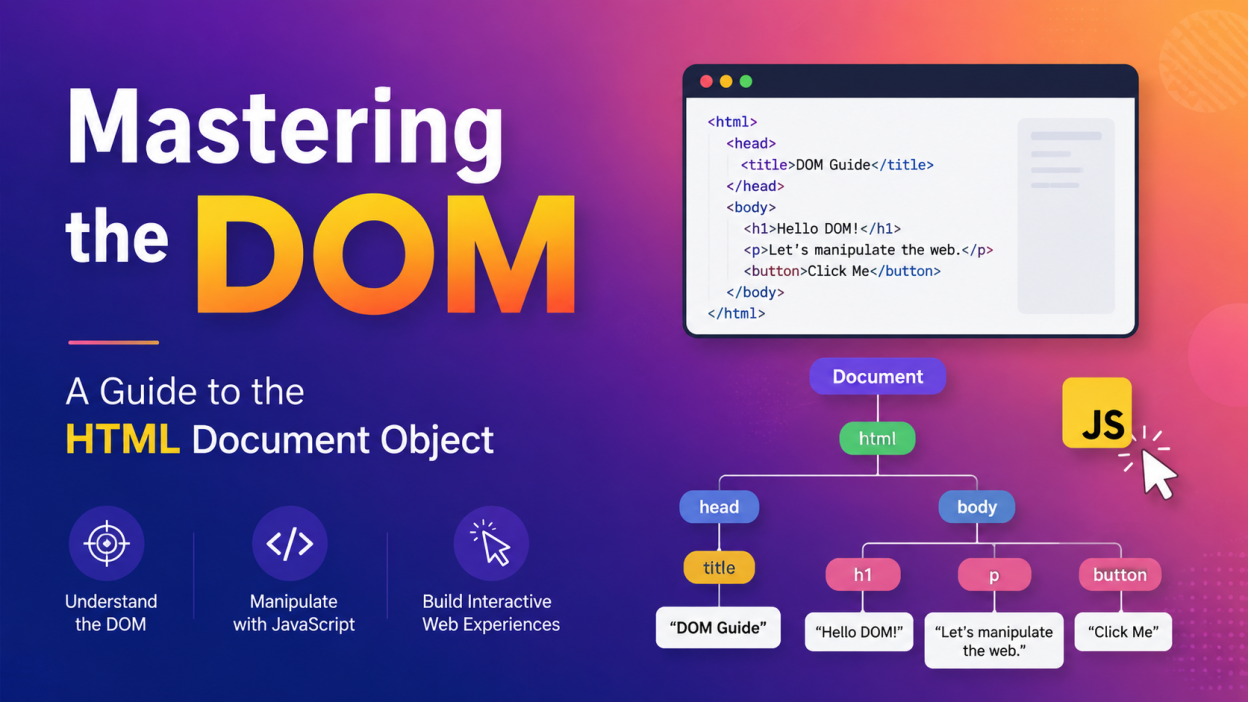
Mastering the DOM is one of those things that completely changes the way I look at JavaScript.
When I first started learning JavaScript, I could write variables, functions, loops, and conditions. That part felt manageable. But then I came across code like document.querySelector(), addEventListener(), textContent, and createElement().
I remember thinking: “Okay… but what exactly is document?”
That question leads straight to the DOM — Document Object Model.
Mastering the DOM means learning how JavaScript finds, reads, changes, creates, and removes elements on an HTML page. Once this clicks, JavaScript suddenly feels much less mysterious.
In this guide, I’ll walk through the DOM from the basics to practical manipulation with simple examples.
🔑 Key Highlights
By the end of this guide, you’ll understand:
- ✅ What the DOM actually is
- ✅ How HTML becomes a DOM tree
- ✅ The difference between HTML and DOM
- ✅ What Document, Element, Node, and Text mean
- ✅ How to select HTML elements using JavaScript
- ✅ How to change text, HTML, attributes, and styles
- ✅ How to create and remove elements
- ✅ How DOM events work
- ✅ How
addEventListener()connects user actions with JavaScript - ✅ Common DOM mistakes beginners make
- ✅ How to practice Mastering the DOM with a real mini-project
What Is the DOM?
Let’s start with the simplest definition.
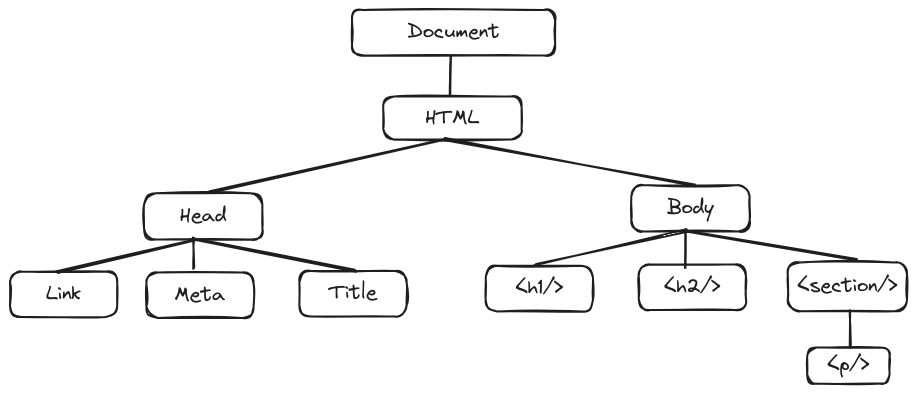
The DOM (Document Object Model) is a programming interface that represents an HTML document as a tree of objects called nodes.
That’s the official idea, but honestly, that definition can feel a little dry.
Here’s how I think about it.
Imagine your HTML page is a family tree.
<!DOCTYPE html>
<html>
    <head>
        <title>My Website</title>
    </head>

    <body>
        <h1>Hello</h1>
        <p>Welcome to my website.</p>
    </body>
</html>
The browser doesn’t just stare at this HTML as plain text.
It parses the document and creates a structure that JavaScript can work with.
Something like:
Document
   |
   └── html
       |
       ├── head
       |    |
       |    └── title
       |         |
       |         └── "My Website"
       |
       └── body
            |
            ├── h1
            |    |
            |    └── "Hello"
            |
            └── p
                 |
                 └── "Welcome to my website."
That’s the DOM tree.
The WHATWG DOM Standard describes the document as a node tree containing objects such as Document, Element, and Text nodes.
So, instead of thinking: HTML = a bunch of tags
I prefer thinking: HTML creates the structure, and the DOM gives JavaScript a way to interact with that structure.
That’s the heart of Mastering the DOM.
HTML vs DOM: Are They the Same?
No. And this is a very common beginner confusion.
HTML
HTML is the markup you write.
<h1>Hello World</h1>
DOM
The browser parses that HTML and creates an object-based representation of the document.
JavaScript can then access that representation.
For example:
const heading = document.querySelector("h1");

console.log(heading);
Here, JavaScript is not searching through your .html file like a normal text file.
It is working with the DOM representation created by the browser.
MDN describes the DOM as a document model represented as a node tree, where nodes can be accessed, changed, created, moved, and removed.
That distinction becomes really important once you start building interactive websites.
Understanding the DOM Tree 🌳
If you’ve learned basic data structures, the DOM tree will feel familiar.
A tree contains:
- Parent nodes
- Child nodes
- Sibling nodes
- Root node
- Leaf nodes
For example:
<body>
    <div>
        <p>Hello</p>
        <button>Click Me</button>
    </div>
</body>
We can imagine it like this:
body
 |
 └── div
      |
      ├── p
      |    |
      |    └── "Hello"
      |
      └── button
           |
           └── "Click Me"
Here:
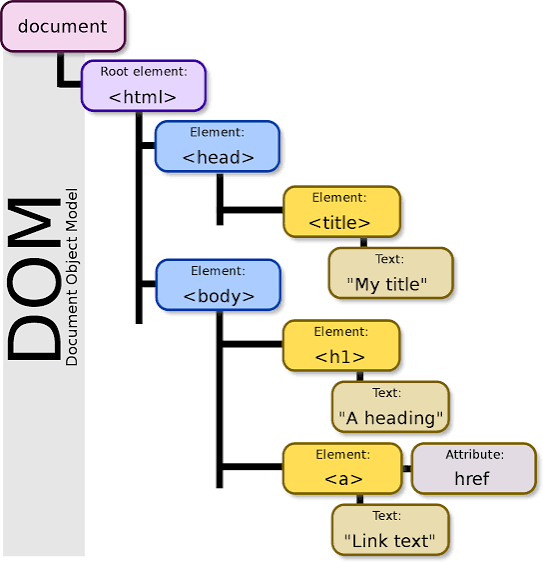
bodyis the parent ofdivdivis the parent ofpandbuttonpandbuttonare siblings"Hello"is a text node
MDN’s DOM anatomy documentation explains the tree structure using concepts such as root, parent, child, sibling, ancestor, and descendant.
Once I understood this tree structure, methods like parentNode, children, firstChild, and nextSibling started making much more sense.
4 Important DOM Concepts You Should Know
Before we start manipulating the DOM, let’s understand four words you’ll see constantly.
1. Document
The document represents the web page currently loaded in the browser.
For example:
console.log(document);
You’ll often start DOM operations with:
document
That’s why we write:
document.querySelector()
or:
document.getElementById()
2. Element
An element is an HTML element.
For example:
<h1>Hello</h1>
<p>Welcome</p>
<button>Click</button>
The <h1>, <p>, and <button> are elements.
JavaScript can select these elements and manipulate them.
3. Node
Node is a broader concept.
Elements are nodes, but not every node is an element.
The DOM can contain different kinds of nodes, including:
- Document nodes
- Element nodes
- Text nodes
- Comment nodes
For example:
<p>Hello</p>
contains an element node:
p
and a text node:
Hello
This distinction becomes useful when you start navigating the DOM more deeply.
4. Text Node
The actual text inside an HTML element can exist as a text node.
<h1>Hello World</h1>
Here:
<h1> → Element node
Hello World → Text node
Don’t worry if this feels slightly confusing now. It becomes much clearer when you start using DOM properties.
Selecting HTML Elements Using JavaScript 🎯
Here’s where Mastering the DOM becomes practical.
Before JavaScript can change something, it usually needs to find it.
Suppose we have:
<h1 id="title">Welcome</h1>
We can select it using:
const heading = document.getElementById("title");
Now heading refers to that element.
Using getElementById()
const heading = document.getElementById("title");

console.log(heading);
getElementById() finds an element based on its id. IDs are intended to be unique within a document.
Using querySelector() for DOM Selection
If I had to choose one DOM selection method for beginners to learn first, I’d strongly recommend:
querySelector()
For example:
const heading = document.querySelector("h1");
It selects the first element matching the CSS selector.
You can also use:
const heading = document.querySelector("#title");
or:
const paragraph = document.querySelector(".description");
This is convenient because you can use familiar CSS selectors.
For example:
document.querySelector("#title");
document.querySelector(".box");
document.querySelector("button");
MDN confirms that querySelector() returns the first matching element, while querySelectorAll() returns all matching elements.
Selecting multiple elements
const buttons = document.querySelectorAll("button");

console.log(buttons);
This gives you a NodeList containing the matching elements.
So remember:
querySelector()     → first matching element
querySelectorAll()  → all matching elements
That’s a small detail, but it saves a lot of debugging headaches later.
Changing HTML Content with the DOM
Now let’s do something fun.
Suppose we have:
<h1 id="title">Hello</h1>
JavaScript can change the text:
const heading = document.getElementById("title");

heading.textContent = "Welcome to My Website";
The browser immediately displays:
Welcome to My Website
No page reload is required.
That’s one of the reasons the DOM is so powerful.

textContent vs innerHTML
These two properties often confuse beginners.
textContent
Use textContent when you want to change text.
heading.textContent = "Hello World";
innerHTML
Use innerHTML when you intentionally want to work with HTML markup.
heading.innerHTML = "<span>Hello</span>";
But here’s my advice: don’t reach for innerHTML automatically.
If you only need to change text, use:
textContent
It’s clearer and avoids treating user-provided text as HTML.
Changing CSS with the DOM 🎨
Yes, JavaScript can also change styles.
Suppose:
<p id="message">Hello</p>
We can write:
const message = document.getElementById("message");

message.style.fontSize = "30px";
message.style.backgroundColor = "yellow";
The paragraph changes immediately.
You can also change several properties:
message.style.color = "blue";
message.style.padding = "20px";
message.style.border = "1px solid black";
However, in larger projects, I usually prefer changing CSS classes rather than adding lots of inline styles through JavaScript.
For example:
message.classList.add("active");
Then CSS controls how .active looks.
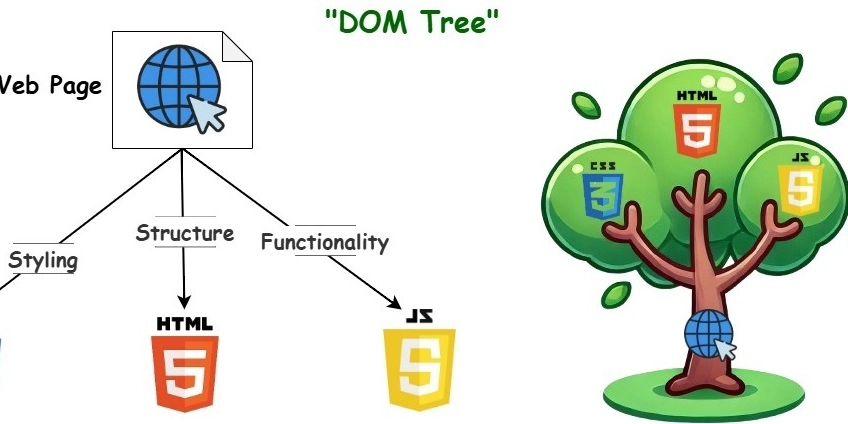
This keeps responsibilities cleaner:
HTML       → Structure
CSS        → Appearance
JavaScript → Behaviour
That separation will make your future projects much easier to maintain.
Changing HTML Attributes with JavaScript
DOM manipulation isn’t limited to text and CSS.
We can change attributes too.
Consider:
<img id="profile" src="old-image.jpg">
JavaScript:
const image = document.getElementById("profile");

image.src = "new-image.jpg";
Now the image source changes.
You can also use:
image.setAttribute("alt", "Profile picture");
And retrieve attributes with:
console.log(image.getAttribute("src"));
This becomes particularly useful when you’re building forms, menus, image galleries, and interactive components.
Creating New Elements with the DOM
Here’s another part of Mastering the DOM that I really enjoy: creating HTML elements completely from JavaScript.
Suppose we start with:
<div id="container"></div>
We can create a paragraph:
const paragraph = document.createElement("p");

paragraph.textContent = "This paragraph was created using JavaScript.";

document.getElementById("container").appendChild(paragraph);
The browser now contains:
<div id="container">
    <p>This paragraph was created using JavaScript.</p>
</div>
We didn’t manually write the <p> into the original HTML.
JavaScript created it.
MDN provides DOM examples showing how elements can be created and inserted into the document dynamically.
Removing Elements from the DOM
We can also remove elements.
For example:
const paragraph = document.querySelector("p");

paragraph.remove();
The paragraph disappears from the DOM.
This is useful for things such as:
- Removing shopping-cart items
- Closing notification messages
- Deleting comments
- Removing completed tasks
- Hiding dynamic content
A modern JavaScript application may perform hundreds of these small DOM operations during a user’s session.
DOM Events: Making Websites Interactive ⚡
Now we reach the part that makes a webpage feel alive.
Imagine a button:
<button id="btn">Click Me</button>
We want something to happen when the user clicks it.
JavaScript:
const button = document.getElementById("btn");

button.addEventListener("click", function() {
    alert("Button clicked!");
});
That’s a DOM event.
The browser detects the click and runs our function.
MDN recommends addEventListener() for registering event handlers because it supports multiple listeners and can later remove listeners when needed.
Common DOM Events You Should Know
You don’t need to memorize every event.
Start with these:
| Event | When it happens |
|---|---|
click | User clicks something |
dblclick | User double-clicks |
mouseover | Mouse moves over an element |
mouseout | Mouse leaves an element |
keydown | Keyboard key is pressed |
keyup | Keyboard key is released |
input | Input value changes |
submit | Form is submitted |
change | Form control value changes |
For example:
const input = document.querySelector("#name");

input.addEventListener("input", function() {
    console.log(input.value);
});
Now JavaScript can react while the user types.
This is how we start building things like live search boxes, validation messages, calculators, filters, and interactive forms.
A Simple DOM Project: Change a Heading
Let’s combine everything.
HTML
<!DOCTYPE html>
<html>
<head>
    <title>DOM Example</title>
</head>

<body>

    <h1 id="title">Hello World</h1>

    <button id="changeBtn">Change Heading</button>

    <script src="script.js"></script>

</body>
</html>
JavaScript
const title = document.querySelector("#title");
const button = document.querySelector("#changeBtn");

button.addEventListener("click", function() {
    title.textContent = "You Changed the DOM! 🎉";
});
Click the button.
The heading changes.
That’s DOM manipulation in action.
The JavaScript is essentially saying:
Find the heading
        ↓
Find the button
        ↓
Wait for a click
        ↓
Change the heading
Once you see that pattern, a lot of frontend JavaScript starts looking less intimidating.
Common DOM Mistakes Beginners Make
While Mastering the DOM, you’re going to make mistakes. I certainly wouldn’t try to avoid all of them — debugging is part of learning.
Here are a few common ones.
1. Selecting an element that doesn’t exist
const title = document.querySelector("#wrongId");

title.textContent = "Hello";
If the selector finds nothing, querySelector() returns null.
So this can cause an error when you try to access textContent.
2. Loading JavaScript too early
Suppose your JavaScript tries to find:
<h1 id="title">Hello</h1>
before the browser has parsed that part of the HTML.
Your selector may not find the element.
This is why script placement and loading strategies matter. MDN specifically notes that JavaScript manipulating DOM elements needs to run after the relevant HTML has been parsed.
A simple approach is to put your script near the end of the <body>:
<body>

    <h1 id="title">Hello</h1>

    <script src="script.js"></script>
</body>
3. Confusing querySelector() and querySelectorAll()
Remember:
querySelector()
gets the first match.
While:
querySelectorAll()
gets all matching elements.
If you have five buttons and write:
const button = document.querySelector("button");
you’ve selected only the first one.
That’s not necessarily wrong. You just need to know what your code is asking for.
DOM and JavaScript: How Do They Work Together?
This is another important point.
The DOM itself isn’t JavaScript.
The DOM is a web platform API that JavaScript can use in the browser.
Think about it this way:
HTML
  ↓
Browser parses HTML
  ↓
DOM Tree
  ↓
JavaScript accesses DOM
  ↓
DOM changes
  ↓
Browser displays updated page
MDN explains that client-side JavaScript uses browser-provided objects and DOM APIs to programmatically control webpages and respond to user actions.
That mental model helped me understand why JavaScript can do things like:
document.querySelector()
The document object is part of the browser environment. JavaScript uses it to interact with the current document.
Why Is Mastering the DOM Important?
You might be wondering:
“Do I really need to learn all this if frameworks like React exist?”
Yes.
Even when you eventually use React, Vue, Angular, or another frontend framework, understanding the underlying browser and DOM concepts gives you a much stronger foundation.
You don’t have to become a DOM wizard before touching a framework.
But if you understand:
- Elements
- Nodes
- Events
- Event listeners
- Attributes
- DOM traversal
- Dynamic element creation
- DOM updates
then debugging frontend code becomes much easier.
And if you’re learning JavaScript from scratch, I strongly recommend learning DOM manipulation before jumping too quickly into a framework.
Best Way to Practice Mastering the DOM
Don’t just read about the DOM.
Touch it. Break it. Fix it.
Open your browser and create tiny projects.
Try building:
📝 To-Do List
Practice:
- Creating elements
- Removing elements
- Click events
- Input values
🎨 Color Changer
Practice:
- Button events
- CSS manipulation
- Random values
🔢 Counter
Practice:
- Click events
- Variables
textContent
🔍 Live Search
Practice:
inputeventsquerySelectorAll()- Filtering elements
🖼️ Image Gallery
Practice:
- Attributes
- Click events
- Dynamic content
These projects may look small. That’s actually the point.
A tiny project where you understand every line is far more valuable than copying a 500-line JavaScript application from a tutorial.
DOM Methods Cheat Sheet 📌
Here’s a quick reference I would keep beside me while practicing.
| Method / Property | Purpose |
|---|---|
document.getElementById() | Select by ID |
document.querySelector() | Select first matching element |
document.querySelectorAll() | Select all matching elements |
textContent | Read/change text |
innerHTML | Read/change HTML |
style | Change inline styles |
classList | Work with CSS classes |
getAttribute() | Get an attribute |
setAttribute() | Set an attribute |
createElement() | Create an element |
appendChild() | Add a child |
append() | Add content/nodes |
remove() | Remove an element |
addEventListener() | Listen for events |
You don’t need to memorize this table today.
Use it repeatedly while building things. Your brain will eventually remember the methods naturally.
Final Thoughts on Mastering the DOM
Mastering the DOM isn’t about memorizing dozens of methods.
It’s about developing a simple mental model:
HTML creates the page structure
          ↓
Browser creates the DOM
          ↓
JavaScript finds DOM elements
          ↓
JavaScript changes them
          ↓
Events respond to the user
          ↓
The webpage becomes interactive
That’s it.
Of course, the DOM gets much deeper from here. You’ll eventually encounter event bubbling, event delegation, DOM traversal, forms, validation, MutationObserver, DocumentFragment, templates, Shadow DOM, and more.
But don’t rush there.
Start with:
- Understand the DOM tree.
- Learn how to select elements.
- Change text.
- Change attributes.
- Change classes and styles.
- Create elements.
- Remove elements.
- Learn events.
- Build small projects.
That’s the path I’d recommend to anyone beginning Mastering the DOM.
And honestly, once you build your first little project where a button changes something on the screen, you’ll have that satisfying moment:
“Oh… so THIS is how JavaScript controls the webpage.” 😄
That moment matters.
Keep building from there.
Want to learn more about javascript??, kaashiv Infotech Offers Front End Development Course, Full Stack Development Course, & More www.kaashivinfotech.com.

