UiPath Installation
UiPath Installation
Before we move onto the installation, let's check out the various versions of UiPath in brief:
- Community Cloud
- This version is suitable for people to know the fundamentals of UiPath automation and practice automating tasks there on.
- Studio
- This version is usually employed by individuals on an enterprise level.
- Enterprise Cloud
- This version of UiPath is predicated on Cloud and contains Studio, Robots, and Orchestrator. This version is usually employed by big organizations and enterprises.
- Enterprise Server
- The Enterprise Server of UiPath is an on-premise version of the whole automation platform. It also consists of UiPath Studio, Robots, and Orchestrator. This version is employed for automation on an outsized scale..
Here, we'll install the Community Cloud edition of UiPath. The installation process is that the same for other versions. Also, UiPath Community Cloud is that the free edition of UiPath. Other versions accompany 60 days of the free test period.
UiPath Installation Steps
Step 1
- We need to navigate to the official site using the subsequent link: https://www.uipath.com/
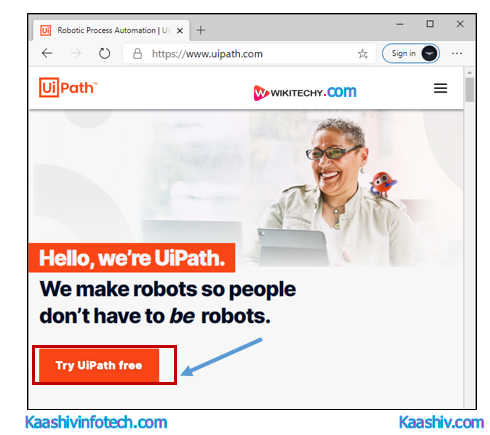
Step 2
- We'd like to click on the button "Try UiPath Free", as shown in the following window:
Step 3
- On subsequent screen, we'll see different versions of UiPath on the left side and therefore the sign-up page on the proper side, as shown within the image.

Here, we'd like to check in using an Email, Google account, Microsoft account, or Linkedln. We are getting to use "Sign up with Email".
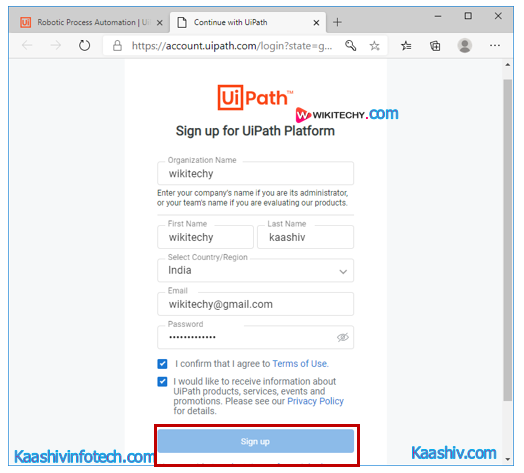
Step 4
- Once, we click on the "Sign up with Email" button, we'll get a form like this as shown below:
Step 5
- After we submit the form, we'll receive a verification mail on the submitted email-id.
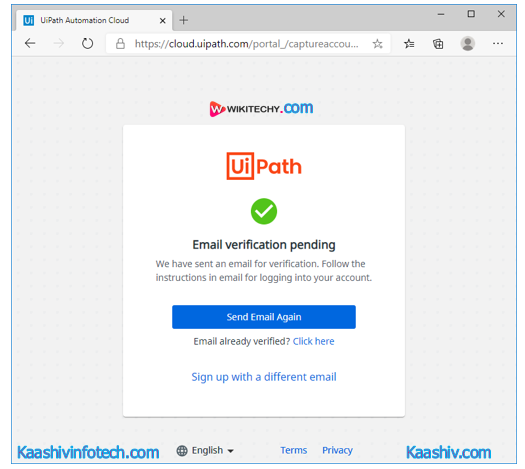
- We need to login to our email account and click on the "Verify Email" button.

Step 6
- After clicking on the "Verify Email" button, we'll be redirected into the customized home page of the UiPath Automation Cloud. We need to click on the highlighted link that is “resource center”, as shown within the image:
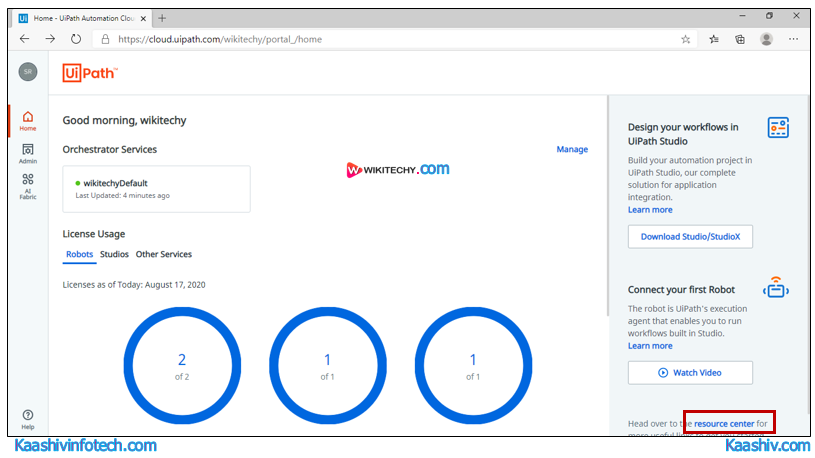
It will display all the available resources and packages of UiPath.
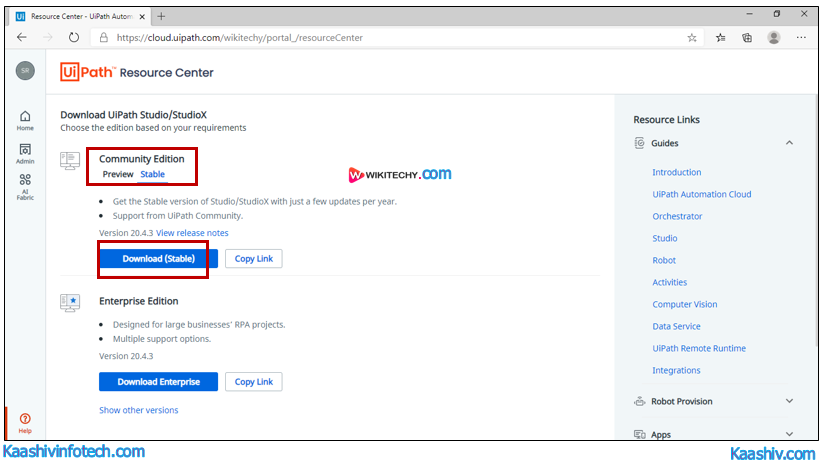
Step 7
- On subsequent screen, we'd like to download the UiPath. We download a stable version of "UiPath Community Edition".
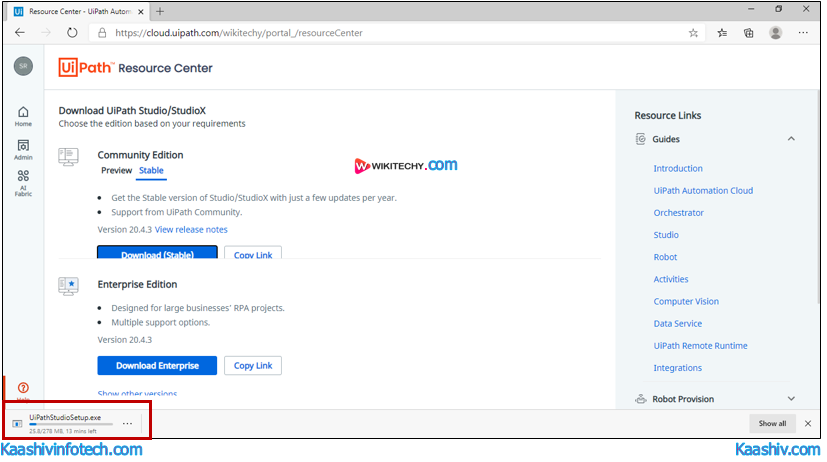
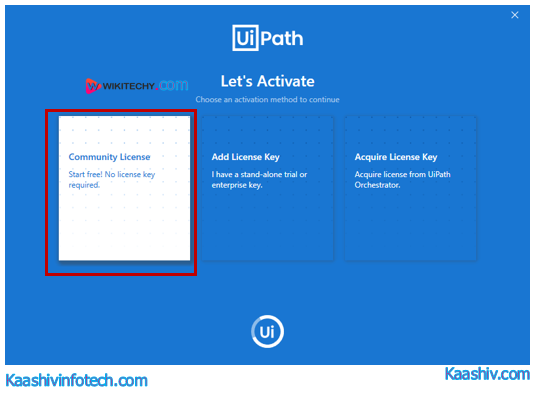
Step 8
- After the download has finished, we'd like to double-click on the UiPath setup file to start out the installation. Once we launch a setup, we'll get the subsequent screen to settle on a license type. Here, we'd like to click on the "Community Licence".
Step 9
- We need to select an appropriate profile between "UiPath Studio Pro Community" and "UiPathStudioX Community". He, we Select the "UiPath Studio Pro Community".

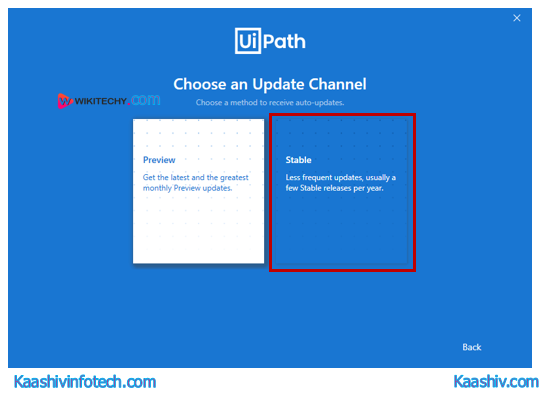
Step 10
- We'd like to select on between a "Preview" version and a "Stable" version of UiPath. Here, we Select the "Stable" edition.
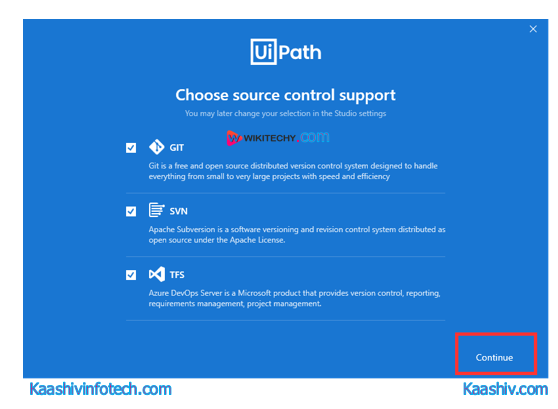
Step 11
- On subsequent screen, we'd like to Select the specified source control support and click on on the 'Continue' button. We leave the settings as per the recommendations by UiPath.
Step 12
- Once we've completed of these on-screen instructions, we'll be directed into the most screen of UiPath, as shown below:
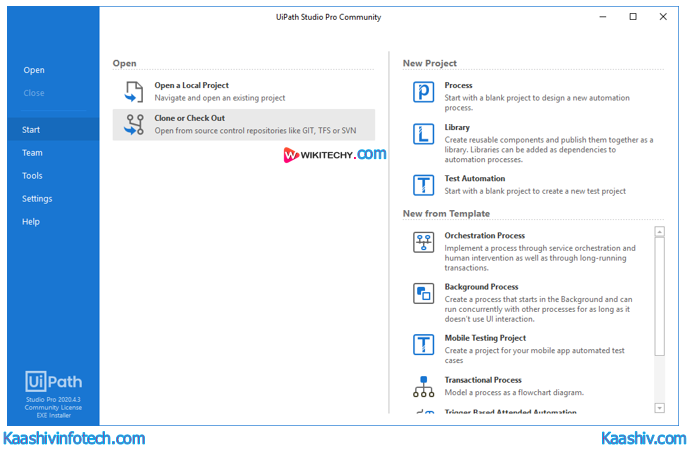
- Here, we will start a replacement automation project or work with the existing one based on the requirements. That is how we will configure/install UiPath.