

How to Install Miro on Windows – Miro is a popular online visual collaboration platform that helps teams, students, designers, developers, and businesses work together on digital whiteboards. It can be used for brainstorming, project planning, mind maps, presentations, workflows, meetings, and many other collaborative activities.
Although Miro can be accessed directly through a web browser, installing the Miro desktop app on Windows can provide a more focused workspace. The desktop application supports the basic features available in the browser version and allows users to open Miro directly from their computer.
If you are new to Miro and want to install it on a Windows computer, the process is straightforward. This guide explains the installation process in simple steps.
What Is Miro?

Miro is a digital whiteboard platform designed for visual collaboration. Instead of using a physical whiteboard, users can create online boards and add text, images, diagrams, sticky notes, shapes, files, and other elements.
It is commonly used by:
- Students for project planning
- Teachers for interactive lessons
- Developers for software planning
- UI/UX designers for wireframes
- Project managers for task planning
- Businesses for team collaboration
- Remote teams for brainstorming and meetings
Miro boards can also be shared with other users, making it useful for teams working from different locations.
Why Install the Miro Desktop App?
Using Miro through a browser is convenient, but the desktop application provides a dedicated environment for working with boards.
Some benefits include:
- Quick access from the Windows desktop
- A dedicated workspace without browser distractions
- Easy access to Miro boards
- Support for basic browser-version features
- Keyboard shortcuts designed for the desktop app
- Support for common board export features
Miro officially provides a Windows 64-bit desktop application. Windows 32-bit is no longer supported for the desktop app.
System Requirements for Miro on Windows
Before installing Miro, make sure your computer meets the basic requirements.
According to Miro’s current documentation, the Windows application requires Windows 10 or later. Miro lists 8 GB RAM as the minimum and 16 GB RAM as recommended. The company also recommends a network connection of at least 32 Mbps, while 8 Mbps is listed as the minimum. Windows ARM is currently not supported.
For most modern Windows 10 and Windows 11 computers, these requirements should not be difficult to meet.
Step 1: Download the Miro Desktop App
The first step is to download the official Miro application.
Open your web browser and visit the official Miro download page. Miro provides a dedicated Windows 64-bit download along with other platform options.
Choose the Windows 64-bit version.
The installer will be downloaded to your computer, usually into the Downloads folder. Microsoft also recommends downloading Windows programs from trusted publishers and official websites.
Once the download is complete, open your Downloads folder and locate the Miro installer.
Step 2: Install and Sign In to Miro
Double-click the downloaded Miro installer to begin the installation.
Depending on your Windows security settings, Windows may display a permission or security prompt. Review the application information and allow the installation if you downloaded it from the official Miro website.
Follow the instructions displayed by the installer. After installation is completed, you can launch Miro from the Start menu or desktop shortcut if one was created.
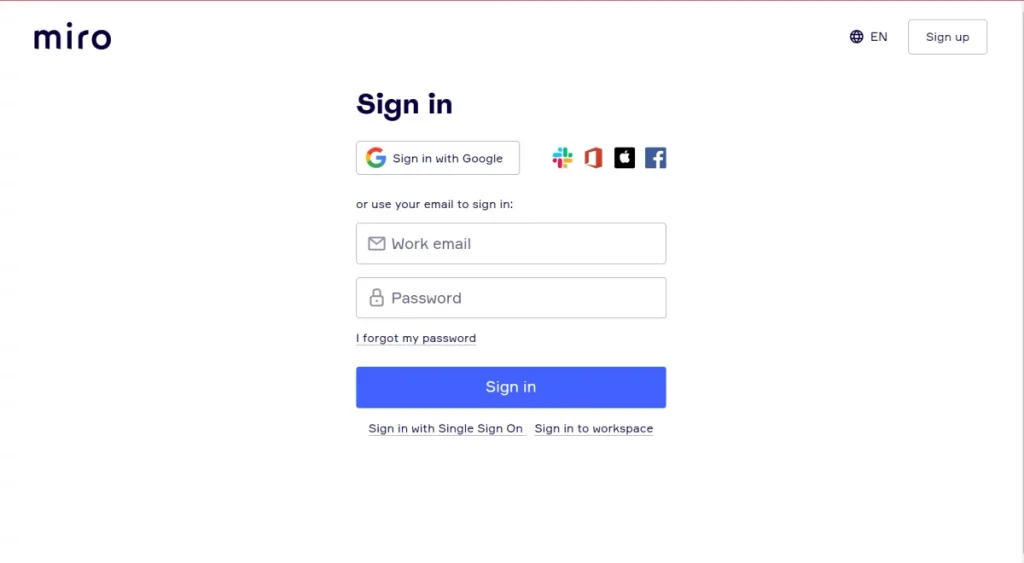
When Miro opens, sign in using your Miro account. Only registered Miro users can log in to the desktop application.
After signing in, your available Miro boards should be accessible from the application. You can open an existing board or create a new one depending on your account and workspace permissions.
Start Using Your Miro Board
Once you are logged in, you can begin working with your boards.
For example, you can create a board for a software project and use sticky notes to collect requirements. A development team can create a workflow showing different stages of a project. Students can use a board to organize research and assignment ideas.
Miro also supports features such as saving boards as images or PDFs and exporting information to spreadsheets, depending on the supported functionality and account setup.
Useful Miro Windows Shortcuts
The desktop application provides several useful keyboard shortcuts.
For example:
- Ctrl + R – Reload the current tab
- Ctrl + W – Close the current tab
- Ctrl + Q – Exit the Miro application
- Ctrl + Shift + L – Copy the board link
- Ctrl + ~ – Zoom
These shortcuts can make regular Miro usage faster, particularly when working with multiple boards.
What If Miro Does Not Work After Installation?
Sometimes an application may experience login problems, loading issues, or other unexpected errors. Miro provides an option to reset application data on Windows.
For the standard desktop version, you can press Alt, open Help, and select the option to reset application data. If you installed Miro through the Microsoft Store, the reset process can instead be accessed through Windows Settings under the application’s advanced options.
If the problem continues, reinstalling the latest version of Miro can also be useful.
Does Uninstalling Miro Delete Your Boards?
No. Removing the desktop application does not delete your Miro boards. Your content is associated with your Miro profile, so you can access it through supported Miro platforms after reinstalling the application or using Miro through a browser.
This means uninstalling the desktop application is different from deleting your Miro account or boards.
Conclusion
Installing Miro on Windows is a simple process that can be completed in just a few steps. First, download the official Windows 64-bit application from Miro’s website. Next, run the installer and sign in with your registered Miro account.
Once installed, Miro provides a dedicated workspace for brainstorming, project planning, online meetings, education, design, and team collaboration. With useful keyboard shortcuts and access to your boards from the desktop, the application can make regular Miro usage more convenient.
If you frequently work with digital whiteboards or collaborate with remote teams, installing the Miro desktop application can be a practical way to keep your workspace easily accessible on Windows.
Want to learn More about Marketing Management Kaashiv Infotech Offers Digital Marketing Course & More, Visit www.kaashivinfotech.com.