Selenium WebDriver Installation - Selenium Testing Tutorial
Step 1 : Install Java on your Computer
- Download and install Java JDK.
Step 2 : Install Eclipse IDE
- Download the latest version of “Eclipse IDE for Java Developers”.
- Be sure to choose the correct version of Windows 32 or Windows 64 bit versions

Install Eclipse
- Once you click on download, you should be able to see an eclipse-inst-win64.exe setup folder in your downloads folder.
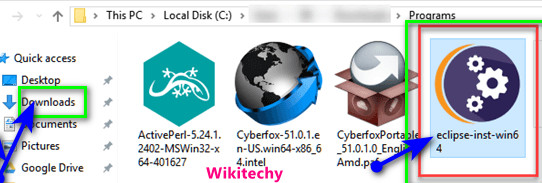
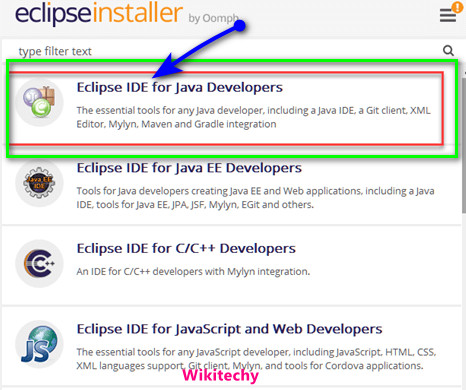
- From the download folder, double click on the Double-click on eclipse-inst-win64.exe setup folder to Install the Eclipse. A new window will open. Click Eclipse IDE for Java Developers.
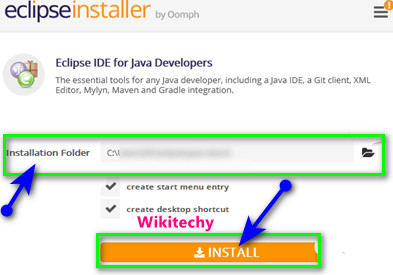
- Once clicked on the above link, a new window will open, in that check for the jdk java installation folder path.
- You can change the installation path if needed.
- After verifying the details, click on install button as shown in the figure:
- Once the installation procedure is completed, a window will appear. Click Launch on the window.
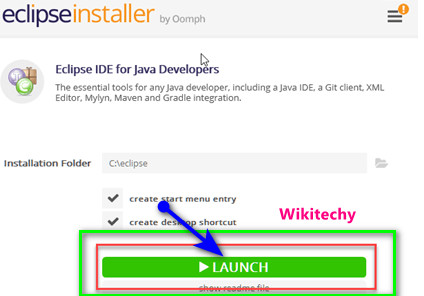
- This will start the Eclipse IDE for Selenium Scripts.
Step 3 : Download the Selenium Java Client Driver
- Open the selenium official website: Selenium.dev

- Under that select Java client driver stable version. Once clicked this will download a ZIP file named “selenium-3.14.0.zip”.
- Extract the contents of the zip folder on your drive, and after extracting the zip folder in your drive which will look like C:\selenium-3.14.0\”.
- This is the directory that will contain all the jar files that we will need to use it in selenium.
Step 4 : Configure Eclipse IDE with WebDriver
- Launch the “eclipse.exe” file inside the “eclipse” folder that was extracted. If extraction was successful, the executable should be located on C:\eclipse\eclipse.exe.
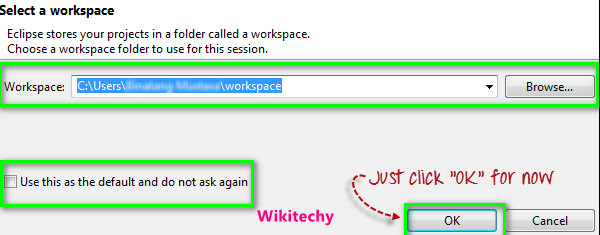
- Select a workplace for the files to be stored, this workspace path can be changed by clicking on the browse button.
- If we donot want to change the workspace location, select use this as default location and click on OK.
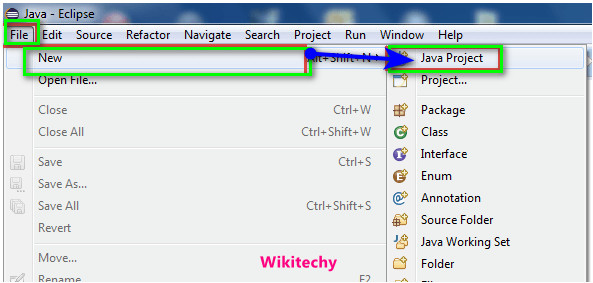
- Create a new project through File > New > Java Project. Name the project as “newproject”.
- A new pop-up window will open enter details as follow
- Project Name
- Location to save project
- Select an execution JRE
- Select layout project option
- Click on Finish button

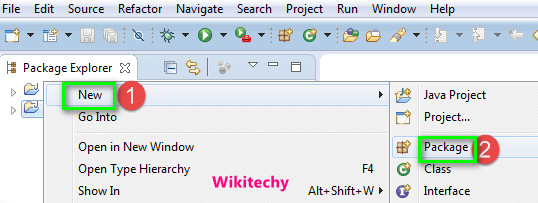
- Once project is set up, you will see a src folder under projects tab, then Right-click on the newly created project and Select New > Package, and name that package as “newpackage”.
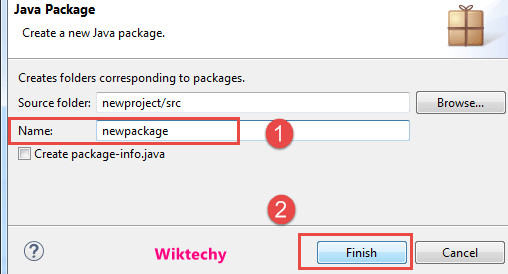
- A pop-up window will open to name the package,
- Enter the name of the package
- Click on Finish button
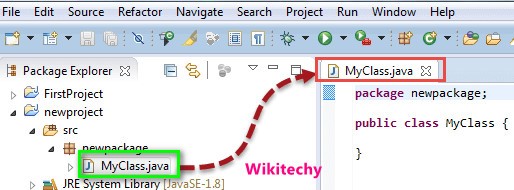
- Create a new Java class under newpackage by right-clicking on it and then selecting- New > Class, and then name it as “MyClass”.
- Your Eclipse IDE should look like the image below.

- When you click on Class, a pop-up window will open, enter details as
- Name of the class
- Click on Finish button

- This is how class is created in Selenium in java
Steps to add Selenium Jar Files to Java Build Path:
- In this step,
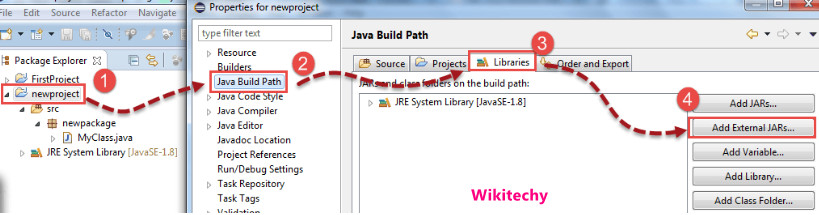
- Right-click on “newproject” and select Properties.
- On the Properties dialog, click on “Java Build Path”.
- Click on the Libraries tab, and then
- Click on “Add External JARs..”
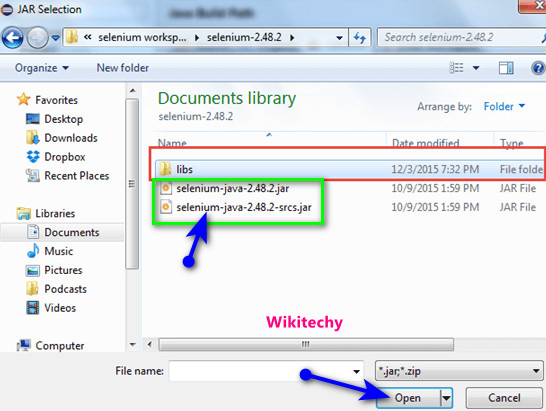
- When you click on “Add External JARs..” It will open a pop-up window. Select the Selenium JAR files you want to add.
- After adding the selenium jar files, add the jar files under the lib folder also.
- After adding all the necessary jar files our java build path will look like
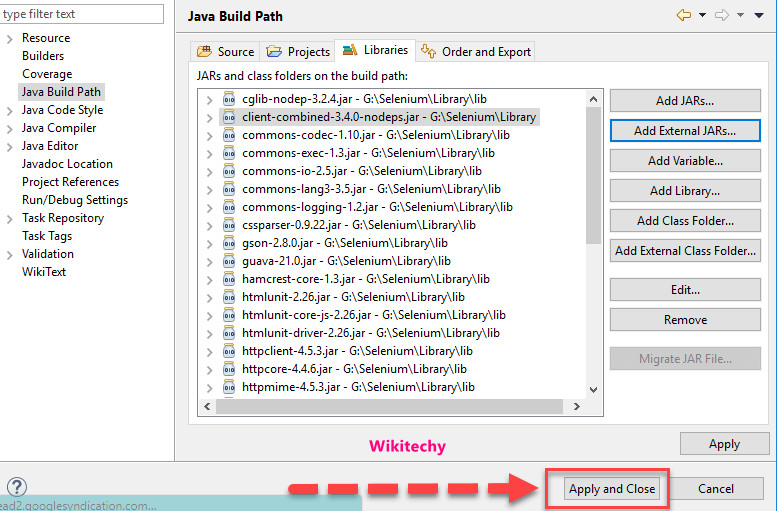
- Click on Apply and Close. You see all the added jar files in Referenced Libraries under your project folder, Now Eclipse IDE is ready to write selenium Scripts.