How to Install Adobe XD on Windows: A Complete Step-by-Step Guide (2026)
How to Install Adobe XD on Windows – Designing modern digital products requires tools that are fast, intuitive, and capable of turning ideas into interactive experiences. One such tool is Adobe XD, which has been widely used by designers for creating user interfaces, prototypes, and design systems.
If you’re a beginner stepping into UI/UX design or a developer wanting to visualize your ideas, installing Adobe XD on your Windows system is the first step. This guide walks you through the entire process in a detailed, easy-to-follow manner—just like a full-length professional blog article.
Introduction to Adobe XD
Adobe XD is a vector-based design tool developed by Adobe Inc.. It was created specifically for designing user experiences for web and mobile applications. Unlike traditional design software, XD focuses on speed, simplicity, and real-time interaction.
With Adobe XD, you can design screens, create clickable prototypes, and even share your work with clients or team members for feedback. This makes it especially useful for UI/UX designers, product designers, and front-end developers.
However, it’s important to understand that Adobe XD is currently in a maintenance phase. This means Adobe is no longer actively adding major new features, though the software is still usable and available in many regions.
System Requirements for Windows
Before installing Adobe XD, your system should meet certain requirements to ensure smooth performance. While the tool is not extremely heavy, it still requires a modern setup.
A Windows 10 or later (64-bit) operating system is essential. The software runs best with at least 8 GB of RAM, although 4 GB can work for basic usage. You should also have at least 2 GB of free storage space, along with a stable internet connection for downloading and updates.
A decent processor and graphics capability will further improve performance, especially when working on complex UI designs or multiple artboards.
Understanding the Installation Process
Unlike many traditional software applications, Adobe XD does not come with a standalone installer file that you can directly download and run. Instead, it is installed through Adobe Creative Cloud, which acts as a central hub for all Adobe applications.
This means that before installing Adobe XD, you must first install Creative Cloud on your system. Once that is done, you can easily search for XD and install it with just a few clicks.
How to Install Adobe XD on Windows -Step-by-Step Guide
Creating an Adobe Account
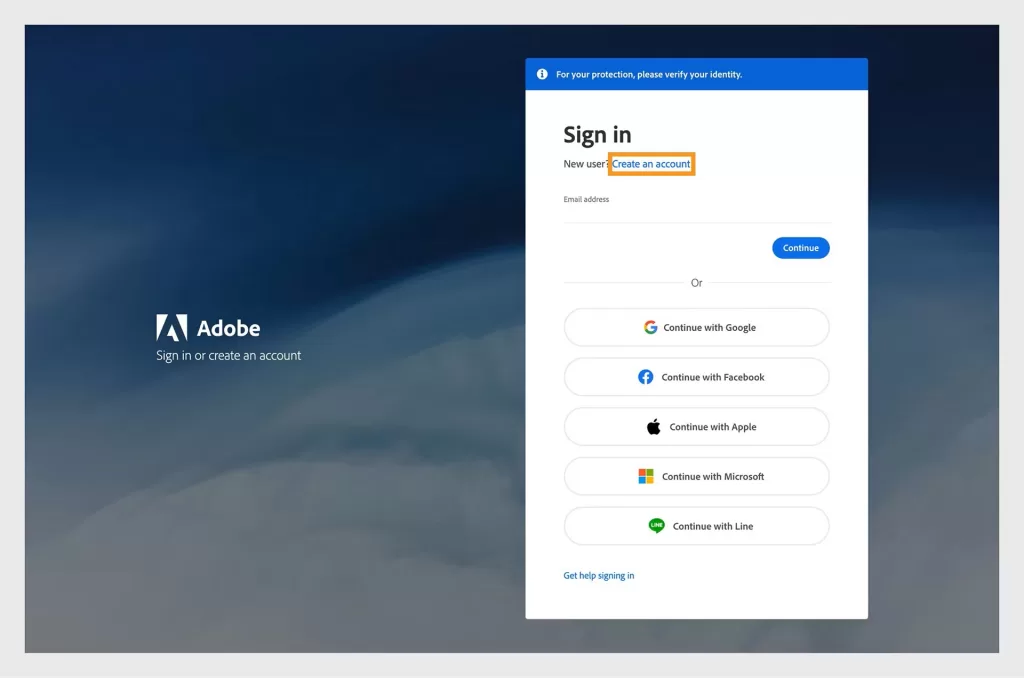
The installation process begins with creating an account. Visit the official Adobe website and sign up using your email address. If you already have an account, you can simply log in.
This account is important because it allows you to access all Adobe services, manage subscriptions, and sync your work across devices.
Downloading Adobe Creative Cloud
After setting up your account, the next step is to download the Creative Cloud application. This is the platform through which Adobe distributes all its software.
Once you click the download option, an executable file will be saved to your system. This file is relatively small and downloads quickly on most internet connections.
Installing Creative Cloud on Windows
Open the downloaded file and follow the on-screen instructions. The installation process is straightforward and does not require advanced configuration.
During installation, the system may prompt you to log in using your Adobe account. After logging in, Creative Cloud will finalize its setup and open automatically.
Signing Into Creative Cloud
Once Creative Cloud is installed, launch the application. You will be asked to sign in if you haven’t already done so.
After logging in, you will see the main dashboard where all Adobe apps are listed. This interface allows you to install, update, and manage your applications.
Searching for Adobe XD
Inside the Creative Cloud dashboard, navigate to the Apps section. There, you will find a search bar where you can type “Adobe XD.”
If Adobe XD is available for your account and region, it will appear in the results. If it does not show up, it may be due to availability restrictions or Adobe’s current product strategy.
Installing Adobe XD
Once you find Adobe XD, click the install button. Creative Cloud will handle everything automatically, including downloading files and setting up the software.
The installation time depends on your internet speed, but typically it completes within a few minutes.
After installation, the button will change from “Install” to “Open,” indicating that the software is ready to use.

Launching Adobe XD
You can now open Adobe XD directly from Creative Cloud or by searching for it in the Windows Start menu.
When you launch it for the first time, it may take a few seconds to initialize. After that, you’ll be greeted with a clean and simple interface where you can start designing immediately.
What If Adobe XD Is Not Available?
Some users may not find Adobe XD in the Creative Cloud app. This is not uncommon due to Adobe shifting its focus toward other tools.
In such cases, you can check the Beta Apps section inside Creative Cloud, where experimental or limited-access versions may appear. Alternatively, users who previously installed XD may still have access to older versions.
If none of these options work, it may simply mean that Adobe XD is not available for your region or account type.
Common Issues and How to Fix Them
While installing Adobe XD is generally smooth, some users may encounter minor issues. One common problem is the app not appearing in Creative Cloud. This can often be fixed by updating Creative Cloud or logging out and logging back in.
Another issue is installation getting stuck midway. In such cases, restarting the application or checking your internet connection usually resolves the problem.
If Adobe XD fails to launch after installation, updating your Windows system or reinstalling Creative Cloud can help. Compatibility issues are rare but can occur on outdated systems.

Getting Started After Installation
Once Adobe XD is installed, the next step is learning how to use it effectively. The interface is beginner-friendly, so you can quickly start creating designs.
Begin by experimenting with artboards, shapes, and text tools. As you progress, you can explore advanced features like prototyping, animations, and plugins.
Practicing small projects such as login screens or mobile app layouts is a great way to build confidence and improve your skills.
Advantages of Using Adobe XD
Adobe XD gained popularity because of its simplicity and performance. It allows designers to work efficiently without dealing with unnecessary complexity.
The integration with other Adobe tools like Photoshop and Illustrator makes it even more powerful for those already in the Adobe ecosystem. Real-time collaboration features also make it easier to work with teams and clients.
Despite being in maintenance mode, Adobe XD remains a solid tool for learning and practicing UI/UX design concepts.
Conclusion
Installing Adobe XD on Windows is not complicated once you understand that everything revolves around Adobe Creative Cloud. From account creation to launching the application, the process is smooth and beginner-friendly.
Although Adobe XD is no longer receiving major updates, it still serves as an excellent tool for beginners entering the world of UI/UX design. Learning it can help you understand core design principles that apply to many other tools in the industry.
Want to learn more, Kaashiv Infotech Offers, UI UX Course, Front End Development Course, Full Stack Development Course & More, Visit Their Website www.kaashivinfotech.com.