ReactJS Router - React Tutorial for Beginner
What is Router in ReactJS?
- Routing being a key aspect of web applications (and even other platforms) could not be left out in React.
- You can make full fleshed single page applications with React if we harness the powers of routing. This does not have to be a manual process, we can make use of React-Router.
Step 1: Install React Router
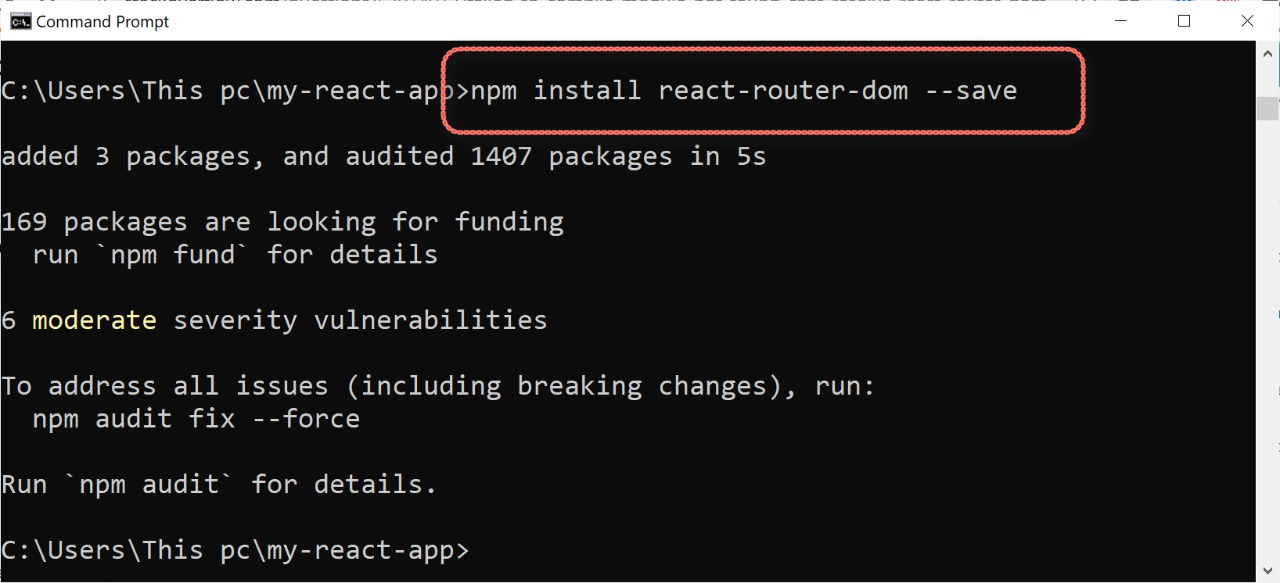
- Simple way to install react-router is to run the following code snippet in command prompt window.
npm install react-router-dom --save
Step 2: Create Components
- In this step, we are creating four components. The App component will be used as a tab menu.
- The other three components (Wikitechy Home), (Wikitechy Blogs) and (Wikitechy Projects) are rendered once the route has changed.
- To create an application with multiple page routes, let's first start with the file structure.
- In the src folder, we'll create a folder named pages with several files:
- src\pages\:
- Layout.js
- wikitechy-home.js
- wikitechy-blogs.js
- wikitechy-projects.js
- NoPage.js

Pages / Components
- The Layout component has <Outlet> and <Link> elements
- The <Outlet> renders the recent route selected.
- <Link> is used to set the URL and save path of browsing history
- Everytime we link to an internal path, we will use <Link>instead of <a href="">.
- The "layout route" is a shared component that inserts common content on all pages, such as a navigation menu.
Layout.js
import { Outlet, Link } from "react-router-dom";

const Layout = () => {
  return (
    <>
      <nav>
        <ul>
          <li>
            <Link to="/">Wikitechy Home</Link>
          </li>
          <li>
            <Link to="/blogs">Wikitechy Blogs</Link>
          </li>
          <li>
            <Link to="/contact">Wikitechy
            Projects</Link>
          </li>
        </ul>
      </nav>

      <Outlet />
    </>
  )
};

export default Layout;
NoPage.js
const NoPage = () => {
    return <h1>404</h1>;
  };

  export default NoPage;
wikitechy-blogs.js
const Blogs = () => {
    return <h1>Wikitechy Course</h1>;
  };

  export default Blogs;
wikitechy-home.js
const  Home = () => {
    return <h1>Welcome to Wikitechy Tutorial</h1>;
  };

  export default  Home;
wikitechy-projects.js
const Contact = () => {
    return <h1>Welcome to Wikitechy Projects</h1>;
  };

  export default Contact;
Step 3 - Add Router
- Now we want to add routes to our app.
- Instead of rendering App element like in previous examples, this time the Router will be rendered.
- We will also set components for each route.
index.js
Here we can use React Router to route to pages based on URL:
import ReactDOM from "react-dom";
import { BrowserRouter, Routes, Route } from "react-router-dom";
import Layout from "./pages/wikitechy-layout";
import WikitechyHome from "./pages/wikitechy-home";
import WikitechyBlogs from "./pages/wikitechy-blog";
import WikitechyProjects from "./pages/wikitechy-projects";
import NoPage from "./pages/NoPage";

export default function App() {
  return (
    <BrowserRouter>
      <Routes>
        <Route path="/" element={<Layout />}>
          <Route index element={<WikitechyHome />} />
          <Route path="blogs" element={<WikitechyBlogs />} />
          <Route path="contact" element={<WikitechyProjects />} />
          <Route path="*" element={<NoPage />} />
        </Route>
      </Routes>
    </BrowserRouter>
  );
}

ReactDOM.render(<App />, document.getElementById("root"));
- We wrap our content first with <BrowserRouter>.
- Then we describe our <Routes>. An application can have multiple <Routes>. In this example only uses one.
- <Routes> can be nested. The first <Route> has a path of / and renders the Layout component.
- The nested <Routes>inherit and add to the parent route. So, the Wikitechy blogs path is joint with the parent and becomes /blogs.
- The nested <Routes>inherit and add to the parent route. So, the Wikitechy blogs path is joint with the parent and becomes /blogs.
- The Wikitechy Home component route does not have a path but has an index attribute. That requires this route as the default route for the par-ent route, which is /.
- Setting the path to * will act as a catch-all for any undefined URLs. This is great for a 404 error page.
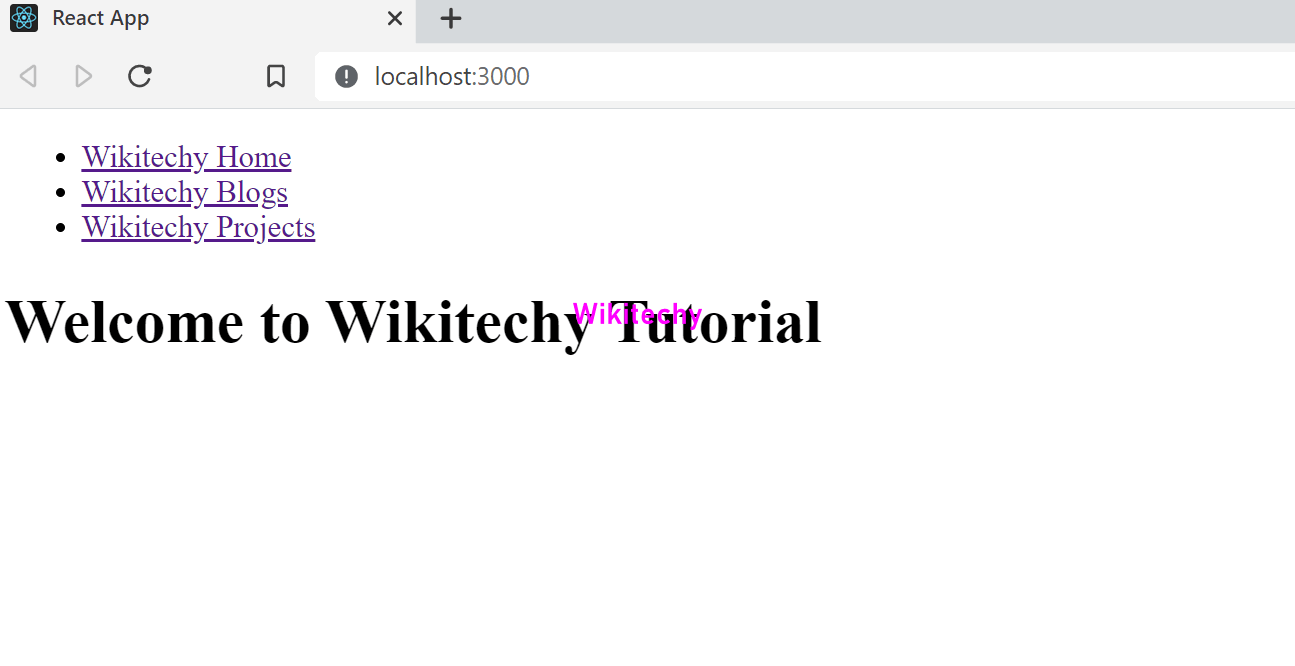
Output
- When the app is started, we will see three clickable links that can be used to change the route.