react - Reactjs Using Flux - react js - reactjs
Article tag : react , react native , react js tutorial , create react app , react tutorial , learn react
What is Flux in Reactjs?
- we will show you how to implement flux pattern in React applications.
- We will use Redux framework.
- It can present you the simplest example of every piece needed for connecting Redux and React.
learn reactjs tutorial -
reactjs flux - reactjs examples
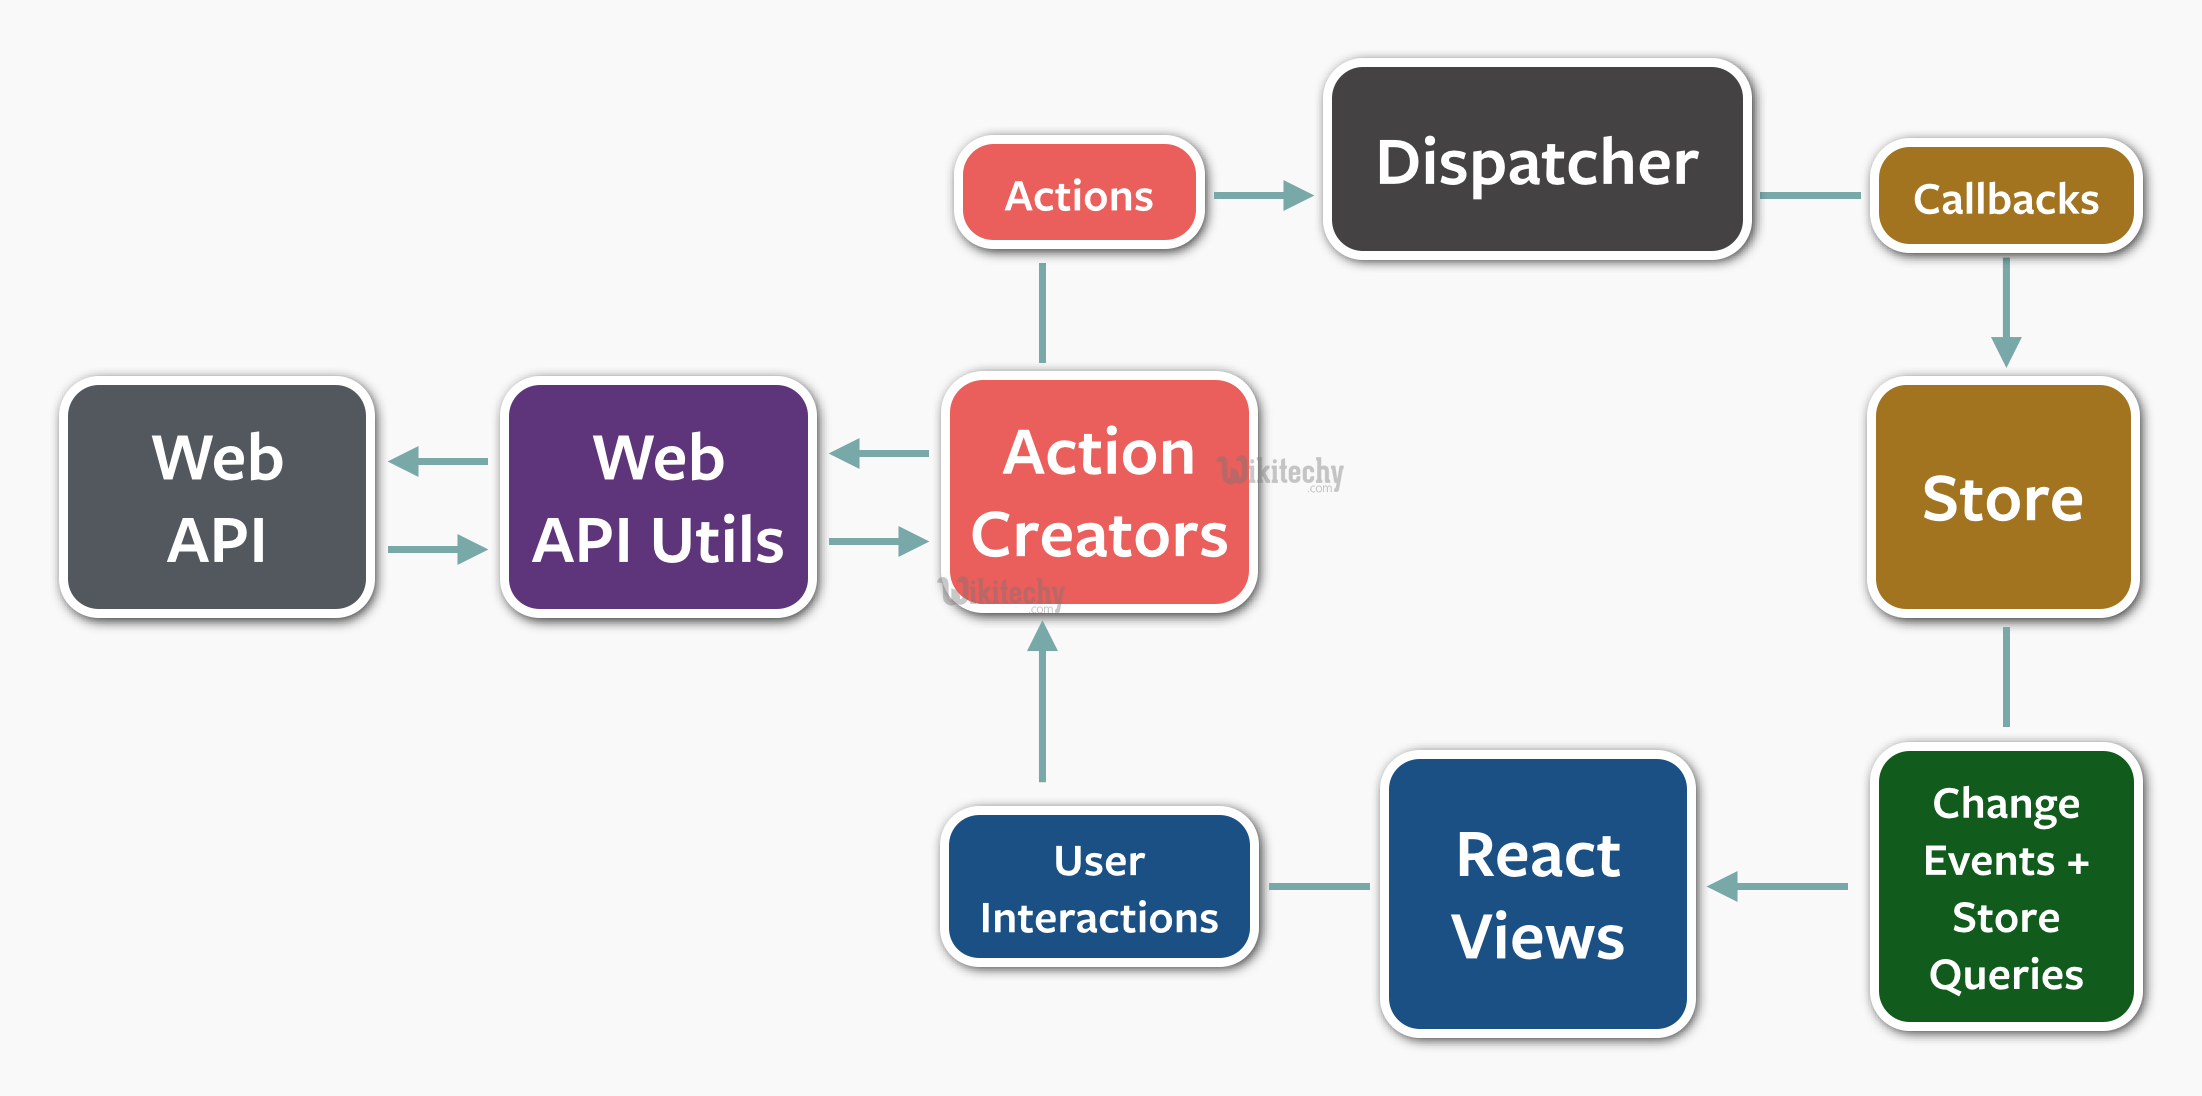
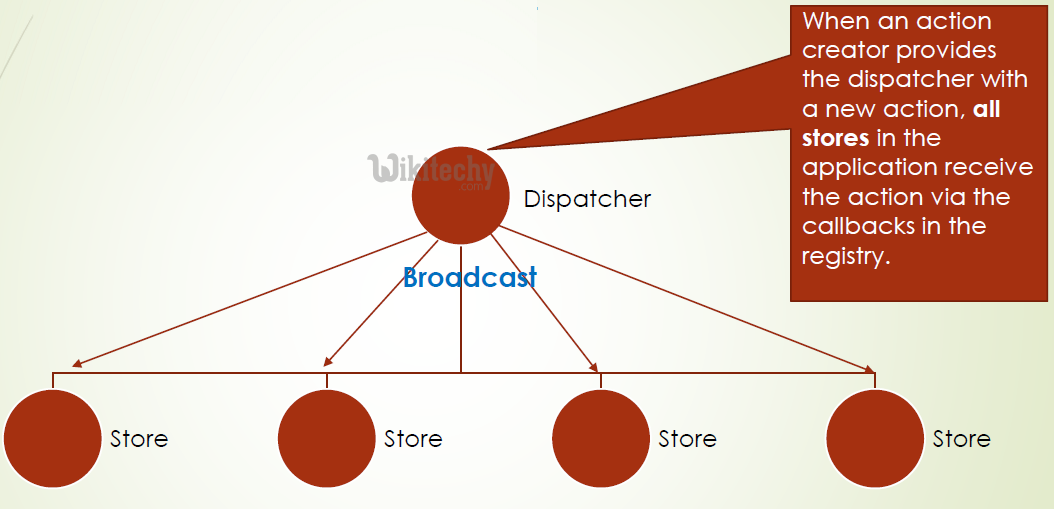
react js flux flow :
Article tag : react , react native , react js tutorial , create react app , react tutorial , learn react
react js flux flow - Stores :
Article tag : react , react native , react js tutorial , create react app , react tutorial , learn react
react js flux flow - Views :
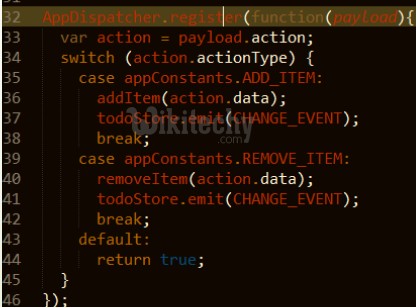
react js flux flow - Implement :
- Flux(by Facebook: https://github.com/facebook/flux)
- Reflux(by Mikael Brassman: https://github.com/reflux/refluxjs)
- Redux(by Dan Abramov:https://github.com/reactjs/redux)
react js flux flow - Full source code :
https://github.com/tylermcginnis/Flux-TodolistFollow the below steps
Step 1 - Installing Redux
- We will install Redux in command prompt window.
C:\Users\username\Desktop\reactApp>npm install --save react-redux
click below button to copy the code. By reactjs tutorial team
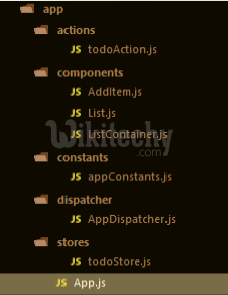
Step 2 - Create Files and Folders
- In this step we will create folders and files for our actions, reducers and components.
- After we are done with it, this is how the folder structure will look like.

learn reactjs tutorial -
create files in reactjs using flux - reactjs examples
Step 3 - Actions
- Actions are JavaScript objects that use type property to inform about the data that should be sent to the store.
- We are defining ADD_TODO action that will be used for adding new item to our list.
- The addTodo function is action creator that returns our action and sets an id for every created item.
actions/actions.js
export const ADD_TODO = 'ADD_TODO'

let nextTodoId = 0;

export function addTodo(text) {
   return {
      type: ADD_TODO,
      id: nextTodoId++,
      text
   };
}
click below button to copy the code. By reactjs tutorial team
Step 4 - Reducers
- While actions only trigger changes in the app, the reducers specify those changes.
- We are using switch statement to search for a ADD_TODO action.
- The reducer is a function that takes two parameters (state and action) to calculate and return updated state.
- The first function will be used to create new item, while the second one will push that item to the list.
- At the end we are using combineReducers helper function where we can add any new reducers we might use in the future.
reducers/reducers.js
import { combineReducers } from 'redux'
import { ADD_TODO } from '../actions/actions'

function todo(state, action) {
   switch (action.type) {

      case ADD_TODO:
         return {
            id: action.id,
            text: action.text,
         }

      default:
      return state
   }
}

function todos(state = [], action) {
   switch (action.type) {

      case ADD_TODO:
         return [
            ...state,
            todo(undefined, action)
         ]

      default:
      return state
   }
}

const todoApp = combineReducers({
   todos
})

export default todoApp
click below button to copy the code. By reactjs tutorial team
Step 5 - Store
- The store is the place that holds the app's state.
- It is very easy to create store once you have reducers.
- We are passing store property to the provider element which wraps our route component.
main.js
import React from 'react'

import { render } from 'react-dom'
import { createStore } from 'redux'
import { Provider } from 'react-redux'

import App from './App.jsx'
import todoApp from './reducers/reducers'

let store = createStore(todoApp)

let rootElement = document.getElementById('app')

render(

   <Provider store = {store}>
      <App />
   </Provider>,

   rootElement
)
click below button to copy the code. By reactjs tutorial team
Article tag : react , react native , react js tutorial , create react app , react tutorial , learn react
Step 6 - Root Component
- The App component is the root component of the app. Only root component should be aware of a redux.
- The important part to notice is the connect function which is used for connecting our root component App to the store.
- This function takes select function as an argument.
- The select function takes state from the store and returns the props (visibleTodos) that we can use in our components.
App.js
import React, { Component } from 'react'
import { connect } from 'react-redux'
import { addTodo } from './actions/actions'

import AddTodo from './components/AddTodo.jsx'
import TodoList from './components/TodoList.jsx'

class App extends Component {
   render() {
      const { dispatch, visibleTodos } = this.props

      return (
         <div>

            <AddTodo
               onAddClick = {text ⇒
               dispatch(addTodo(text))}
            />

            <TodoList todos = {visibleTodos}/>

         </div>
      )
   }
}

function select(state) {
   return {
      visibleTodos: state.todos
   }
}

export default connect(select)(App)
click below button to copy the code. By reactjs tutorial team
Article tag : react , react native , react js tutorial , create react app , react tutorial , learn react
Step 7 - Other Components
- These components shouldn't be aware of the redux.
components/AddTodo.js
import React, { Component, PropTypes } from 'react'

export default class AddTodo extends Component {
   render() {
      return (
         <div>
            <input type = 'text' ref = 'input' />

            <button onClick = {(e) ⇒ this.handleClick(e)}>
               Add
            </button>

         </div>
      )
   }

   handleClick(e) {
      const node = this.refs.input
      const text = node.value.trim()
      this.props.onAddClick(text)
      node.value = ''
   }
}
click below button to copy the code. By reactjs tutorial team
components/Todo.js
import React, { Component, PropTypes } from 'react'

export default class Todo extends Component {
   render() {
      return (
         <li>
            {this.props.text}
         </li>
      )
   }
}
click below button to copy the code. By reactjs tutorial team
components/TodoList.js
import React, { Component, PropTypes } from 'react'
import Todo from './Todo.jsx'

export default class TodoList extends Component {
   render() {
      return (
         <ul>
            {this.props.todos.map(todo ⇒
               <Todo
               key = {todo.id}
               {...todo}
               />
            )}
         </ul>
      )
   }
}
click below button to copy the code. By reactjs tutorial team
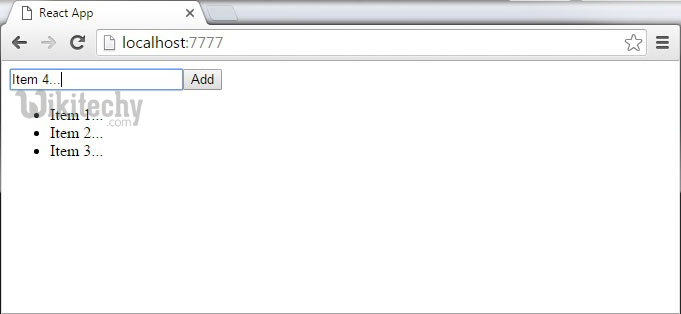
Output
- When we start our app we will be able to add items to our list.