C++ Compiler | Compiling your first program - Learn C++ - C++ Tutorial - C++ programming
Learn c++ - c++ tutorial - c++ compiler - c++ examples - c++ programs
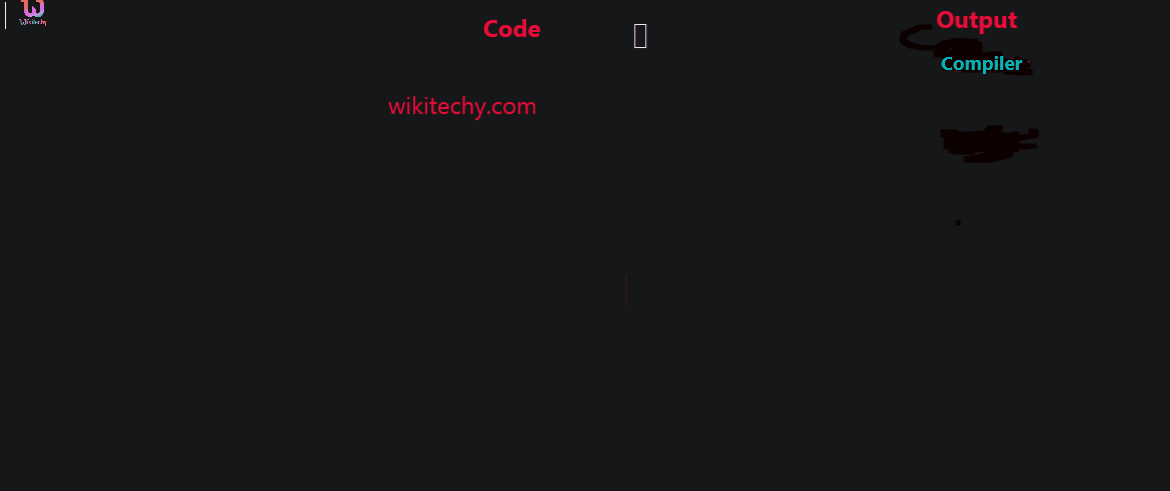
How To Compile Program In C++

- Before we can write our first program (which we will do very soon), we need to know a few things about development environments.
- First, although our programs will be written inside .cpp files, the .cpp files themselves will be added to a project.
- The project stores the names of all the code files we want to compile, and also saves various IDE settings.
- Every time we reopen the project, it will restore the state of the IDE to where we left off.
- When we choose to compile our program, the project tells the compiler and linker which files to compile and link.
- It is worth noting that project files for one IDE will not work in another IDE. You will need to create a new project for each program you write (or overwrite an old one).
- Third, when you create a new project for your program, many IDEs will automatically add your project to a “workspace” or a “solution”.
- A workspace or solution is a container that can hold one or more related projects. Although you can add multiple projects to a single solution, we recommend creating a new workspace or solution for each program.
- It’s simpler and there’s less chance of something going wrong.
learn c++ tutorials - compiler parser Example
Learn C++ , C++ Tutorial , C++ programming - C++ Language -Cplusplus
Download Turbo C++ software
- You can download turbo C++ from many sites. Click here to Download Turbo c++
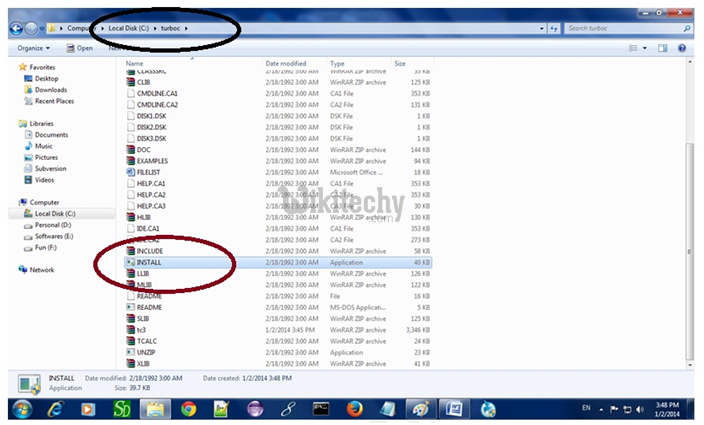
Create turboc directory in c drive and extract the tc3.zip
- Now, you need to create a new directory turboc inside the c: drive. Now extract the tc3.zip file in c:\turboc directory.
3) Double click on the install.exe file and follow steps
- Now, click on the install icon located inside the c:\turboc

- Change your drive to c, press c.
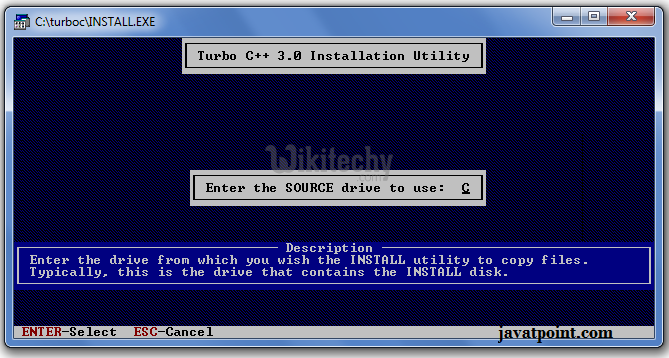
- Press enter, it will look inside the c:\turboc directory for the required files.

- Select Start installation by the down arrow key then press enter.
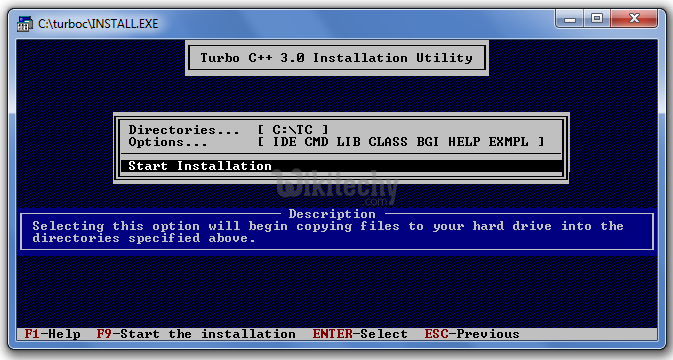
- Now C is installed, press enter to read documentation or close the software.

- Click on the tc application located inside c:\TC\BIN
Learn C++ , C++ Tutorial , C++ programming - C++ Language -Cplusplus
Click on the tc application located inside c:\TC\BIN
- Now double click on the tc icon located in c:\TC\BIN directory to write the c program.
- In windows 7 or window 8, it will show a dialog block to ignore and close the application because full screen mode is not supported. Click on Ignore button.
- Now it will showing following console.
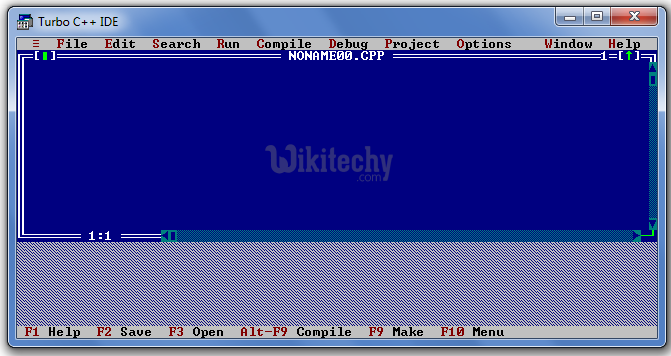
- In the above given blue workspace is the place where we can proceed our code for both C/C++ in this software to develop the deployment of the C and C++.
- There is also another IDE for the C++ programming language.
A quick note about examples containing code
- Starting with this lesson, you will see many examples of C++ code presented. Most of these examples will look something like this:
#include <iostream>

int main()
{
	std::cout << "Hello world!" << std::endl;
	return 0;
}- If you select the code from these examples with your mouse and then copy/paste it into your IDE
- you may also get the line numbers (depending on how you made the selection). If so, you’ll need to remove these manually.
If you’re using the Visual Studio IDE
- Although the following article was written using Visual Studio 2005, it essentially works the same for all versions of Visual Studio.
- To create a new project in Visual Studio, go to the File menu, and select New -> Project. A dialog box will pop up that looks like this:
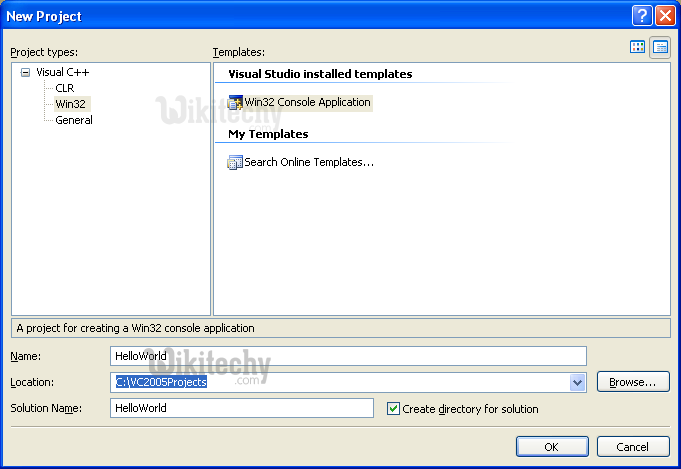
- First, make sure “Visual C++” is selected on the left side.
- Second, underneath “Visual C++”, select the Win32 project type, and Win32 Console Application will automatically be selected for you.
- In the Namefield, you will enter the name of your program.
- Type in HelloWorld. In the Location field.
- pick a directory that you would like your project to be placed into.
- We recommend you place them in a subdirectory off of your C drive, such as C:\VC2005Projects. Click OK, and then Finish.
- On the left side, in the Solution Explorer, Visual Studio has created a number of files for you, including stdafx.h, HelloWorld.cpp, and stdafx.cpp.

- In the text editor, you will see that VC2005 has already created some code for you. Select and delete all of the code, and type/copy the following into your compiler:
#include "stdafx.h"
#include <iostream>

int main()
{
	std::cout << "Hello world!" << std::endl;
	return 0;
}- What you end up with should look like this:

- To compile your program, either press F7 or go to the Build menu and choose “Build Solution”. If all goes well, you should see the following appear in the Output window:
- This means your compile was successful!
- To run your compiled program, press ctrl-F5, or go the Debug menu and choose “Start Without Debugging”. You will see the following:
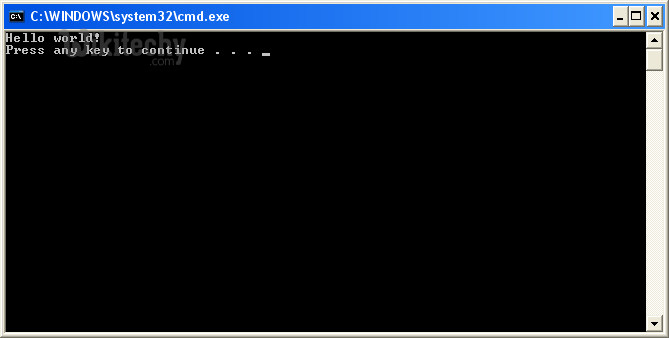
- That is the result of your program!
- Note: If you see the console window (black box) without any text, your anti-virus may be interfering. Try turning your anti-virus off temporarily and try again.
- Important note to Visual Studio users: Visual studio programs should ALWAYS begin with the following line:
#include "stdafx.h"- Otherwise you will receive a compiler warning, such as c:testtest.cpp(21) : fatal error C1010:
- unexpected end of file while looking for precompiled header directive
- Alternately, you can turn off precompiled headers. However, using precompiled headers will make your program compile much faster,
- so we recommend leaving them on unless you are developing a cross-platform program.
- The example programs we show you throughout the tutorial will not include this line, because it is specific to your compiler.
Learn C++ , C++ Tutorial , C++ programming - C++ Language -Cplusplus
If you’re using the Code::Blocks IDE
- To create a new project, go to the File menu, and select New Project. A dialog box will pop up that looks something like this:
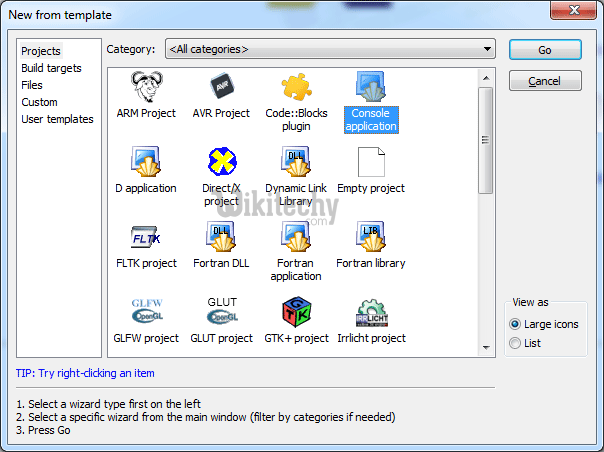
- Select Console Application and press the Go button.
- This should pop up a wizard:
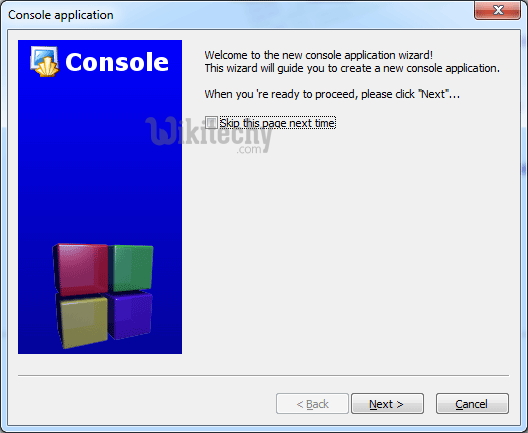
- On the next page, select “C++” as your language. Click Next.

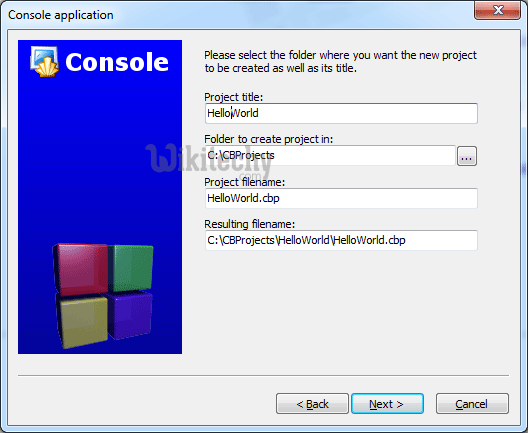
- Next, you’ll be asked to name your project and choose a location. For your project title, set a name (such as HelloWorld).
- In the Project Title field, you will enter the name of your program. Type in HelloWorld. In the Folder to create project in field,
- pick a directory that you would like your project to be placed into. We recommend you place them in a subdirectory off of your C drive, such as C:\CBProjects. Click Next.
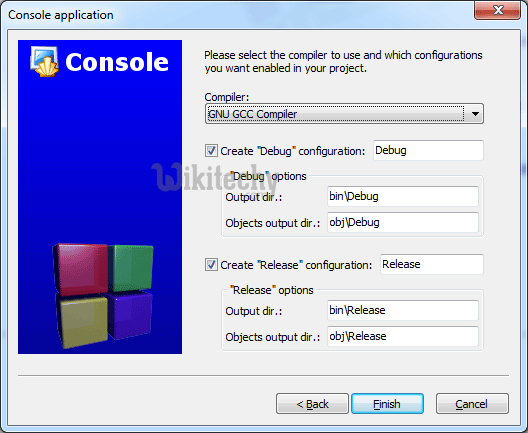
- On the next screen, Code::Blocks asks you what compiler you want to use, and what configurations you want. Don’t touch anything here, just hit Finish.
- Now you’ve created your project, and should see your project under the default workspace:

- Open the tree under “Console Application”, open “Sources”, and double click on “main.cpp”. You will see that the hello world program has already been written for you!
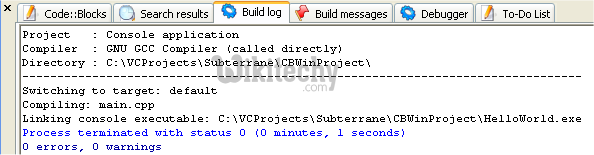
- To build your project, press ctrl-F9, or go to the Build menu and choose “Build”. If all goes well, you should see the following appear in the Build log window:
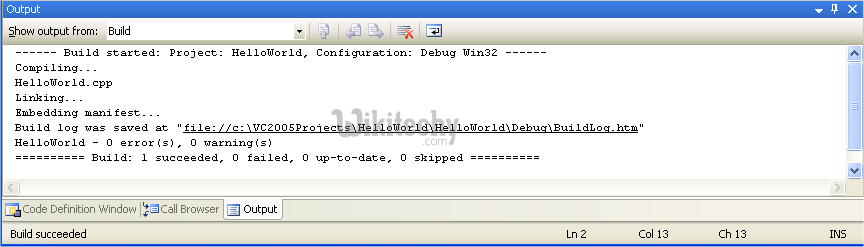
- This means your compile was successful!
- To run your compiled program, press ctrl-F10, or go the Build menu and choose “Run”. You will see something similar to the following:
- That is the result of your program!