
How To Install Mac OS X Cisco VPN Set Up
Table Of Content
Starting with Mac OS X 10.6 it is now possible to connect to a Cisco IPSec VPN without having to download any extra software.
Main Set Up Steps:
Before you begin please have your VPN’s IP address, your username, password, shared secret, certificate, and/or group name ready.
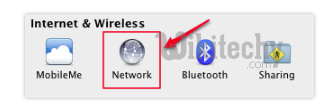
Open System Preferences and click on the Network icon:
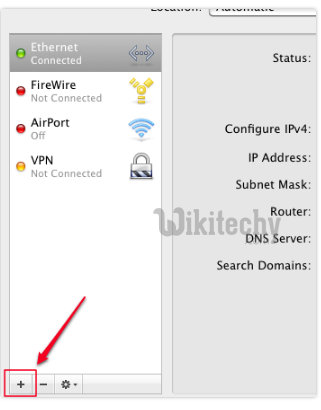
On the Network screen, click on the + symbol in the lower left :
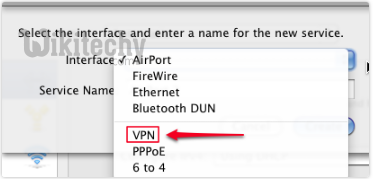
On the following screen click on Interface drop-down menu and choose VPN:
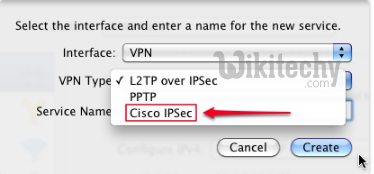
Click on the VPN Type menu and choose Cisco IPSec:
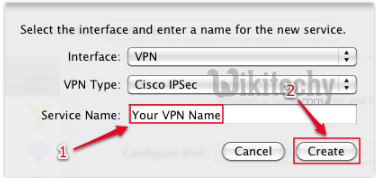
Give your new VPN connection a label in the Service Name text field(1) (Any name you choose) and click Create (2):
Back on the main Network screen, click on your new VPN name in the list on the left side. Enter your VPN server’s IP address, your user name (Account Name), and password:
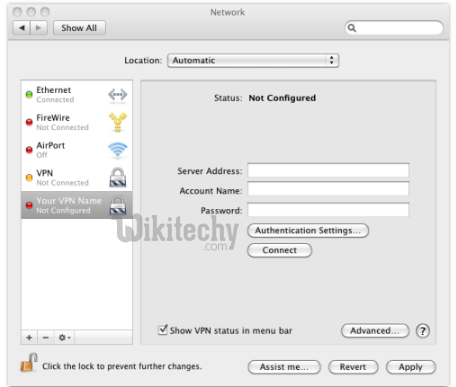
If you allow the checkbox marked Show VPN standing within the menu bar checked a replacement menu bar icon can seems that permits you quickly flip the VPN association on and off.
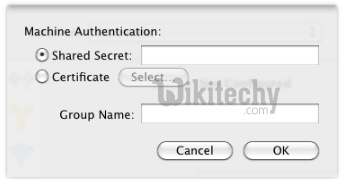
Click on the Authentication Settings button and enter the VPN’s Shared Secret, Certificate, and/or cluster Name. Click OK once done:
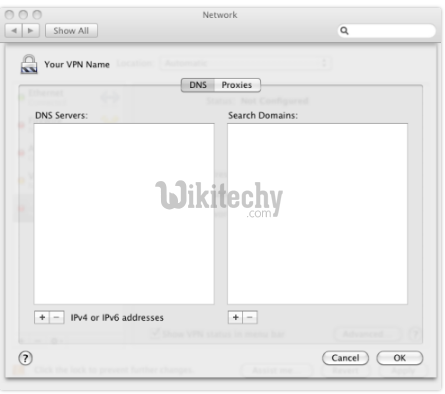
Depending on your network and VPN configuration you will currently begin mistreatment your new VPN connection. If you need to add settings for DNS servers or Proxies once mistreatment the VPN please see the screenshots below for reference.
Optional Set Up Steps
The settings below can be reached by clicking the Advanced… button when viewing your VPN connection in the network list.
DNS Servers and Search Domains:
Proxy Settings:
Check below screen for proxy settings


