
You are here because:
Table Of Content
- You are using Windows OS version 10+
- You would wish to use multiple Python versions on an equivalent computer
- You are uninterested in the web telling you to “Just Use Virtualenv”
TL;DR
- Open prompt and enter pip install virtualenv
- Download the specified python version (do NOT increase PATH!), and remember the path\to\new_python.exe of the newly installed version
- To create a virtualenv, open prompt and enter
virtualenv \path\to\env -p path\to\new_python.exe - If you’re using PyCharm, update the Project Interpreter and therefore the Code compatibility inspection.
- To install packages:
(I) Activate virtualenv: open prompt and enter path\to\env\Scripts\activate.bat
(II) Install desired packages
(III) Deactivate with deactivate .
The Long version; Do Read
Prologue
If you’re using the Anaconda App this process could be easier using their GUI. I haven’t tried it myself, please let me skills it went if you’re taking place that road 🙂
1. Install virtualenv
If you have already got some virtual environments, or are using Anaconda, confirm subsequent steps are performed from outside of these environments.
2. Install Python
You can download python from the official site, for instance for python3.7.3 go here.
The file you ought to be downloading is named Windows x86–64 executable installer, or Windows x86 executable installer if for a few reason you’re employing a 32-bit windows.
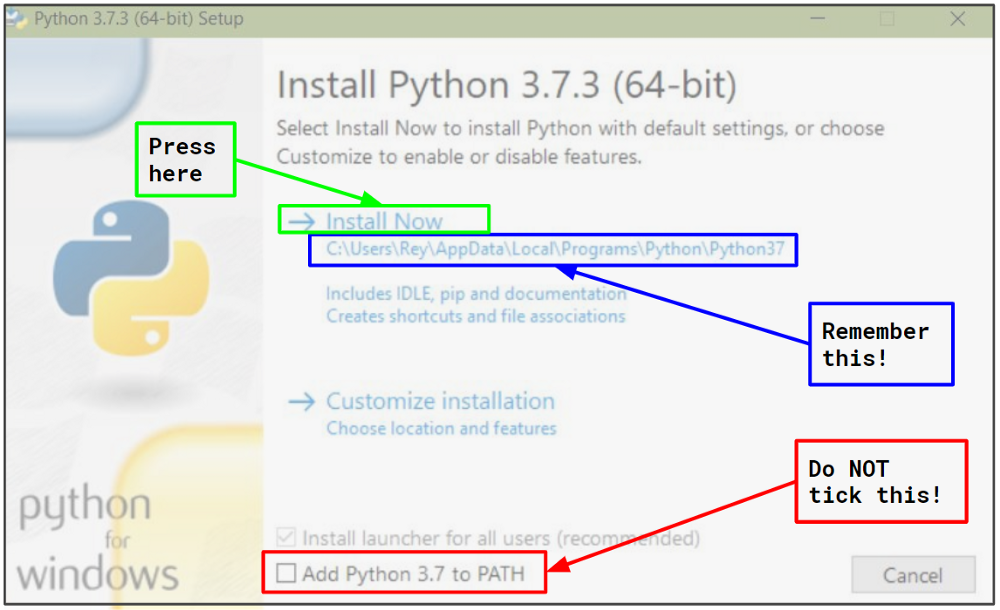
Once downloading is finished, open the executable file and an installation prompt will appear.
- You do NOT want to feature the new python to your PATH since we are getting to have multiple python versions on an equivalent computer, and that we would really like for every application to understand just one python version.
- Either use the default suggested location for the new python, or supply a location of your choice. Either way, remember this location and let’s denote it from now on with
C:\.\Python37
3. Create a virtualenv
Open the prompt , or if you’re using Anaconda open the Anaconda Prompt .
Decide where you would like your virtualenv to be, for instance ,
C:\Users\\Anaconda3\envs\ .
Enter:
virtualenv C:\Users\\Anaconda3\envs\ -p C:\\Python37\python.exe
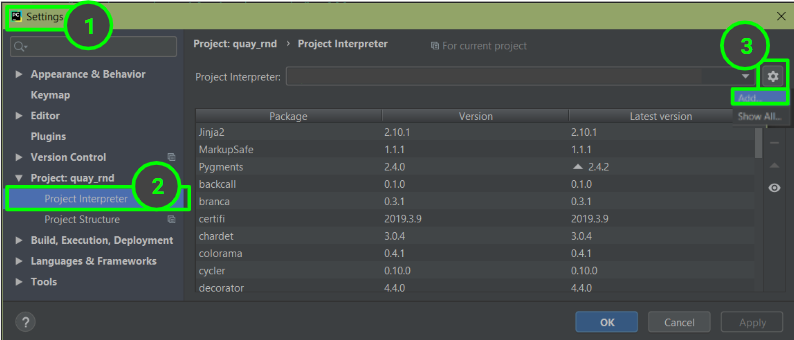
4. Update PyCharm Interpreter
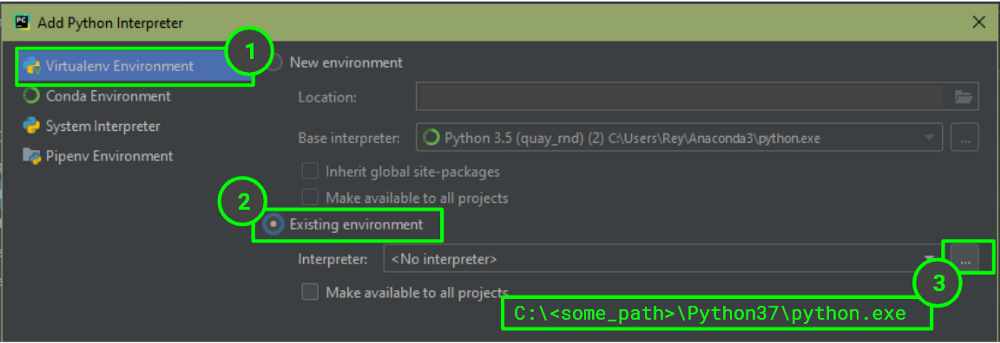
If you’re using PyCharm, open the project you’d wish to work on (that is/will be written with the new python version), and attend File -> Settings -> Project -> Project Interpreter press the gear icon then Add.. .
This will open a prompt window that allows you to define a new interpreter:
Assuming you’re using Code Inspections, you would possibly got to tell PyCharm which python version to examine for. attend File -> Settings-> Editor -> Inspections -> Python -> Code compatibility Inspection , confirm the box on the highest indicates the precise project you’re performing on , and tick the box of your python version.
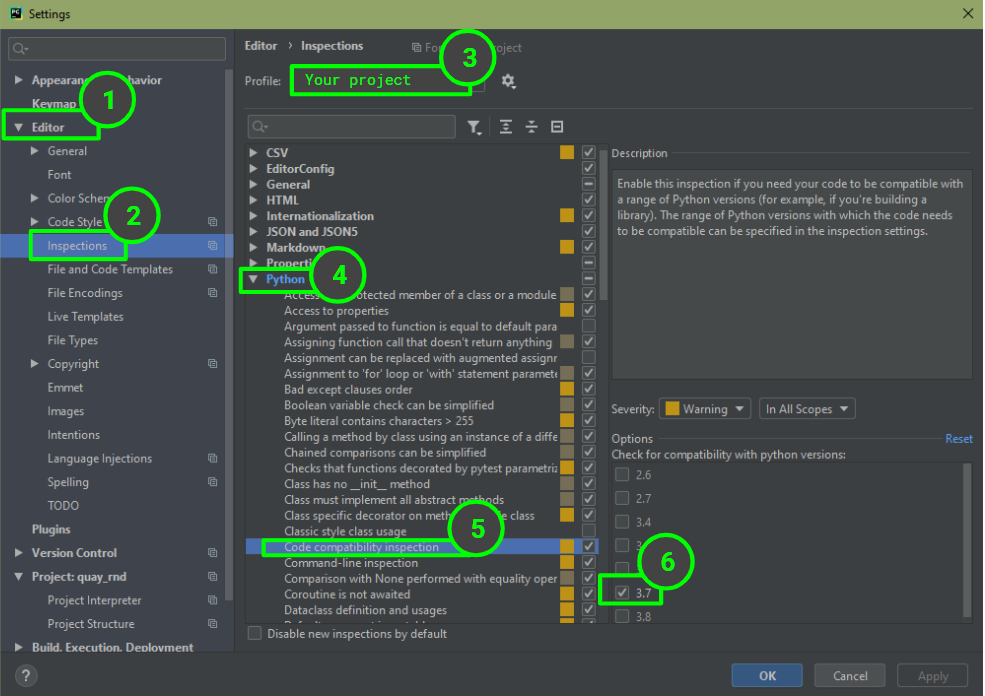
If you don’t see your python version on the Options list, this might also be the time to update PyCharm… yup, happened to me too…
5. Install packages
Currently, your virtualenv contains only the crucial packages, pip and setuptools . to put in more packages:
- Open prompt or Anaconda Prompt , and activate your virtualenv by entering
C:\Users\\Anaconda3\envs\\activate.bat - Use pip to put in packages such as you usually do.
- Deactivate your virtualenv by entering deactivate .


