

Many people know their flyer or poster isn’t usable when it arrives, and the output looks like someone smeared Vaseline across the camera lens. It looks like this: pixels are visible, sharp text edges have turned fuzzy, and your crisp brand logo looks muddy. What once looked sleek, vibrant, and razor-sharp on your phone, laptop, and social feed is now like a disaster in print.
Table Of Content
- Why Web-Compressed Campaign Images are Difficult to See
- The Real Business Cost of Low-Resolution Printing
- Traditional Resizing vs AI Visual Reconstruction
- Matching the Enhancement Strategy to the Job
- Large-Format Displays (Banners, Event Signage, Wall Wraps)
- Small-Format Collateral (Flyers, Postcards, Packaging, Business Cards)
- A Quick Pre-Flight Checklist for Print-Ready Collateral
This feels like heartbreak because you have spent weeks fine-tuning your marketing campaign graphics. Your screen had given you the confidence to send the visuals to a commercial printer for your upcoming trade show banner, flyer drop, or product packaging run.
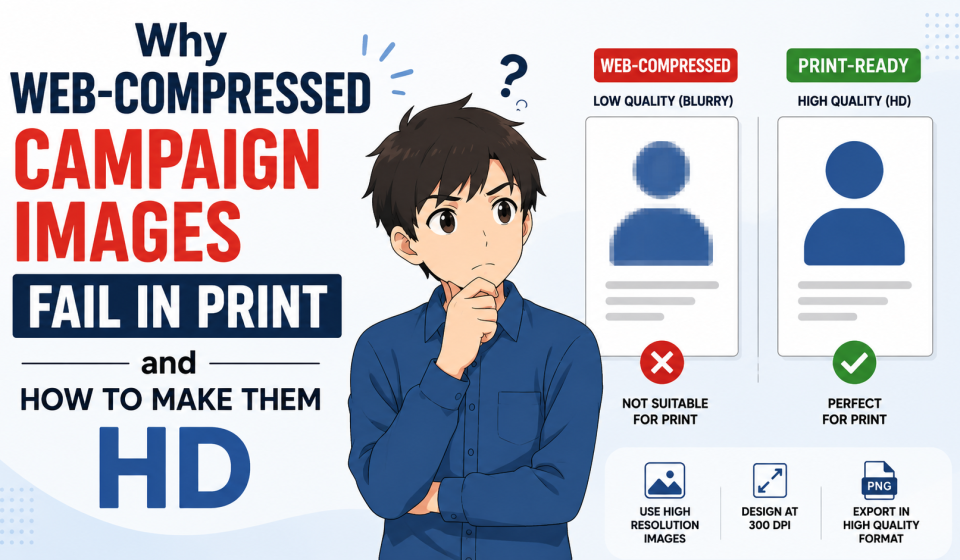
What changed wasn’t the overall photo quality; it was the job you asked that file to perform. Web graphics and physical print operate under entirely different technical standards, and pushing a compressed digital asset onto paper without proper optimisation guarantees a severe drop in quality.
Why Web-Compressed Campaign Images are Difficult to See
To understand why screen-ready graphics collapse on paper, look at how light and pixel density interact across media formats.
Screens and printers don’t measure sharpness the same way. Your phone or monitor lights up pixels, and you usually view them from a foot or two away. Hence, images look crisp even at a fairly low pixel density — monitors run around 72 PPI, phones somewhere between 150 and 300. On top of that, every platform you upload to is quietly compressing the file so it loads fast, stripping out image data your eye was never going to notice on a small glowing screen anyway.
Print doesn’t work like that. There’s no backlight, no compression — just ink laid down on paper, and it needs roughly 300 dots per inch to look smooth instead of grainy. So take a standard Instagram graphic, something like 1080×1080 pixels, and blow it up to fill a three-foot banner. You’re asking a small amount of image data to cover a huge physical area. The file doesn’t have enough detail to fill that space, so the printer stretches each pixel bigger —and what reads as a smooth gradient on your phone turns into a grid of visible, blocky squares on paper.
The Real Business Cost of Low-Resolution Printing
A blurry print job is more than an aesthetic disappointment. It directly hits your operating budget and weakens customer trust. To avoid this, your physical marketing materials must carry weight—high-quality print work signals credibility, structure, and professional standards, while pixelated banners or fuzzy flyers signal poor execution.
Beyond visual credibility, resolution errors create direct financial penalties through two costly scenarios:
- Accept flawed prints: deploy blurry banners at your booth or distribute pixelated flyers because there is no time to fix them. Even if the campaign proceeds, your visual presentation cheapens your brand with prospective clients, partners, and investors.
- Order a last-minute reprint: You catch the error before launch, stop the production run, and reorder. Now you pay double for print materials and risk missing campaign launch dates.
Catching resolution issues on your laptop takes two minutes. Catching them after the ink hits paper forfeits a portion of your marketing budget.
Traditional Resizing vs AI Visual Reconstruction
Fixing a low-res graphic used to mean one of three things: going back to the designer, booking an expensive reshoot, or brute-forcing it bigger in standard photo editing software. That third option rarely worked because regular resizing tools rely on bicubic interpolation. When you stretch an image, the software fills in the new space between pixels by averaging the colours around them. It’s a guess, not a reconstruction, which is why enlarged images from these tools often look soft or blurry.
Modern workflows overcome this limitation by leveraging intelligent visual reconstruction. Instead of guessing colour averages, AI tools such as Zawa AI let you analyse visual context, identify object boundaries, and synthesise brand-new high-definition detail.
Rather than treating asset enhancement as a standalone technical patch, Zawa AI features such as the image upscaler, HD image converter, and Image enhancer treat low-res inputs as foundational blueprints. The technology identifies textures, sharpens typographic edges, and reconstructs missing pixel data so compressed web files can scale seamlessly into physical print formats.
Matching the Enhancement Strategy to the Job
Not every print project demands the same level of resolution processing. Match your optimisation approach to the physical dimensions and viewing distance of your final product to protect visual fidelity without over-processing files. Here is a two-step strategy to fix or guard against pixelated prints with Zawa AI.
Large-Format Displays (Banners, Event Signage, Wall Wraps)
As you expand graphics, the physical surface area grows exponentially. For these applications, run your work through the AI Image Upscaler. This adds deep skin textures, fabric patterns, and sharp background elements so your designs hold up when event attendees stand inches away.
This is how to upscale an image to 4K with Zawa AI.
- Upload the image and choose 4K
- Choose upscale to 4x and select “Edit size.”
- Review and download results.
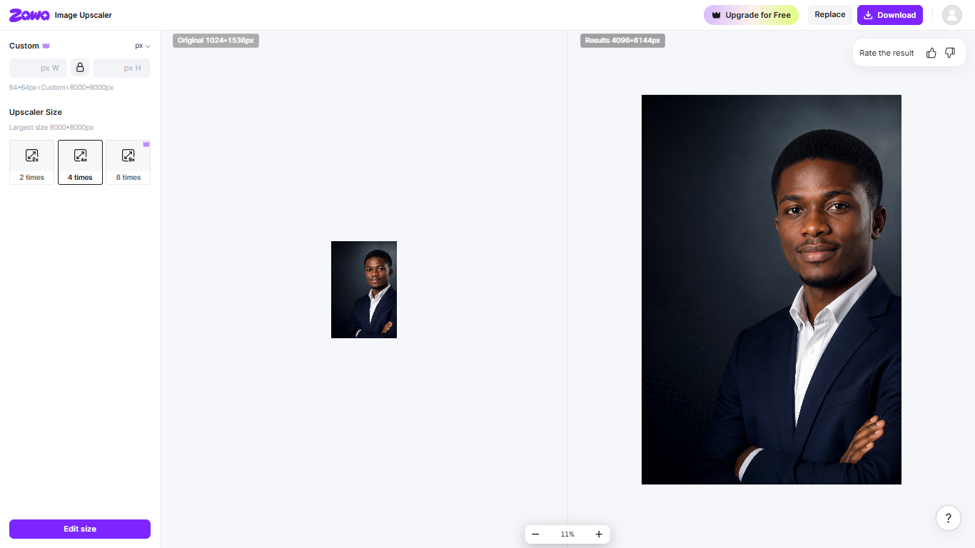
Image 1 placement: screenshot of upscaling process
Small-Format Collateral (Flyers, Postcards, Packaging, Business Cards)
Smaller printed items don’t require dimensions, but they do require edge sharpness—customers review them at arm’s length. Automated brand design tools, such as Zawa AI’s HD Photo converter, allow you to upscale web graphics to standard 300 DPI print. This cleans up vector shapes, logos, and typography boundaries without creating unnecessarily massive file sizes that slow down pre-press software. These visuals show a portrait before and after running it through the Zawa HD Photo converter.

Image 2: Image before converting to HD

Image 3: Image after converting to HD
A Quick Pre-Flight Checklist for Print-Ready Collateral
Before a file goes off to commercial printing, it’s worth running it through a quick check. Start with pixel dimensions: the rule of thumb is 300 DPI at actual print size, so a 4×6 flyer needs a file at least 1200×1800 pixels. Anything less, and the file is already fighting an uphill battle before it even reaches the printer.
Next, open it on a calibrated monitor and zoom to 100% — actual size, not fit-to-screen. If the linework or text looks even slightly soft at that zoom, that softness only gets worse when it’s blown up on paper.
If any image or logo isn’t pulling its weight, run it through an AI upscaler before it goes into the layout — fix it while it’s still easy to fix, not after it’s buried in a finished template. Then export as a print-ready PDF, which preserves the resolution, CMYK profile, and vector paths.
Paper doesn’t forgive a soft file the way a phone screen does. A few minutes on these checks now beats a reprint and an awkward conversation with a client later.