
How Developers Can Turn a Single Image into a Game-Ready 3D Model with AI and Bring It into Unity or Unreal

Every game needs far more 3D assets than most small teams can model by hand. A single level can call for dozens of props, a handful of characters, and enough set dressing to make the world feel lived in. For students and indie developers, that asset list is often the real bottleneck, not the code.
Table Of Content
- What “game-ready” actually means
- Step 1: Pick the right input image
- Step 2: Convert the image to a 3D model with AI
- Step 3: Prepare the asset for real-time use
- Step 4: Export in the right format
- Step 5: Import the model into Unity
- Step 6: Import the model into Unreal Engine
- Tips for building a whole asset library
- Conclusion
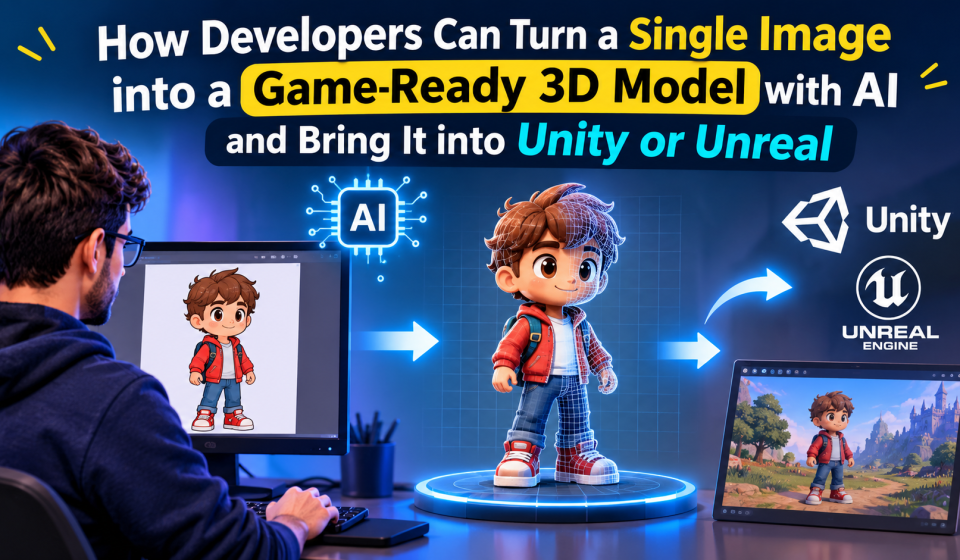
AI image-to-3D tools change that math. Instead of starting from a blank viewport, you start from a picture: a concept sketch, a photo of a real object, or a piece of reference art. The AI reconstructs it as a textured 3D mesh in minutes, and you spend your time on the part that actually needs a developer: getting the asset to behave well inside your engine.
This guide walks through that workflow step by step, from choosing the right input image to importing a game-ready model into Unity or Unreal Engine.
What “game-ready” actually means
A 3D model that looks good in a preview window is not automatically ready for a game. Before an asset goes into a real-time engine, it usually needs:
- A sensible polygon count for the target platform (low poly for mobile and web, more detail for PC and console).
- Clean UVs and PBR textures (base color, normal, metallic, and roughness maps) so it reacts correctly to the engine’s lighting.
- A format the engine understands well, typically FBX or GLB/glTF.
- Correct scale and pivot so it drops into a scene without manual fixing.
- A skeleton and skin weights if it is a character that needs to move.
Keep this checklist in mind. A good AI workflow should cover most of it automatically, and the rest is quick to fix in the engine.
Step 1: Pick the right input image
The quality of your 2D image has the biggest impact on the 3D result. A few rules of thumb:
- Use a single, clearly separated subject. A sword on a plain background works better than a sword on a cluttered desk.
- Prefer even lighting without harsh shadows, which the AI may interpret as geometry or paint into the texture.
- Show the object from a three-quarter angle when possible, so the model has more information about depth.
- If you have them, add extra views of the same object (front, side, back). Several tools accept multiple views and use them to rebuild the hidden sides more accurately.
Concept art works especially well for stylized games, while product photos are a good fit for realistic props.
Step 2: Convert the image to a 3D model with AI
Next, upload the image to an AI image-to-3D generator. In this walkthrough we use Meshy AI, which accepts PNG, JPG, or WebP images and can remove the background in one click. You choose a geometry resolution, and at the standard setting the tool returns a fully textured model in about a minute.
A few things are worth checking in the preview before you export:
- Silhouette and proportions: does the model match the shape you expect from every angle, not just the front?
- Hidden sides: the back of a single-view object is inferred, so inspect it and regenerate with extra views if needed.
- Texture quality: look for smeared colors or seams where the AI had little information.
If the first result is close but not perfect, regenerating with a cleaner image or an extra reference view usually helps more than heavy manual edits.
Step 3: Prepare the asset for real-time use
Raw AI output is often denser than a game needs. Before exporting, prepare the model for your target platform:
- Remesh or reduce the polygon count. Low poly game assets (a few thousand triangles) keep mobile and web builds fast, while hero props can afford more detail.
- Check that PBR maps are included. Meshy’s AI texture generator, for example, creates base color, normal, metallic, and roughness maps automatically, so the asset reacts to light the way your engine expects.
- Rig characters before export. For humanoid and quadruped characters, auto-rigging adds a skeleton and skin weights, and you can apply preset animations such as idle, walk, or run.
This is also the stage where you decide on an art direction. If your game uses a consistent style, generate every asset from reference images in that same style so props and characters look like they belong together.
Step 4: Export in the right format
For most engines, two formats cover nearly every case:
- FBX: the safest choice for Unity and Unreal, especially for rigged and animated characters, because it carries skeleton and animation data.
- GLB/glTF: compact and widely supported, and the native format for engines such as Godot. It bundles the mesh and textures in a single file.
Export the PBR texture maps alongside the model (or embedded in it), and keep a consistent naming convention so your project stays organized as the asset list grows.
Step 5: Import the model into Unity
To import FBX into Unity, drag the exported file into your project’s Assets folder. Unity creates a model asset and a prefab you can drop into a scene. Then:
- Check the Scale Factor in the import settings so the model matches your scene units.
- Confirm that the materials are mapped to your render pipeline (Built-in, URP, or HDRP) and that the normal map is set to the Normal Map texture type.
- For rigged characters, set the Rig tab to Humanoid or Generic and connect the animation clips to an Animator Controller.
- Add colliders, then test the asset under your actual scene lighting.
Meshy also offers an official Unity plugin that sends a generated model straight into the Assets folder with materials mapped, which removes most of the manual export and import steps.
Step 6: Import the model into Unreal Engine
In Unreal Engine, use Import in the Content Browser (or drag the FBX file in). In the import dialog:
- Import as a Static Mesh for props, or as a Skeletal Mesh for rigged characters, and include animations if the file contains them.
- Check the import scale (Unreal uses centimeters) and fix any rotation on import rather than in the level.
- Let Unreal create materials from the embedded textures, then adjust them in the Material Editor if needed.
- Generate or assign collision, and set up LODs for assets that appear many times in a level.
Epic’s official Unreal Engine documentation on the FBX content pipeline is a good reference for skeletal meshes, animation import, and material handling.
Tips for building a whole asset library
- Batch by category. Generate all crates, barrels, and signs in one session so they share a look and a polygon budget.
- Start from free 3D game assets when you can. Ready-made, engine-friendly characters, weapons, and environment pieces fill a prototype quickly, and you can generate custom assets only where your game needs something unique.
- Keep a style guide. Save the reference images, resolutions, and polygon targets you used, so new assets match old ones months later.
- Test in the engine early. An asset that looks perfect in a viewer can still need a scale, pivot, or material fix once it meets your game’s lighting.
Conclusion
Converting a 2D image to a 3D model with AI will not replace a skilled 3D artist on a large production, but it removes the slowest part of the job for students and indie developers: building every asset from scratch. With a clean input image, a quick check of the generated mesh, a sensible polygon budget, and the right export format, you can go from a single picture to a game-ready model in your Unity or Unreal scene in well under an hour, and spend the time you save on gameplay.