Android tutorial - Android Camera | Best camera app - android app development - android studio - android development tutorial
Learn android - android tutorial - Android camera - android examples - android programs
What is Android Camera
- The Android framework includes support for various cameras and camera features available on devices, allowing you to capture pictures and videos in your applications.
- This document discusses a quick, simple approach to image and video capture and outlines an advanced approach for creating custom camera experiences for your users.
- Camera is mainly used to capture picture and video. We can control the camera by using methods of camera api. Android provides the facility to work on camera by 2 ways:
- By Camera Intent
- By Camera API
Understanding basic classes of Camera Intent and API
- There are mainly four classes that we are going to discuss.
Intent
- By the help of 2 constants of MediaStore class, we can capture picture and video without using the instance of Camera class.
- ACTION_IMAGE_CAPTURE
- ACTION_VIDEO_CAPTURE
Camera
- It is main class of camera api, that can be used to take picture and video.
SurfaceView
- It represents a surface view ore preview of live camera.
MediaRecorder
- It is used to record video using camera. It can also be used to record audio files as we have seen in the previous example of media framework.
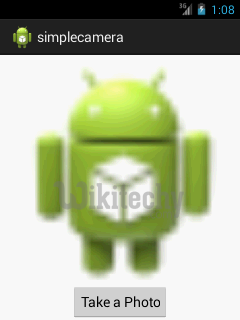
Android camera app example by camera intent
- In this example, we are writing the simple code to capture image using camera and displaying the image using imageview.
activity_main.xml
- Drag one imageview and one button from the pallete, now the xml file will look like this:
- File: activity_main.xml
<RelativeLayout xmlns:androclass="http://schemas.android.com/apk/res/android"
    xmlns:tools="http://schemas.android.com/tools"
    android:layout_width="match_parent"
    android:layout_height="match_parent"
    tools:context=".MainActivity" >

   <Button
        android:id="@+id/button1"
        android:layout_width="wrap_content"
        android:layout_height="wrap_content"
        android:layout_alignParentBottom="true"
        android:layout_centerHorizontal="true"
        android:text="Take a Photo" >
    </Button>

    <ImageView
        android:id="@+id/imageView1"
        android:layout_width="fill_parent"
        android:layout_height="fill_parent"
        android:layout_above="@+id/button1"
        android:layout_alignParentTop="true"
        android:src="@drawable/ic_launcher" >
    </ImageView>
</RelativeLayout>
click below button to copy the code from android tutorial team
Activity class
- Let's write the code to capture image using camera and displaying it on the image view.
- File: MainActivity.java
 package com.example.simplecamera;

import android.app.Activity;
import android.content.Intent;
import android.graphics.Bitmap;
import android.os.Bundle;
import android.view.Menu;
import android.view.View;
import android.widget.Button;
import android.widget.ImageView;

public class MainActivity extends Activity {
     private static final int CAMERA_REQUEST = 1888;
     ImageView imageView;
     public void onCreate(Bundle savedInstanceState) {

         super.onCreate(savedInstanceState);
         setContentView(R.layout.activity_main);

         imageView = (ImageView) this.findViewById(R.id.imageView1);
         Button photoButton = (Button) this.findViewById(R.id.button1);

         photoButton.setOnClickListener(new View.OnClickListener() {

         @Override
         public void onClick(View v) {
              Intent cameraIntent = new Intent(android.provider.MediaStore.ACTION_IMAGE_CAPTURE);
              startActivityForResult(cameraIntent, CAMERA_REQUEST);
         }
        });
       }

     protected void onActivityResult(int requestCode, int resultCode, Intent data) {
      if (requestCode == CAMERA_REQUEST) {
       Bitmap photo = (Bitmap) data.getExtras().get("data");
       imageView.setImageBitmap(photo);
      }
   }

    @Override
    public boolean onCreateOptionsMenu(Menu menu) {
        // Inflate the menu; this adds items to the action bar if it is present.
        getMenuInflater().inflate(R.menu.activity_main, menu);
        return true;
    }

}
click below button to copy the code from android tutorial team
- download this android example
Output: