Android tutorial - Eclipse for android | First Android application in eclipse - android app development - android studio - android development tutorial
How to make android apps
- We are creating the simple example of android using the Eclipse IDE. For creating the simple example:
- Step 1: Create new android project
- Step 2: Write your code
- Step 3: Run the android application
Hello Android Example
- You need to follow the 3 steps mentioned above for creating the Hello android application.
Create the New Android project
- For creating the new android project:
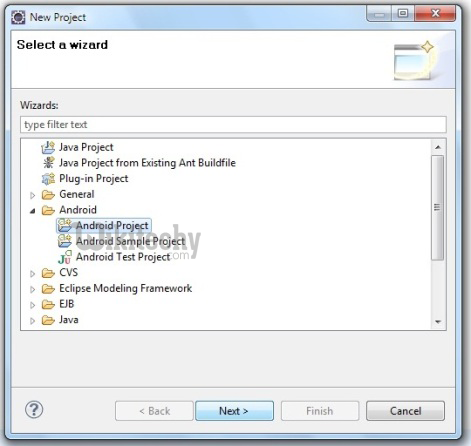
- Select File -> New -> Project
- Select the android project and click next
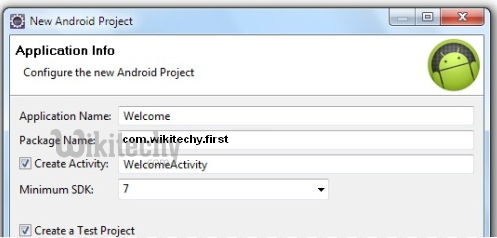
- Fill the Details in this dialog box and click finish
- A new android project have been created. Below is the code generated for your android project and you can customize the code
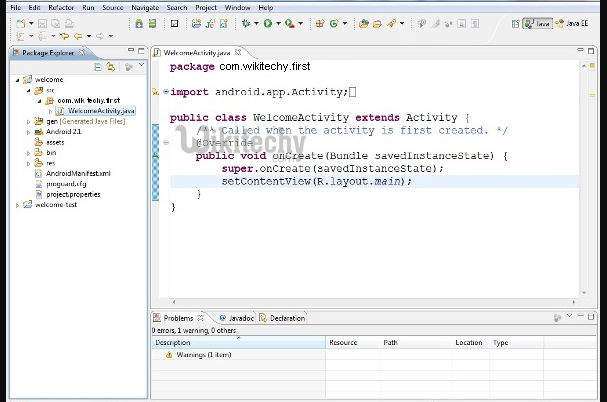
- Under res folder you are able to see the layout page
Layout picture in Android Studio
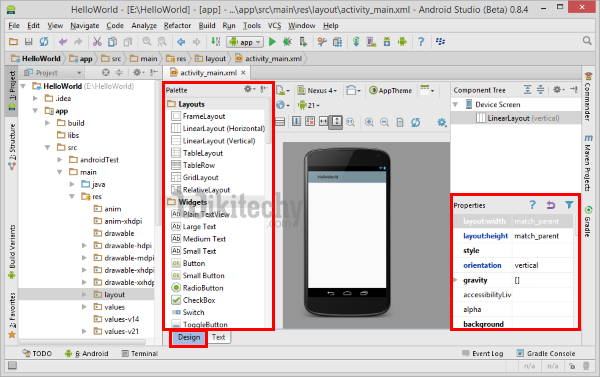
- Above pictures is the Layout Designer, it allow you to drag and drop UI elements on the screen and set their properties.
- The layout file is powered by XML file when you drag and drop or change something on the Design View, the XML code will change automatically.
- On the other hand if you code something on the XML View, it will affect to Design View.
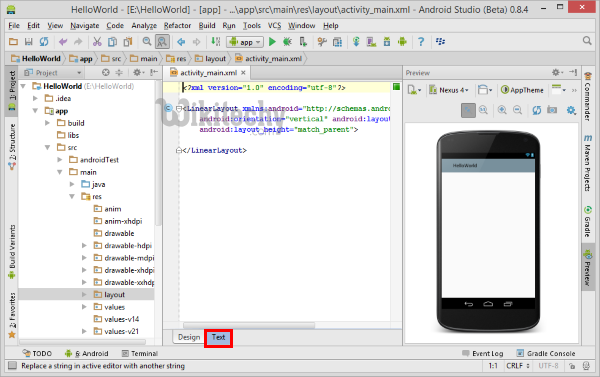
- Try to open the XML View by click the tab "Text" on the bottom of Layout Designer.
- You will see the XML code like this.
<?xml version="1.0" encoding="utf-8"?>

<LinearLayout xmlns:android="http://schemas.android.com/apk/res/android"

    android:orientation="vertical" android:layout_width="match_parent"

    android:layout_height="match_parent">

</LinearLayout>
click below button to copy the code from android tutorial team
- Note: The root element of android Layout resource file must have the android namespace declaration.
- Back to the Design View, try to drag the Large TextView from the Palette and drop on the device screen.
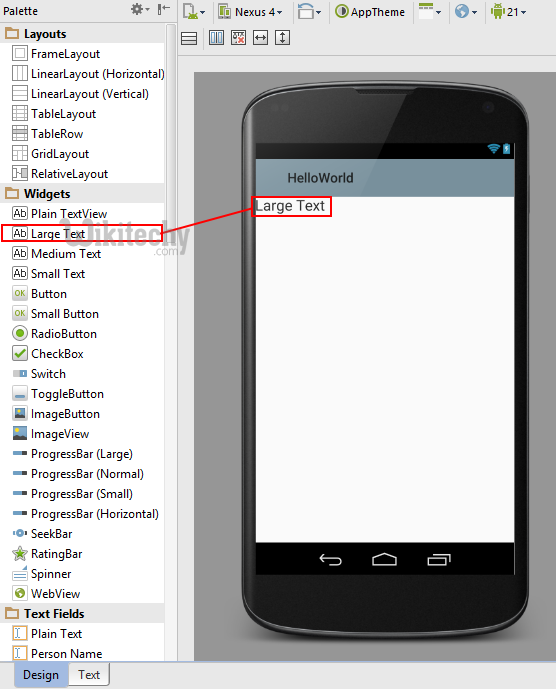
- Now, you have a TextView on the screen. If you want to add other elements, you can do it but in this article I will focus on the TextView.
- Set the MainActivity to use activity_main.xml as it UI
- Go to your MainActivity, find in the onCreate() method and put the setContentView() statement with your layout ID as it parameter.
package com.wikitechy.welcome;

import android.app.Activity;
import android.os.Bundle;

public class MainActivity extends Activity {

    @Override
    protected void onCreate(Bundle savedInstanceState) {
        super.onCreate(savedInstanceState);
        setContentView(R.layout.activity_main);
    }

}
click below button to copy the code from android tutorial team
- Back to the activity_main.xml's XML View, you will see the code:
?xml version="1.0" encoding="utf-8"?>

<LinearLayout xmlns:android="http://schemas.android.com/apk/res/android"

    android:orientation="vertical" android:layout_width="match_parent"

    android:layout_height="match_parent">

    <TextView

        android:layout_width="wrap_content"

        android:layout_height="wrap_content"

        android:textAppearance="?android:attr/textAppearanceLarge"

        android:text="Large Text"

        android:id="@+id/textView" />
</LinearLayout>
click below button to copy the code from android tutorial team
- There is a <TextView> element appered as the child of LinearLayout.
- Note: You can set the properties from the XML code or using the GUI Properties Panel on the left bottom of Design View.
TextView properties
<TextView

    android:layout_width="wrap_content"

    android:layout_height="wrap_content"

    android:textAppearance="?android:attr/textAppearanceLarge"

    android:text="Hello Android"

    android:id="@+id/textview_hello_android" />
click below button to copy the code from android tutorial team
Here's the some View Properties Explaination:
- android:id - The ID that is used to refer this View. Android will generates the ID resources from this attribute.
- android:layout_width - Width of the View, you can see the possible values from The Sizing Topic
- android:layout_height - Height of the View, you can see the possible values from The Sizing Topic
- android:text - The text that you want to show, can set as hard code string or string resource
- android:textAppearance - The appearance of text
- android:layout_margin - The gap between this View and other View. The possible value is the hard code of dimension type such as 8dp or the dimension resource.
- android:padding - The gap or area around the View (inside) that not allow to place the content. The possible value is the hard code of dimension type such as 8dp or the dimension resource.
- android:gravity - The property that define about where to place the content in this View such as on the left, right, center, etc.
- android:layout_gravity - The property that define about where to place this View on it Parent Viewsuch as on the left, right, center, etc.
- Back to the Design View, you will see the text "Hello Android" on the screen.
Display data through java code in eclipse
- For displaying the message we use the TextView class. Change the onCreate method below,
public class MainActivity extends Activity {
    @Override
    protected void onCreate(Bundle savedInstanceState) {
        super.onCreate(savedInstanceState);

    }
Add textview control code with the display text information for the text view
TextView textview=new TextView(this);
textview.setText("Hello Android!");
setContentView(textview);
click below button to copy the code from android tutorial team
- Here is the full code of MainActivity.java file.
package com.wikitechy.welcome;
import android.os.Bundle;
import android.app.Activity;
import android.view.Menu;
import android.widget.TextView;
public class MainActivity extends Activity {
    @Override
    protected void onCreate(Bundle savedInstanceState) {
        super.onCreate(savedInstanceState);
        TextView textview=new TextView(this);
        textview.setText("Hello Android! How r u?");
        setContentView(textview);
    }
    @Override
    public boolean onCreateOptionsMenu(Menu menu) {
        // Inflate the menu; this adds items to the action bar if it is present.
        getMenuInflater().inflate(R.menu.activity_main, menu);
        return true;
    }
}
click below button to copy the code from android tutorial team
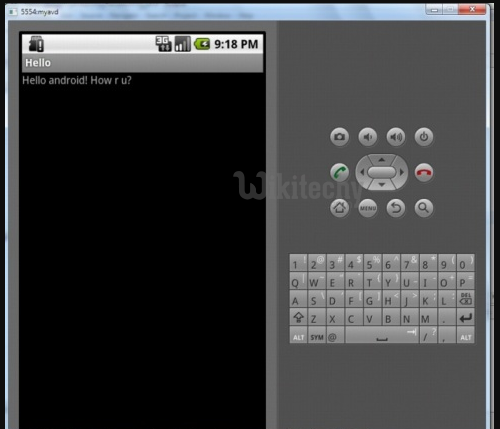
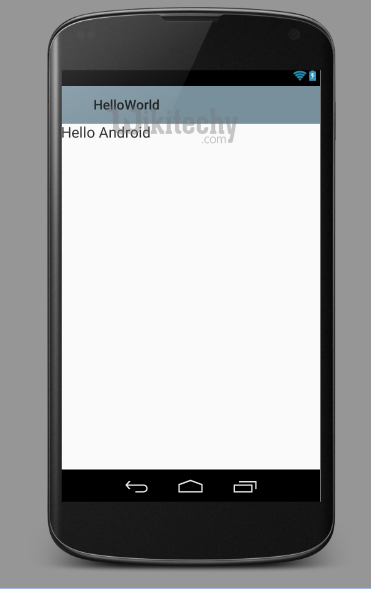
Run the android application
- To run the android application: Right click on your project > Run As.. > Android Application
- The android emulator will boot and it will take some time. After booting the emulator, the eclipse plugin installs the application and launches the activity. You will see the below output