Android tutorial - Import or Add External JAR Files in Android Studio | Android Studio Add External Jar - android studio tutorial
What is JAR Files
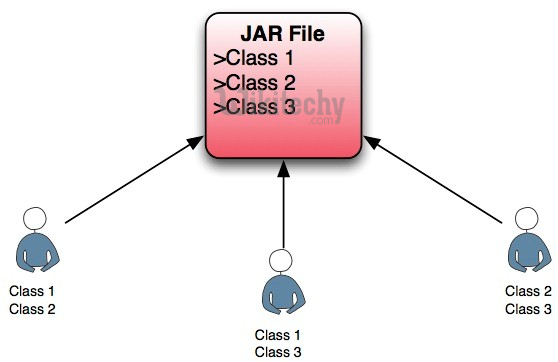
- A JAR (Java archive) is a package file format typically used to aggregate many Java class files and associated metadata and resources (text, images, etc.) into one file for distribution.
- A JAR file allows Java runtimes to efficiently deploy an entire application, including its classes and their associated resources, in a single request.
- JAR file elements may be compressed, shortening download times
- Basically, JAR is a Java Archives Package file, which comprises several Java files to achieve a specific task.
- The meta data and Resources (text, images etc.) are also comprised with in a file to distribute it as Library files.
- All JAR files are archived file which are built on Zip format.
- JAR files have the .JAR extension.
- You can add these JAR files to your libs folder under app folder to provide your project some additional functionality.
- Lets see the steps involve in importing or adding a JAR file in Android Studio.
How to import or Add External JAR files in Android Studio:
Step 1: Download any JAR file for your Project. For Example: Download three Mail dependency JAR files for Android Studio. Get it from Here

Step 2: Download all the three JAR files in somewhere in your system.
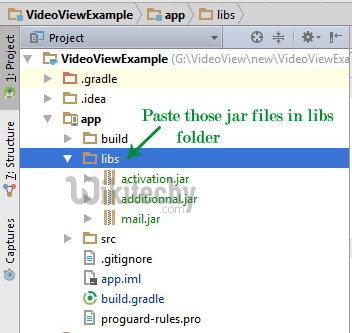
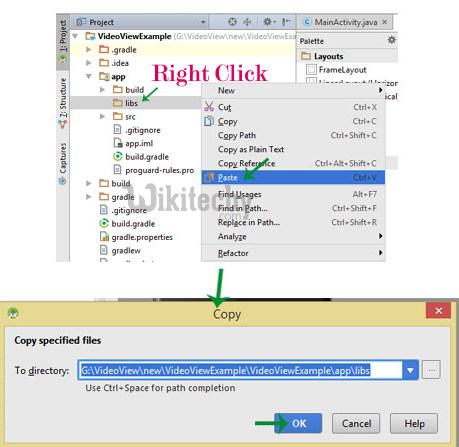
Step 3: Copy these three Files from that folder where you downloaded them, and Paste it in libs folder under app folder of your project.
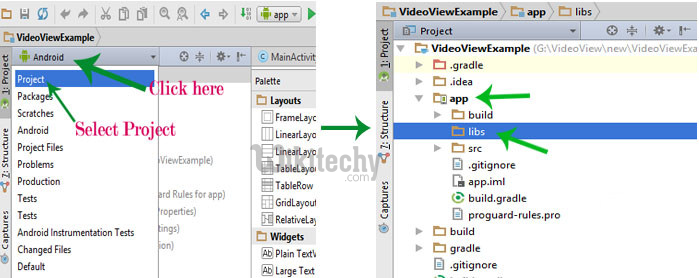
- Important Note: If you are not able to find libs then you must be viewing your project in “Android” view. On the right side of Android tab, you will see < > symbol. Click on it and select Project. This option is available in Android Studio 2.1.
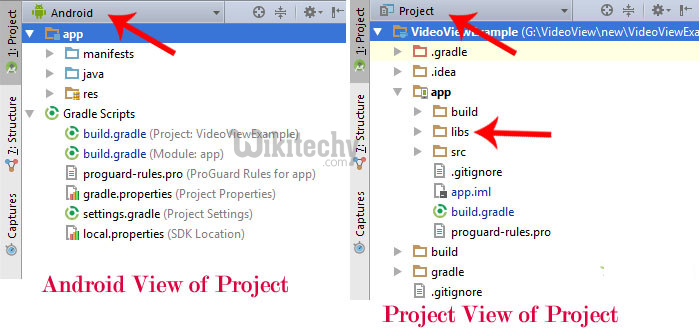
- If you are using any older version where you can’t find this, then you simply need to click on Android tab and it will show you a drop down list from that list select project.
Step 5: Now paste jar files here in libs folder
Step 4: Once your JAR files are successfully copied to libs folder and we will add them as dependency files.
Step 5: Click on File > Project Structure >Select app > Dependencies Tab.
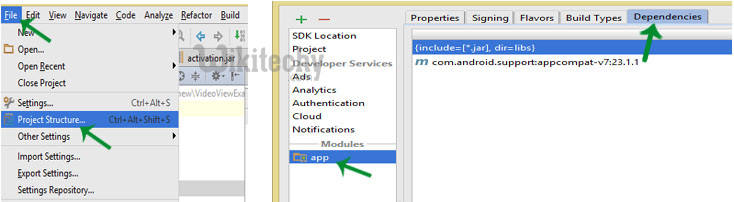
Step 6: Click on (+) plus button given on right side and select File Dependency.

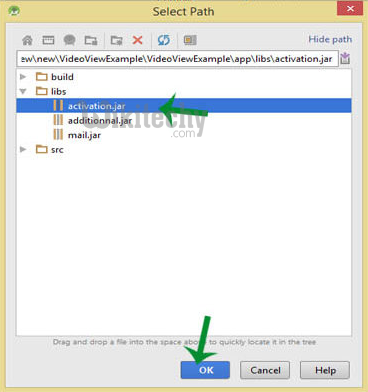
Step 7: This will pop up a dialog box for selecting path. Under this open libs folder and add your Jar files one by one.
Steps 8: Once you select all three Jar files then click Ok button and your Gradle will Start building.
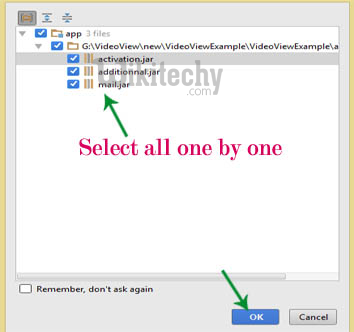
- This way you need to manually add anything in build.gradle file. After completion of gradle building everything will be done and you are ready to use your External JAR Library.