android tutorial - Developer android | Installation and setup in Android Ndk - android app development - android studio - android app developement
Getting started with Android NDK with simple example
- Using Android Studio 2.2 and higher Native Development Kit (NDK) you can use to compile C and C++ code.
- You can use NDK by manually downloading NDK and build it or through CMake .
- Here I will give process flow for manually install NDK and an example code,
- Based on your System OS you can download NDK from this location https://developer.android.com/ndk/downloads/index.html.
After downloading, give the path in System Environment Variable as variable name “NDK_PROJECT_PATH” and variable value “location of NDK stored path”.
- Next, to integrate NDK with Android Studio, after creating a new android project,
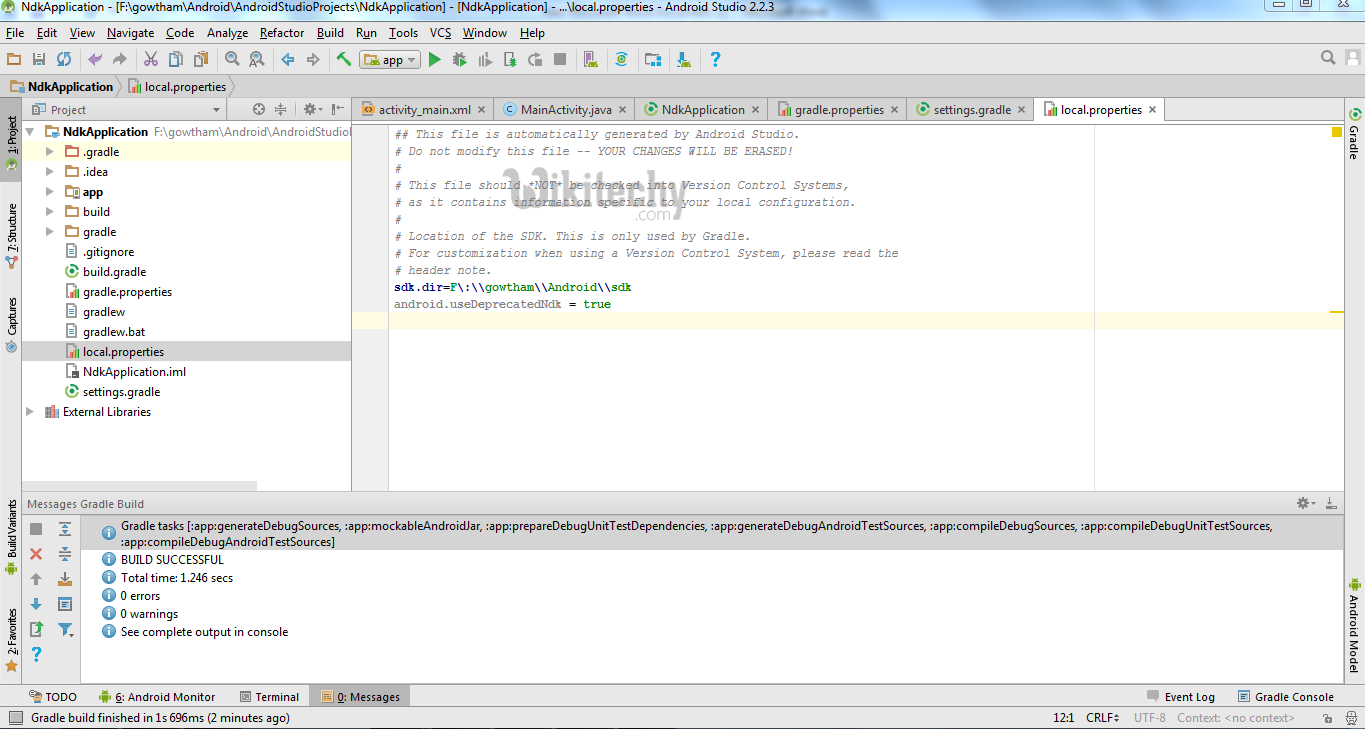
- In gradle – local properties add location of sdk path like
sdk.dir=F\:\\gowtham\\Android\\sdkclick below button to copy code from our android learning website - android tutorial - team
and
android.useDeprecatedNdk = trueclick below button to copy code from our android learning website - android tutorial - team
- Then, Press Build – Make Project (Ctrl + f9).
- Your project will be successfully build and will get BUILD SUCCESFUL in message gradle build, as shown below
Learn - tutorial - learn android - android tutorial - android testing - mobile app developement - android code - android programming - android download - android examples - examples - programs
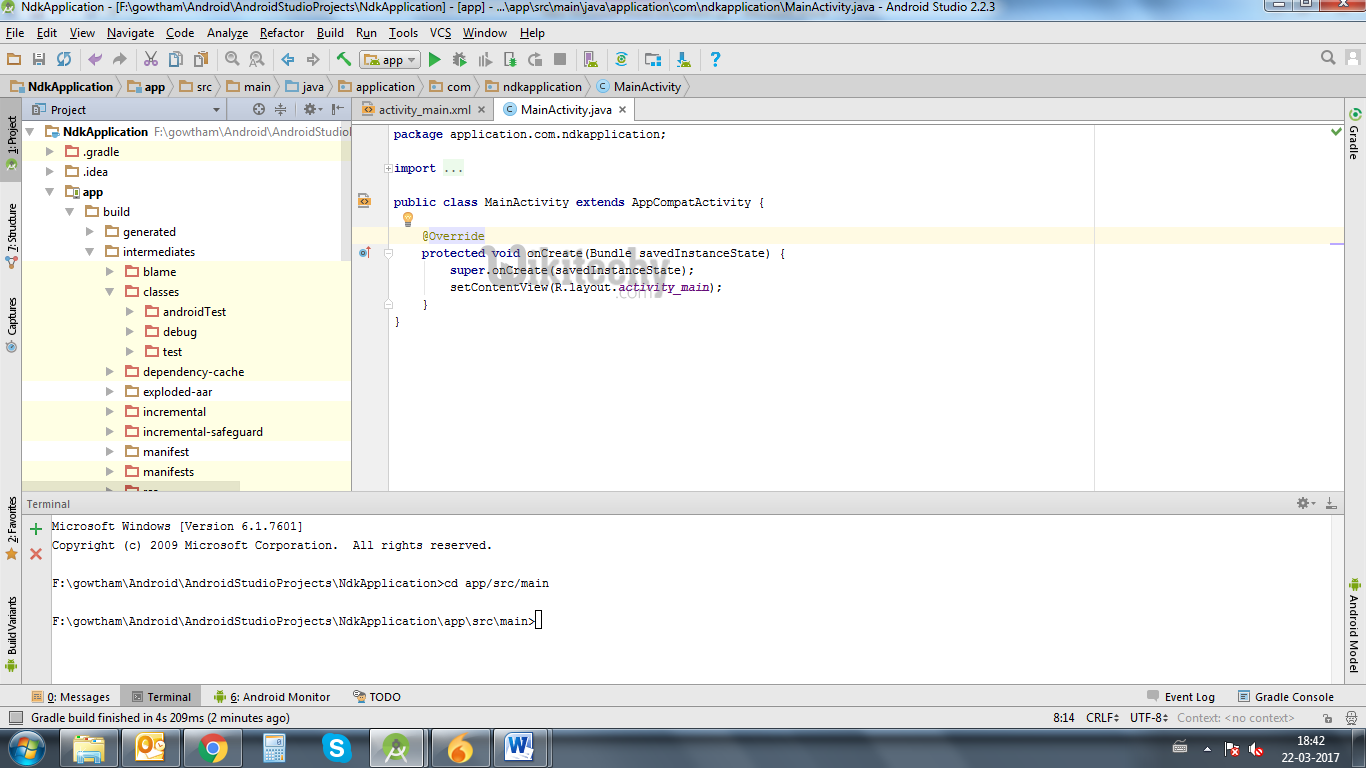
- Then in Terminal, initially it will contains project’s path
- There add cd app/src/main
- Path will extend from project path to main.
- Next, again Build – Make Project (Ctrl + f9).
- Now you will find under app-build–intermediates–classes–debug folder, as shown below.
Learn - tutorial - learn android - android tutorial - android testing - mobile app developement - android code - android programming - android download - android examples - examples - programs
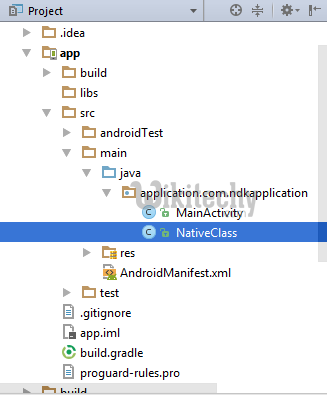
- Now, create a new Java Class file under a app/src/main/java , Here I created java file named NativeClass
Learn - tutorial - learn android - android tutorial - android testing - mobile app developement - android code - android programming - android download - android examples - examples - programs
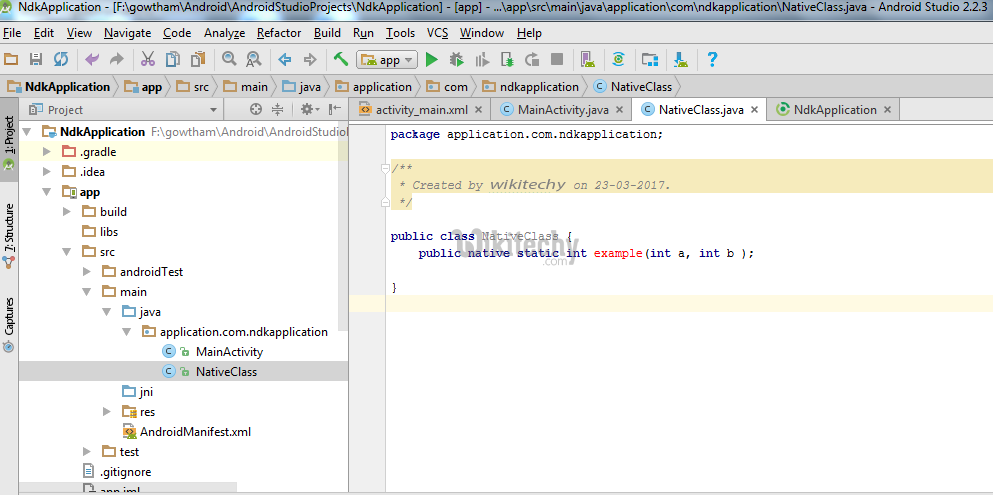
- Write a simple calling function with function name and input for the function, Here I written function as example and given two integer input to it,
Learn - tutorial - learn android - android tutorial - android testing - mobile app developement - android code - android programming - android download - android examples - examples - programs
- Again build the project (Ctrl + f9),
- When you build, you will find the class file created under build like this,

Learn - tutorial - learn android - android tutorial - android testing - mobile app developement - android code - android programming - android download - android examples - examples - programs
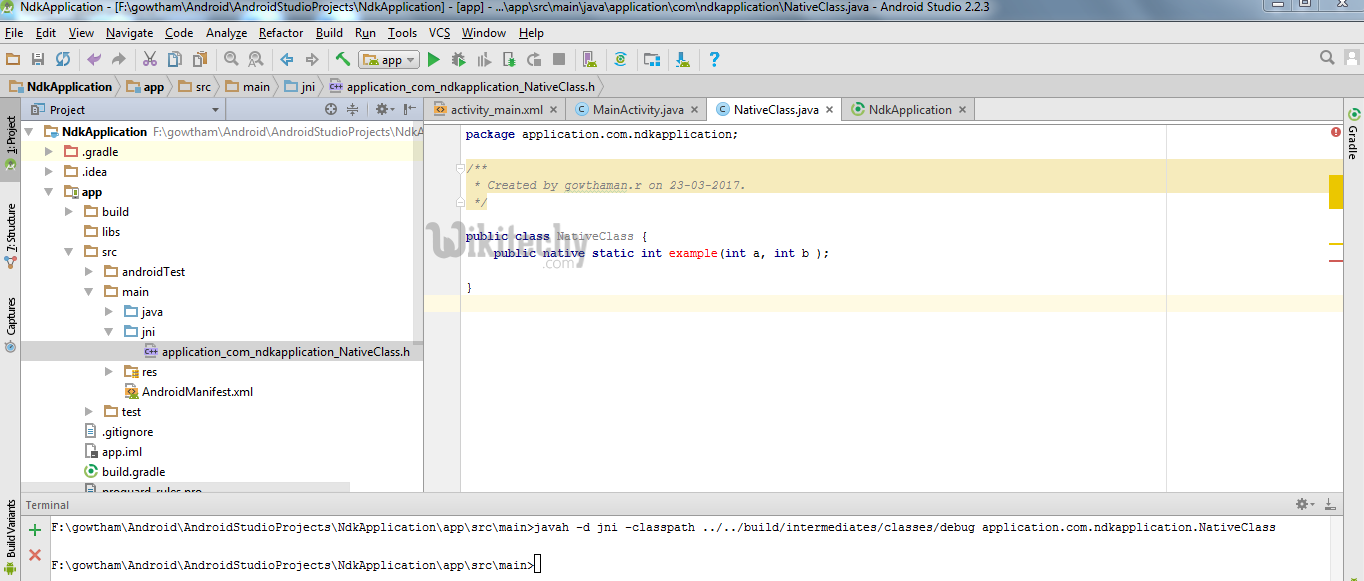
Then,in terminal
ü    `-Javah  -d  jni –classpath ../../build/intermediates/classes/debug`application.com.ndkapplication.NativeClass
click below button to copy code from our android learning website - android tutorial - team
- where , -d – for output directory -jni -Generate JNI-style header file (default) -classpath -- for which to load classes
- Now build the project (Ctrl + f9), you will find jni folder created and a header file will be created with the name you specified in terminal before as shown below
Learn - tutorial - learn android - android tutorial - android testing - mobile app developement - android code - android programming - android download - android examples - examples - programs
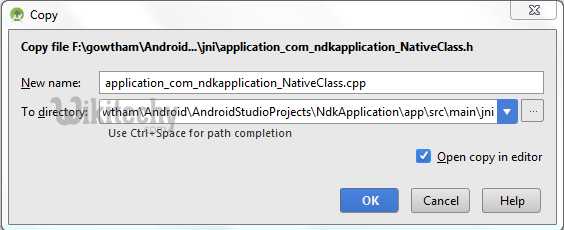
- Now copy header file and save as .cpp or .c file of same name of header file in jni folder .
- I created a cpp file as shown below
Learn - tutorial - learn android - android tutorial - android testing - mobile app developement - android code - android programming - android download - android examples - examples - programs
Delete everything before **JNIEXPORT line** in this file and **add header file name** alone.
Here I am for simple example just adding two numbers and returning value to android java.
click below button to copy code from our android learning website - android tutorial - team
Application_com_ndkapplication_NativeClass.cpp
 #include <application_com_ndkapplication_NativeClass.h>

JNIEXPORT jint JNICALL Java_application_com_ndkapplication_NativeClass_example
  (JNIEnv *, jclass , jint as , jint bs){

    return (as + bs);

    }
click below button to copy code from our android learning website - android tutorial - team
- And for this example no need to add any function in its header file.
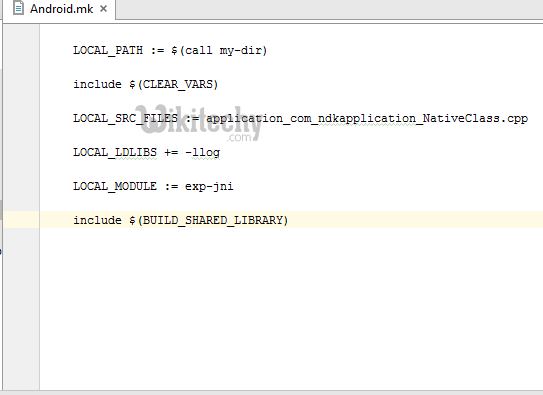
- Create a new file named Android.mk and Application.mk in Jni folder
- Android.mk file is to describe your sources to the build system.
- Android.mk
LOCAL_PATH := $(call my-dir)

include $(CLEAR_VARS)

LOCAL_SRC_FILES := application_com_ndkapplication_NativeClass.cpp

LOCAL_LDLIBS += -llog

LOCAL_MODULE := exp-jni

include $(BUILD_SHARED_LIBRARY)
click below button to copy code from our android learning website - android tutorial - team
- to know detail about this file read from this link https://developer.android.com/ndk/guides/android_mk.html
Learn - tutorial - learn android - android tutorial - android testing - mobile app developement - android code - android programming - android download - android examples - examples - programs
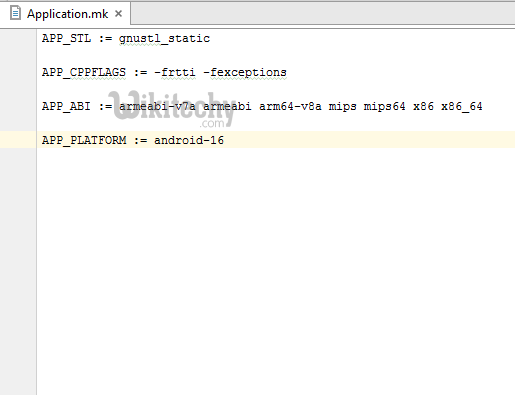
- Application.mk which describes the native modules that your app requires.
Application.mk
APP_STL := gnustl_static

APP_CPPFLAGS := -frtti –fexceptions

APP_ABI := armeabi-v7a armeabi arm64-v8a mips mips64 x86 x86_64

APP_PLATFORM := android-16
click below button to copy code from our android learning website - android tutorial - team
- to know detail about this file read from this link https://developer.android.com/ndk/guides/application_mk.html
Learn - tutorial - learn android - android tutorial - android testing - mobile app developement - android code - android programming - android download - android examples - examples - programs
Now build the project again **(Ctrl + f9)**, you will find the **armeabi-v7a, armeabi, arm64-v8a ,mips, mips64, x86 and x86_64** folder created inside jniLibs.click below button to copy code from our android learning website - android tutorial - team
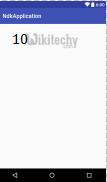
- Then, in main activity pass the input and get output for native class file.
int a = 5, b = 5, res ;

res = NativeClass.example(((int) a),((int) b));

TextView textView = (TextView) this.findViewById(R.id.tv);

textView.setText(new Integer(res).toString());
click below button to copy code from our android learning website - android tutorial - team
- here I given two integers input through a, b and get output from variable res .
- And obtained output is displayed in screen by passing to TextView.
- And don’t forget to add the library which you specified in Android.mk file as LOCAL_MODULE like this,
static {
        System.loadLibrary("exp-jni");
  }
click below button to copy code from our android learning website - android tutorial - team
- Finally build the project again (Ctrl + f9), you will find the .so files created under each armeabi-v7a, armeabi, arm64-v8a ,mips, mips64, x86 and x86_64 folder.

Learn - tutorial - learn android - android tutorial - android testing - mobile app developement - android code - android programming - android download - android examples - examples - programs
- Then now run the application, you will get output for this example as 10 .
Learn - tutorial - learn android - android tutorial - android testing - mobile app developement - android code - android programming - android download - android examples - examples - programs
This is basic program for NDK beginners, OpenCV library can be imported here and you can do image processing applications also.